Installing spring hinges on an exterior door might sound intimidating if you’ve never done it before. Maybe you’re picturing a pile of confusing parts and worrying that one wrong step will leave your door lopsided. Honestly, though, swapping out regular hinges for self-closing spring hinges (such as those from brands like Stanley or Hager) is pretty straightforward if you take it slow and have a few basic tools. Let me explain how it all works—from the nuts and bolts to the little tips that make the process much smoother.
What Are Spring Hinges and Why Use Them On Exterior Doors?
You might be wondering what makes a spring hinge different from a regular door hinge. Here’s the thing: spring hinges have built-in tension springs. When you open the door and let go, the spring pulls it closed again. It’s like having a bungee cord hidden inside the hinge, quietly doing its job over and over.
This is especially helpful for exterior doors—the kind you use for your garage entry, side door, or back patio—where you want a little extra security. With a spring hinge, you lower the risk of accidentally leaving the door open and inviting in cold drafts or, worse, something (or someone) unwanted. Some places even require them by code, especially for doors that lead from a garage into your house. That’s because they help keep fumes and potential fire hazards out.
Unlike automatic closers or hydraulic devices, spring hinges tuck right into the spot where your old hinges went. They look almost exactly the same, so they don’t change the look of your door. Plus, you don’t have to worry about mounting big extra hardware or syncing electronic sensors. Just a little tension adjustment, and you’re set.
Tools and Materials You’ll Need
Before getting your hands dirty, it’s worth gathering everything you’ll need. Trust me—it avoids a lot of back-and-forth mid-project. Here’s a simple checklist:
- Spring hinges (check that they’re rated for exterior doors and match your door size—brands like Stanley, Hager, or National make common models)
- Screwdriver (manual or power,
- Drill (optional, for stubborn screws or pilot holes)
- Level (to keep things even)
- Hammer and finishing nails (if shims or slight adjustments are needed)
- Allen wrench (typically comes with your spring hinges for tension adjustment)
- Wood filler and touch-up paint (if your old hinges left big holes)
- Step ladder (only if your door is tall or awkwardly placed)
If your door already has two or three regular hinges, double-check that your new spring hinges match the same size and hole pattern. Otherwise, you’ll have extra patching to do—never fun when you’re aiming for a quick upgrade.
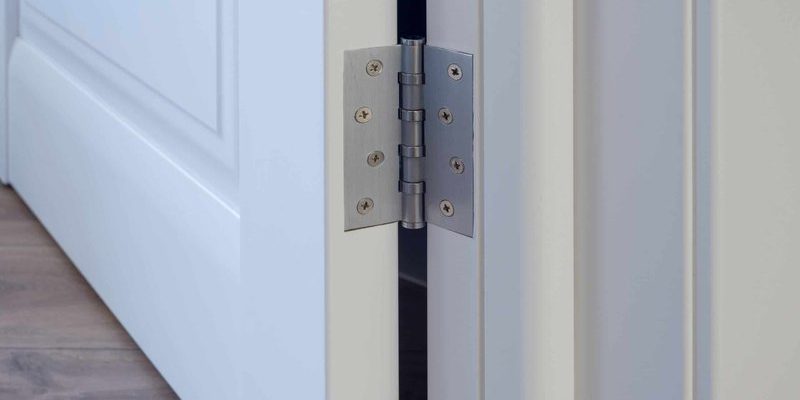
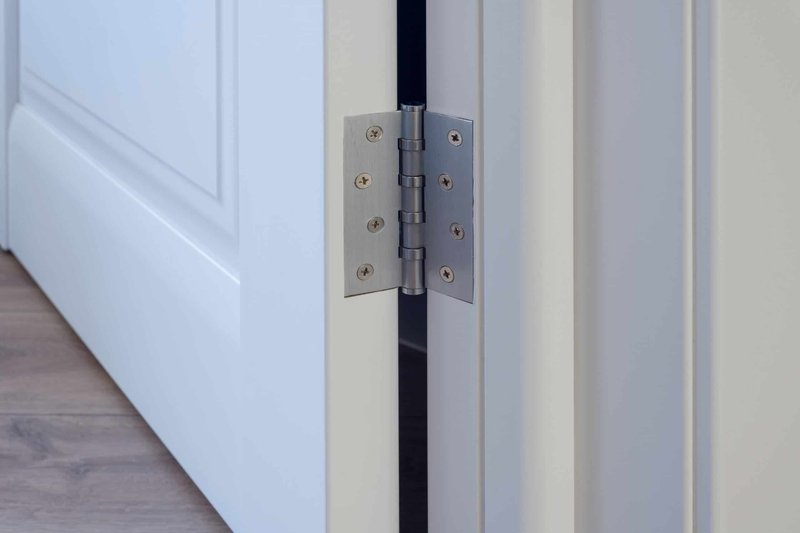
How To Remove the Old Hinges Without Damaging the Door
Taking old hinges off sounds simple, but there are little details that can trip up beginners. The main thing is to keep your exterior door safely supported, because you don’t want it to drop or shift.
Here’s what usually works best:
- Prop open the door with a door wedge, brick, or even a heavy book. This keeps it steady while you work.
- Start with the middle or bottom hinge (if your door has three). Loosen the screws on the door frame first, then on the door leaf.
- If the hinge sticks, gently tap a flat screwdriver under the hinge plate and wiggle it out.
- Move to the next hinge. Always keep at least one hinge attached until you’re ready to swap the last one—this stops the door from tilting or falling.
If you’re worried about the door slipping, have a friend hold it while you swap hinges. Even a lightweight exterior door can surprise you with its weight.
If your old screws are stripped or painted over, use a bit of WD-40 and carefully back them out. Patience here keeps the wood around your hinges in good shape for the new installation.
Step-by-Step: Installing Spring Hinges On Your Exterior Door
Here’s the core of the project: getting those new spring hinges into place. Let’s slow it down and walk through every step.
- Line up the new hinge in the same spot as the old one, using the same screw holes if possible. If you’re replacing multiple hinges, start with the top or middle one first to maintain stability.
- Drive the screws into the frame side first, then the door. Don’t fully tighten until all are loosely in—it gives you wiggle room for tiny adjustments.
- Once both sides of the hinge are attached, check your door’s swing and make sure the gaps around it (the “reveal”) still look even.
- Tighten all the screws snugly, but don’t overdo it or you’ll risk stripping the holes.
Repeat for the second (and possibly third) hinge. If your door is very heavy or wide, using two spring hinges and one regular hinge is sometimes best—it spreads the tension more evenly.
Don’t throw away your old hinges just yet. If something feels off with the door’s swing, you might need to swap one spring hinge back for a regular one to fine-tune the movement.
Setting the Tension: How To Adjust Spring Hinges
Here’s where a little patience pays off. Spring hinges come from the factory with zero tension—they won’t close the door until you add it. Adjusting the tension is a bit like winding a clock or tightening a guitar string.
- Find the tension pin at the top or bottom of the hinge. Insert the included Allen wrench into the hole and turn it to increase the spring load.
- Usually, you’ll need to rotate the wrench clockwise. As you turn, you’ll see new holes line up with a tiny metal pin—insert the pin into the hole to “hold” the tension in place.
- Test the door after each adjustment. Start with a low setting: the goal is a gentle, closing motion, not a door that slams.
- If the door swings too fast or too slow, fine-tune by moving the pin to a different hole and testing again.
Every door is a little different—some may need more tension due to weather seals or heavy construction. Don’t rush through this part; dialing in the right tension can take three or four adjustments.
Common Troubleshooting Problems (and How To Fix Them)
You might run into a few hiccups—that’s normal. Here’s what tends to come up with spring hinge installation on exterior doors, and what you can do about it.
- Door won’t close all the way: Check for tight weatherstripping or misalignment. Sometimes, a slightly loose screw or off-kilter hinge can keep the door from sealing.
- Door slams shut: Back off the spring tension a notch. Too much power makes the door noisy and risks pinched fingers.
- Door binds or rubs: Double-check the hinges are flush with the surface, screws are tight, and the door hasn’t shifted during installation.
- Stripped screw holes: If previous screws were overtightened, fill the hole with wood filler or a matchstick dipped in glue, then re-drive the screw once dry.
If the door still resists closing smoothly, check it with a level. Sometimes the foundation under an exterior entryway can settle after years, and a little shim behind a hinge solves the issue.
Comparing Spring Hinges to Other Self-Closing Door Solutions
There are a few ways to make a door close itself, so it’s fair to wonder when spring hinges are the right pick. Let’s break it down.
- Spring Hinges: Neat, hidden, and low-maintenance. Great for residential exterior doors where you don’t want extra hardware showing. Easy to install and adjust, but not suited for very heavy commercial doors.
- Hydraulic Door Closers: Those boxy gadgets you see in office buildings and schools. They’re smooth, quiet, and adjustable for big, heavy doors—but they’re more visible and require more installation work.
- Gravity or Ball Catches: Sometimes used on screen doors or lightweight interior doors. Cheap and simple, but not secure or strong enough for main exterior entries.
In most homes, spring hinges strike the perfect balance: quick installation, minimal fuss, and reliable performance for everyday use. They also work well with smart locks or keyless entry systems because they gently pull the door shut without relying on electrical power or complicated sync/reset routines.
Tips For A Smooth, Long-Lasting Installation
It’s not just about getting those spring hinges on once—they should work flawlessly for years. A few pro tips can help:
- Check for Factory Lubrication: Some brands come pre-oiled, but a drop of household lubricant in the moving parts never hurts.
- Inspect the Door Jamb: If your exterior door frame is warped, loose, or cracked, take time to shore it up before installing new hardware.
- Don’t Over-tighten: Wood screws only need to be snug, not gorilla-tight. Too much torque strips wood and weakens the attachment.
- Re-test after a week: As the hinges settle, you might need to fine-tune the tension. Weather and humidity can make the door swell or shrink, too.
If you ever need to remove or reset the spring hinges (say, to repaint the door or swap in a new style), just reverse the steps above. The beauty of this system is that it’s as easy to undo as it is to install.
Final Thoughts on Installing Spring Hinges On An Exterior Door
Swapping regular hinges for spring hinges turns an ordinary exterior door into a bit of a hands-free helper. Whether you’re tired of slamming doors or just want a bit more peace of mind, this project is simple enough for most DIYers, but it makes a big difference daily. The little bits of patience—lining up the plates, getting just the right spring tension—are what separates a clunky result from a door that closes like magic.
Honestly, once you’ve installed spring hinges, it’s hard to remember how you ever lived without them. With the right tools, a steady hand, and a few careful adjustments, your exterior door is set to close smoothly for years, making your space just that little bit safer and more convenient.