Let me break it down: You’ve got a brand new fiberglass door, or maybe an old one that’s never had hardware installed. You want to put in a lockset or a deadbolt (maybe a Schlage or Kwikset, maybe both). What stands between you and a functional door is the fact that there are no holes—nothing has been drilled, routed, or chiseled out. This process is a little different from working with a wood door, both in terms of technique and care. But honestly, it’s totally doable, even if you’re not a pro.
You might be wondering why doors aren’t always pre-bored from the factory. Well, not everyone wants the same lock placement, and fiberglass doors are used in all sorts of applications, so keeping them blank gives you (or your installer) some flexibility. The trick is making sure you measure carefully, use the correct tools, and follow the right order. I’ll walk you through how to install hardware on a previously un-bored fiberglass door so you don’t have to worry about cracking, splintering, or having to buy a new door because of one unfortunate slip.
What You’ll Need To Install Hardware On A Fiberglass Door
Before you crack open your toolbox, let’s talk about supplies. Fiberglass doors aren’t like wood—they require a bit more finesse so you don’t shatter the surface. Some tools are absolute must-haves for this job, while others just make your life a lot easier. Here’s a checklist:
- Hole Saw Kit: You’ll need a good hole saw (usually 2 1/8″ for the main bore, 1″ for the latch) that can handle fiberglass. Bi-metal or carbide-tipped bits are safest.
- Drill: A corded drill gives you more power, but a quality cordless drill is fine if it doesn’t bog down.
- Measuring Tape & Marking Pencil: Accuracy is everything. Don’t eyeball it.
- Lock Installation Jig: Not required, but so helpful. They keep your holes lined up and centered.
- Chisel or Utility Knife: For squaring out the latch plate area. Go gently—fiberglass splinters like crazy if you get aggressive.
- Protective Tape: Blue painter’s tape or masking tape helps reduce chipping where you drill.
- Eye Protection & Dust Mask: Fiberglass dust is itchy and nasty. Don’t skip these.
Honestly, if you’re missing a jig, you can do it old-school, but your results will be much cleaner with one. If you’re using a smart deadbolt (like a Schlage Encode or Yale Assure), double-check the manufacturer’s template—they sometimes need non-standard hole placements or wire pass-throughs.
Measuring And Marking The Door For New Hardware
Let’s slow down here, because an inch off now means a permanently crooked handle later. Start by deciding on your hardware placement. Most residential locks have a “backset” of either 2 3/8″ or 2 3/4″—that’s the distance from the door edge to the center of the big bore hole. Pick what matches your lock.
- Mark The Height: Standard knob or lever height is 36″–38″ from the finished floor. Use a measuring tape, make a pencil mark on both faces of the door, and double-check with a level.
- Mark The Backset: Measure from the edge of the door, mark your chosen backset distance at the correct height.
- Align Both Sides: Mark the hole center on both faces and the edge. Use a square to ensure your marks are true. If you’re installing both a handle and a deadbolt, repeat this process for the second hole (usually about 5 1/2″ above the knob for deadbolts).
Here’s the thing: If the door has decorative “skins” or contours, this step is extra important. You want your hardware flush, not tilted on a ridge or sunk into a valley. If possible, dry-fit the lock template to see how things will sit before drilling anything. Better to spend 10 minutes checking now than cursing later.
Drilling Holes In A Fiberglass Door Without Damaging It
Drilling fiberglass isn’t quite like drilling wood. It’s tough, splintery, and can crack if you rush. The main goal is clean, chip-free holes that won’t weaken the door. Here’s how to do it right, even if you’re nervous:
- Apply Tape: Cover the drilling spots on both sides with blue painter’s tape. Mark your hole centers right on the tape.
- Clamp The Jig (If Using): Attach your lock installation jig, lining up the marks. This keeps your hole saw from wandering.
- Start Slow: Use a low speed and gentle pressure, letting the hole saw do its work. Don’t force it—rushing creates heat, which melts the resin and can shatter the surface.
- Drill Halfway, Then Switch Sides: Don’t punch all the way through in one go. Stop as soon as the pilot bit pokes out the other side, then finish the cut from that side. This method keeps both faces clean and avoids tear-out.
If you don’t have a jig, stabilize the drill with both hands and eye those marks like a hawk. For the edge bore, a 1″ spade or hole saw does the trick—just be extra careful on pressure, since that part of the door is thin. Honestly, patience pays off. If you sense the bit straining or the door vibrating, pause and clear away dust. A shop vac with a narrow attachment helps suck up the itchy fiberglass shavings before they get everywhere.
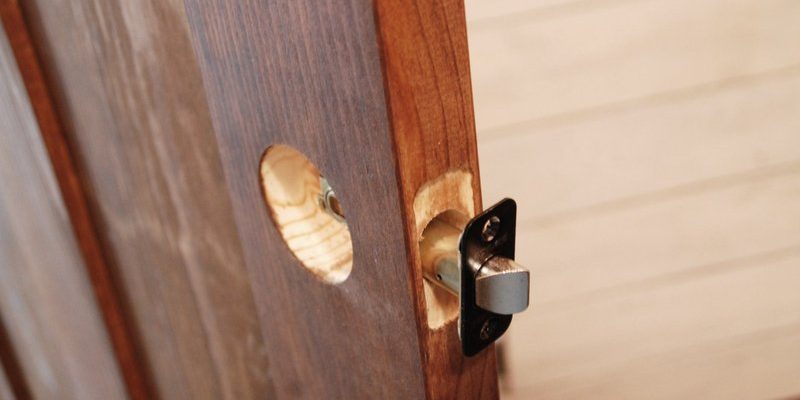
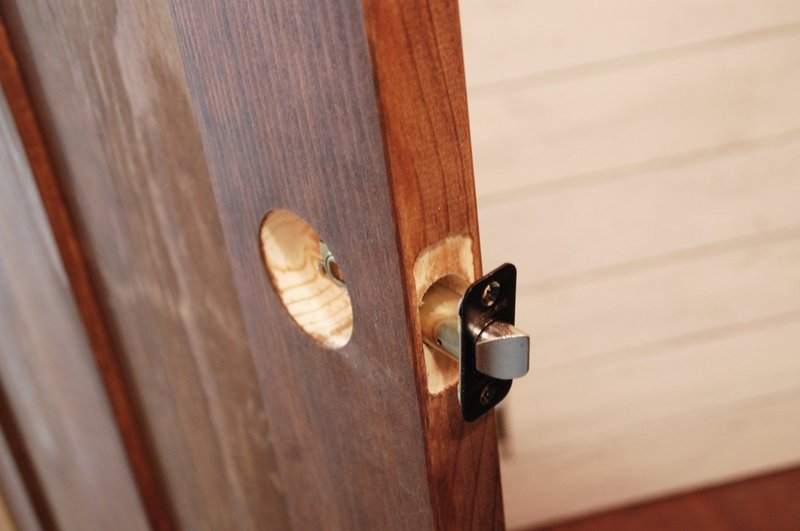
Cutting And Fitting The Latch Plate Area
Here’s where things get a bit delicate. Unlike wood, fiberglass can’t just be chiseled out in big chips—it’ll crack if you get aggressive, and the inner foam core can get chewed up fast. Most latch plates want a shallow rectangular recess for a flush fit.
- Score The Outline: Use a sharp utility knife to carefully score the plate outline on the door edge. Don’t rush—multiple shallow passes work better than one deep slice.
- Remove The Fiberglass Skin: With the knife or a small chisel, gently shave away the hashed area, keeping depth consistent (usually 1/8″ deep). Take your time.
- Test-Fit Frequently: Pop the latch and plate in to check your progress. It should sit flush but not rattle around. If you make the recess too deep or wide, the plate might not anchor securely.
Let me explain: For foam-core fiberglass doors, avoid cutting so deep that you expose or crumble the inner foam. If you do break through, don’t panic—pack any gaps with wood filler or epoxy before screwing in the latch plate. Honestly, going slow here saves a ton of heartache and ensures the finished product looks (and works) great.
Installing The Deadbolt Or Lockset
The hard part’s over. Now it’s just assembly, but you still want things to look sharp and work smoothly. Most locks—for example, Schlage or Kwikset—come with a template, screws, strike plates, and clear instructions. If you’re pairing a smart lock or a universal remote deadbolt, follow the included wiring and battery steps.
- Insert The Latch: Slide the latch into the edge hole, lining up the screw holes. Don’t overtighten—fiberglass doesn’t have as much “give” as wood.
- Fit The Exterior And Interior Pieces: Feed any connecting bars or wires through. Hold the outside and inside parts together and align the screw holes.
- Attach And Tighten Screws: Use the included screws, tightening evenly so the lock sits flush. If your hardware is snug but not binding, you did it right.
- Install The Strike Plate: On the door frame, mark the latch/bolt location, drill pilot holes, and screw in the plate. If you switch to a remote deadbolt, this is where you’ll sync, pair, and test the remote function or code entry.
If you’re running into problems—maybe the latch is stiff or the deadbolt won’t turn—take the hardware back out and check for misalignment. Sometimes the bore holes are just a hair off, which is easy to clean up with a round file. For smart hardware, now’s the time to install batteries, reset or sync the device, and confirm everything pairs with your app or universal remote as needed.
Dealing With Common Problems When Boring Fiberglass Doors
No DIY project ever goes perfectly—especially when fiberglass’s involved. Here’s a quick troubleshooting guide for those “uh-oh” moments:
- Chipped Or Splintered Fiberglass: If the outer layer cracks, don’t panic. You can smooth minor chips with sandpaper, then fill with a bit of auto body filler (like Bondo). Once dry, sand flush and paint to match.
- Misaligned Bore Holes: If your lock doesn’t fit or binds, remove the hardware and gently enlarge the holes with a file. Don’t muscle it—just enough for a smooth fit.
- Latch Plate Won’t Sit Flush: If the recess is too shallow, deepen it gently with your knife. If it’s too deep, build up with wood filler or a plastic shim behind the plate.
- Foam Core Exposed: If you accidentally cut too far, pack the gap with wood filler or marine epoxy so the screws have something to grip. You don’t want the hardware pulling loose over time.
Honestly, most mistakes are fixable. The key is to go slow and check your work every step of the way. If you ever get totally stuck, most brands (like Schlage or Kwikset) have customer helplines and clear video guides for syncing, resetting, or re-pairing smart remotes and lock codes.
Comparing Fiberglass With Wood And Steel Doors For Hardware Installation
You might be curious: “Is fiberglass really that much harder than wood or steel for this kind of work?” The short answer is yes…and no.
- Wood Doors: Easiest to drill and chisel—wood’s forgiving and repairs are simple. But it swells, shrinks, and is vulnerable to water.
- Steel Doors: Much tougher than wood, but usually have a wood or foam core. You’ll need special bits, and the surface can dent. Plus, you can’t chisel a steel face plate—you’ll need a Dremel or metal file.
- Fiberglass Doors: Won’t rot, warp, or rust. But the reinforced shell can chip or crack if you force tools or skip steps. Once bored, though, it holds hardware just as securely as wood—sometimes better, especially with reinforced cores.
If you want the simplest possible install, wood wins. But for durability, energy efficiency, and long life—especially with modern smart locks or remotes—a fiberglass door is a solid upgrade, even if it takes a little more patience to get the hardware set up.
When To Call A Pro For Hardware Installation
Let’s be honest: There’s a point where DIY pride might get you in trouble. If you’re uncertain about your tools, short on patience, or worried about voiding a door warranty, it’s smart to call in a professional. Most locksmiths or door installers have jigs, hole saws, and dust control down to an art—they can bore and fit new hardware in a fraction of the time.
Here are some situations where calling a pro makes sense:
- You’re installing an expensive smart lock or remote system and want perfect fit and finish.
- The door is already installed and hard to maneuver.
- You’re nervous about measuring, drilling, or cutting fiberglass without making a costly mistake.
- You need help with syncing, resetting, or pairing a new universal remote lock, especially on complicated systems.
Honestly, there’s no shame in outsourcing tricky stuff. A pro can also help troubleshoot post-install issues—like battery drain, code resets, or remote pairing—so your new hardware works smoothly from day one.
Wrapping Up: Take Your Time, Do It Right
Installing hardware on a previously un-bored fiberglass door isn’t rocket science, but it does take a steady hand and some patience. The trick is measuring twice, drilling slow, and treating the fiberglass like the tough-but-brittle material it is. Get your holes lined up, protect the surfaces with tape, and don’t rush the latch plate cut. If you’re careful, even a total beginner can get professional-looking results—plus the satisfaction of knowing you did it yourself.
Whether you’re adding a new Schlage deadbolt, a Kwikset handle, or going all-in with a smart remote lock, the key is to go step by step and double-check your work. Mistakes can usually be fixed, and the learning curve is worth it. So grab your tools, breathe deep, and take it one slow, careful step at a time—you’ll have your fiberglass door hardware installed and working before you know it.