A great option is using adhesive or sticker locks, which are perfect for interior doors. These locks can be a game changer, giving you peace of mind while keeping your home looking neat without damaging your doors. In this guide, I’ll walk you through the process step-by-step, so you feel confident tackling this project yourself. You might be wondering, “How hard can it be?” Honestly, once you know what to do, it’s quite straightforward!
Why Choose Child-Proof Locks?
When it comes to child-proof locks, safety is the main reason to consider them. These locks help prevent little explorers from accessing areas that might not be safe for them, like bathrooms, kitchens, or home offices with hazardous materials. Think of them as your home’s safety net—keeping your child away from potential dangers while still allowing them to play freely.
Another reason to use child-proof locks is convenience. Many of these locks come with easy-to-use mechanisms that allow adults to open doors quickly while keeping curious hands at bay. Depending on the type you choose, it can save you from the hassle of constantly worrying about where your child is and what they might be getting into.
Lastly, the variety of options available means you can find locks that match your home’s decor. Whether you prefer something sleek and modern or a little more classic, you can find child-proof locks that blend seamlessly into your interior design.
Types of Child-Proof Locks
There are a few different types of child-proof locks available, and understanding these options can help you pick the best one for your needs. Here are some popular choices:
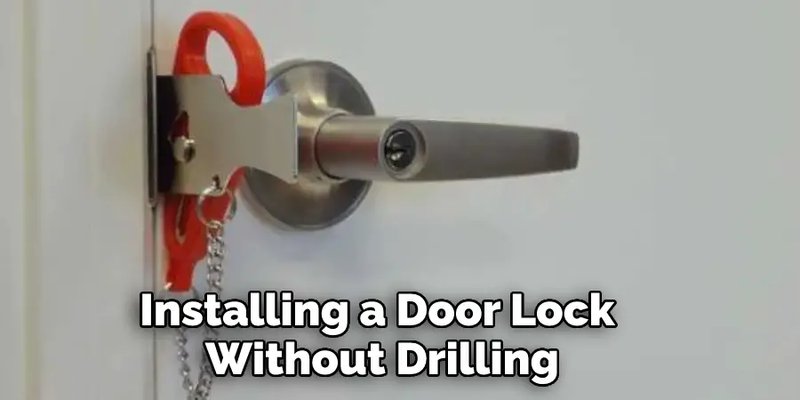
- Adhesive Locks: These locks use strong adhesive strips to attach to your doors, making installation a breeze. They don’t damage your doors, and they’re easy to remove when you no longer need them.
- Sliding Bolt Locks: These feature a bolt that slides into place, keeping the door securely closed. They can be installed without drilling using adhesive or self-adhesive tape.
- Finger Pinch Guards: These locks work as a barrier to prevent fingers from getting pinched. They’re ideal for keeping doors slightly ajar to allow airflow but safely out of reach for little ones.
Each type has its pros and cons, so think about your specific needs. For instance, if you move frequently or rent your home, adhesive locks are perfect since they won’t leave marks behind.
Gather Your Materials
Before diving into installation, you’ll want to gather everything you’ll need. Here’s a quick list:
- Child-proof locks (preferably adhesive ones)
- Rubbing alcohol or a cleaning solution
- A clean cloth
- A measuring tape
- Pencil (optional, but helpful)
Having these materials on hand will help streamline the process and make it easier to focus on securing your interior doors. If you don’t have the locks yet, consider shopping online or at a local hardware store to find the right style for your home.
Preparation: Cleaning the Surface
The first step to installing child-proof locks is ensuring that the surfaces are clean and ready to adhere. To do this, use rubbing alcohol or a gentle cleaning solution:
1. Clean the Door Area: Use a clean cloth to wipe down the area where you plan to place the lock. Make sure to remove any dust, grease, or residue. This step is crucial because dirt can prevent the adhesive from sticking properly.
2. Dry the Area: Allow the area to dry completely before proceeding. If the adhesive doesn’t have a clean surface to bond with, it might not hold well.
3. Measure and Mark (if necessary): If your locks require specific placement, use a measuring tape to find the ideal position. A pencil can help mark where the lock will go, ensuring it’s straight and centered.
By preparing the surfaces properly, you’re setting the foundation for a successful install.
How to Install Adhesive Child-Proof Locks
Now that the area is clean and ready, it’s time to install the locks. Here’s a step-by-step guide:
1. Remove the Backing: Most adhesive locks have a protective backing. Carefully peel this off, exposing the adhesive side.
2. Position the Lock: Align the lock with your markings, ensuring it’s level. Press it firmly against the door, applying even pressure. If your lock has multiple parts, make sure to attach each section in the correct position.
3. Hold in Place: For best results, hold the lock in place for about 30 seconds. This helps the adhesive bond better.
4. Test the Lock: After allowing the adhesive to set for a few hours, test the lock. Make sure it opens and closes smoothly while being secure when locked.
This method is simple and straightforward, and it works for most interior doors, allowing you to keep your little ones safe without any drill or extra tools.
Alternatives: No-Drill Locking Solutions
If adhesive locks aren’t your style, there are other no-drill options you can consider. One popular alternative is using a temporary door knob cover. This is a simple cap that fits over the existing doorknob, making it difficult for small hands to turn.
Another option is magnetic locks. These locks use a magnetic key that you can keep out of reach. When it’s time to access the locked area, use the key to unlock it effortlessly. These locks offer an added layer of safety since they typically have a sleek design.
Troubleshooting Common Installation Issues
Even with simple installations, you might run into a few hiccups. Here’s what to watch out for:
1. Poor Adhesion: If the lock isn’t sticking well, it could be due to surface contamination. Re-clean the area with rubbing alcohol and try again.
2. Lock Misalignment: If you find the lock isn’t lining up properly, don’t hesitate to remove it carefully and reposition it. Just make sure the adhesive hasn’t fully set before adjusting.
3. Child’s Blazing Curiosity: Sometimes, kids are just determined to get around any lock you install. You might need to reinforce your approach by having additional safety measures in place, like teaching your child about boundaries.
These tips will help you overcome any minor barriers during the installation.
Installing child-proof locks on interior doors doesn’t have to be a project filled with frustration. With the right materials and a little patience, you can make your home safer for your little ones—all without drilling a single hole. Remember, the goal is to protect your children from potential hazards while allowing for a comfortable living space.
Now that you understand how to install child-proof locks, you can confidently take on this task. Before you know it, your home will be more secure, and you can enjoy peace of mind as you watch your little ones explore their environment safely. Take the first step today and transform your living space into a safer haven!