Here’s the thing: door hardware, especially the kind meant for smart home upgrades like the August Wi-Fi Smart Lock or Schlage Encode, is designed for standard bore holes. But plenty of older or custom doors have holes that are off-size, off-center, or just a little weird. Instead of giving up or calling in a pro right away, there are ways to work with what you’ve got. Think of it like tailoring a suit—sometimes you need a little adjustment to make modern tools fit vintage style.
Let’s break it down, step by step. Whether you’ve got a vintage wooden door with a small mortise, an odd-shaped aluminum entryway, or a brand new smart lock kit in hand, you can absolutely get that high-tech security upgrade working. You just need the right tools, a bit of patience, and a willingness to think outside the “standard” box.
What Counts As a Non-Standard Bore Hole (And Why Does It Matter)?
A “standard” bore hole is usually 2 1/8 inches in diameter, drilled straight through the door where the deadbolt sits. There’s also a smaller cross-bore hole on the edge, about 1 inch across, for the latch. If your holes don’t match these, you’re dealing with a non-standard situation.
Older homes—we’re talking anything from 70s ranches to pre-war bungalows—often have doors with smaller holes, larger holes, or holes placed a bit off the usual template. Here’s why that matters: most smart lock manufacturers build their products to fit the standard sizes. If your holes are too small, the lock won’t fit. Too big, and it’ll wobble or leave gaps. Off-center? Forget about neat installation.
The good news is, a non-standard bore hole doesn’t mean you need a new door. It just means you’ll have to do a bit of measuring, maybe a little drilling or filling, and choose the right mounting hardware. Before you start, grab a tape measure and jot down the diameter of the existing holes, plus the backset (how far the holes are from the door’s edge). This info will help you pick the right approach—and avoid surprises halfway through the job.
How To Measure and Prepare Your Door for a Smart Lock
Honestly, if there’s one step you shouldn’t skip, it’s measuring. Installing a smart lock on a door with non-standard bore holes requires a clear picture of what you’re working with before you start reaching for the drill. Here’s how to check everything, from hole size to alignment.
- Measure the diameter of the main hole (where the lock body sits). You’ll want it as close to 2 1/8 inches as possible.
- Check the cross-bore hole on the door’s edge. This is where the latch or bolt goes—ideally, it’s 1 inch wide.
- Find the backset distance—the space from the door’s edge to the center of the main hole. It’s usually either 2 3/8 or 2 3/4 inches. An odd measurement here can make things interesting.
Take your time here. Use a ruler or, better yet, a caliper for accuracy. Double-check everything and write it down. If your holes are too small or large—or oddly placed—don’t panic. There are ways to fix nearly every size mismatch, but you’ll want to know what you’re up against before you open that fancy new Yale or August lock box.
If you’re feeling uneasy about your door’s measurements, snap a few photos and bring them to your local hardware store. Staff there have definitely seen stranger things, and they can help you choose the right tools (or filler plates) for your job.
Choosing the Right Smart Lock for Non-Standard Bore Holes
Not every smart lock is a plug-and-play solution for older or non-standard doors. Some brands, like August, design their locks to retrofit existing deadbolts, while others—like Schlage Encode or Yale Assure—usually want those holes to be textbook standard. Here’s what to look for when shopping.
- Retrofitting models: These are great because they fit over your existing hardware. If your old lock works, just add the tech layer. August Smart Lock (especially 3rd and 4th-gen models) is the classic choice here.
- Deadbolt replacements: If you’re swapping out the entire mechanism, make sure the kit comes with adjustable mounting plates or installation templates. Some brands offer “universal fit” options, but read the fine print for minimum and maximum hole sizes.
- Out-of-the-box adjustability: Features like adjustable backsets, filler rings, and thick door kits make life easier if your door is non-standard.
You might be wondering—do universal smart locks really fit anything? Honestly, they’re better than they used to be, but nothing is guaranteed. Always compare your door measurements to those in the manufacturer’s instructions. If there’s a mismatch, check if that brand offers extra hardware (like filler plates or adapters). That small upgrade can turn a “no way” into a “why didn’t I do this sooner?”
Tools and Supplies You’ll Need for the Job
Installing a smart lock on a door that doesn’t play by the rules means you’ll be reaching for more than just a screwdriver. Here’s a quick rundown of what you’ll need, beyond what comes in the smart lock box.
- Drill and hole saw kit: If your bore hole is too small, you’ll need to widen it. Pick up a 2 1/8-inch hole saw.
- Wood filler or metal filler plates: For holes that are too big, these close gaps and create a snug fit.
- Sanding block and utility knife: To smooth rough edges—important for a clean install and keeping the lock from catching.
- Measuring tape and pencil: For marking new centers if you need to shift your hole placement (for odd backsets).
- Screwdrivers (Phillips and flathead): To remove old hardware and install the new.
- Battery pack or proper battery size: Most smart locks run on AA or CR123 batteries. Have fresh ones ready for sync and testing.
If your door’s surface is delicate or you’re worried about splintering, painter’s tape can help keep holes clean as you drill. And if you run into a tricky metal door, specialized hole saws are your friend. Trust me—you don’t want to burn through a standard wood blade on steel.
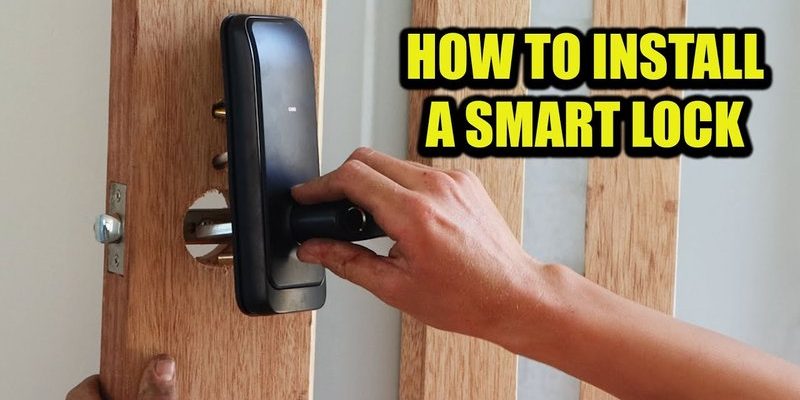
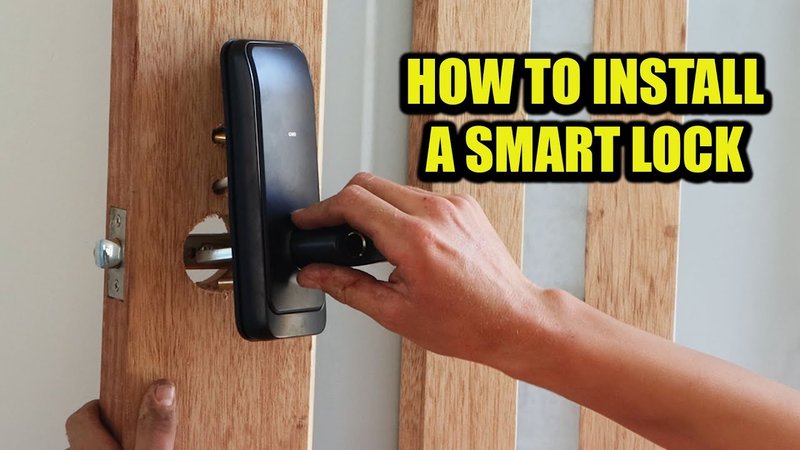
Step-By-Step: Installing Your Smart Lock on a Non-Standard Door
Let me walk you through the practical part. Here’s how to actually get that smart lock working, starting with prep and ending with code setup and troubleshooting. The process will vary a bit depending on your specific brand and door, but these steps cover most situations.
1. Remove the Old Lock Hardware
- Unscrew both sides of the existing lock. Pull out the deadbolt and latch fully.
- Check the shape and condition of the holes. Clean up any jagged edges with a sanding block.
2. Adjust the Bore Hole, If Needed
- If the main hole is too small, use a hole saw to carefully widen it to 2 1/8 inches.
- If the hole is too large, add a filler plate or use wood filler. Let it dry, then sand smooth and repaint as needed.
- For off-center or misaligned holes, mark the new center and carefully re-drill. In extreme cases, you might need to patch and redrill entirely.
3. Install the Smart Lock Hardware
- Follow the manufacturer’s template for screw positioning. Use adjustable plates if your kit includes them.
- Attach the new latch and faceplate, making sure it fits snugly in the edge hole.
- Slide the smart lock body into place, tightening screws gradually for even fit.
4. Set Up and Sync the Lock
- Install fresh batteries as directed (usually AA or CR123).
- Download the smart lock’s companion app on your phone—August, Schlage, Yale, or your brand.
- Follow the prompts to pair or sync the lock. Enter your desired code and test the mechanism.
5. Troubleshooting and Final Adjustments
- If the lock sticks or jams, check alignment and depth. The bolt should move smoothly and seat fully.
- For loose fits, double-check filler plates or consider adding a lock reinforcement ring.
- Not syncing or pairing? Try a reset by removing and reinserting batteries, or check your Wi-Fi connection in the app.
Pro tip: Always test the lock—both mechanical and smart features—before reinstalling any exterior decorative plates. It’ll save you rework if something needs adjustment!
Common Problems (And How to Solve Them)
You might hit a few snags, especially if your door is truly one-of-a-kind. Here are the issues I run into most, and how to handle them.
- Bore hole too small? Don’t try to force the hardware. Use a properly sized hole saw and go slowly—protecting the door’s finish with tape.
- Bore hole too big? Filler plates for oversized holes are your friend. For wood doors, sturdy wood fill works but must be sanded flush. For metal, opt for a metal adapter plate.
- Backset is non-standard? Some latches are adjustable, but if yours isn’t, see if your smart lock brand sells adjustable kits. Otherwise, you may need to redrill and fill the old hole.
- Door thickness is off? Many locks include hardware for thick or thin doors—double-check your model. In a pinch, longer screws or adapter sets often solve this.
Expect a little trial and error. But as long as you measure twice and drill once, most “weird door” issues can be solved with patience, the right parts, and sometimes a bit of DIY creativity.
Are There Alternatives to Drilling or Filling?
Maybe you read all this and thought, “I’m not sure I want to drill my antique door.” That’s a fair point—sometimes, preserving original woodwork is more important than a high-tech upgrade. So, are there other options?
- Retrofitting without modification: Some smart locks, like the August Wi-Fi Smart Lock, work with your existing thumbturn and require zero drilling. They’re ideal for renters or those who want to avoid permanent changes.
- Smart latch adapters: These can fit into smaller mortise locks or old-style doors. Brands like Wyze offer models that work with certain non-standard setups.
- External keypad or smart padlocks: For doors you can’t or don’t want to modify, consider a Wi-Fi-connected padlock or external keypad that operates the existing mechanism.
Still, if you want full smart lock features—like remote code management, auto-locking, or app-based controls—a bit of filling, drilling, or adapting is sometimes worth it.
Final Thoughts: You Can Make Smart Locks Work on Any Door
Installing a smart lock on a door with non-standard bore holes is definitely more work than dropping one onto a modern, cookie-cutter door. But it’s totally doable with the right tools, a dash of patience, and a willingness to learn as you go. If you take time to measure, choose the right smart lock for your situation, and aren’t afraid of a little DIY, you’ll have that keyless entry convenience—without sacrificing your door’s character.
Sometimes, the quirks of an old or custom-built door are exactly what make your home special. Upgrading to a smart lock just adds a layer of modern convenience on top. And who knows? You might even find you enjoy the process—especially when you walk through your front door, code in hand, no key needed, and know you figured it all out yourself.