Self-adhesive weatherstrips—whether from Frost King, 3M, or any of those off-brand kits at the hardware store—are surprisingly easy to use. You just peel, stick, and press. But, like any home fix, there’s a right way and a wrong way to do it. Mess it up, and you’ll be fighting to get the door closed—or worse, discovering the strip peeling off a week later. Let’s walk through this, step by step, like you’re tackling it for the first time (maybe you are). No pro tools, no fancy jargon—just straightforward, honest help.
What Exactly Is a Self-Adhesive Weatherstrip?
If you’re staring at that roll of squishy foam and thinking, “This is it?”—you’re not alone. A self-adhesive weatherstrip is really just a strip of flexible material (usually foam, rubber, or silicone) with one sticky side. You peel off the protective backing, press the sticky edge onto the frame or door edge, and it creates a tight seal. While it sounds basic, this little strip plays a huge role in your comfort and energy bill.
Here’s the thing: weatherstrips come in lots of shapes and thicknesses. Some have a “D” shape, some are flat, and others are tubular. You might see names like “Frost King E/O Self-Stick” or “3M Auto Weatherstrip”—but the goal’s the same. They physically block air, water, and even sound, making your metal door feel solid, not drafty. Honestly, that’s a big win for such a simple trick.
If you’re worried about compatibility: most indoor/outdoor self-adhesive strips will work on any standard metal door. Just make sure yours isn’t too thick to let the door close, and that the adhesive is rated for metal (most are). If you still have doubts, check for mention of “metal doors” on the packaging—or ask the hardware store crew.
Why Choose a Self-Adhesive Strip for Your Metal Door?
You might be wondering: “Why not use screws and old-school weatherstripping?” Good question. Here are a few reasons people go for self-adhesive weatherstrips instead, especially on metal doors:
- No tools required. No drills, screws, or special skills. Just scissors and a clean surface.
- Quick application. Peel and stick. You don’t have to fiddle with alignment for hours.
- Friendly for metal surfaces. Adhesive sticks well to smooth or painted metal, and avoids damage from nails or screws.
The only real catch? Self-adhesive strips work best on clean, dry, and relatively smooth surfaces. If your metal door is rusty, flaking, or warped, you’ll need to prep it beforehand—or consider a different type. Still, for most situations, self-adhesive strips are a practical, affordable fix that anyone can DIY.
In my experience, a self-adhesive weatherstrip is the fastest way to cut down drafts—no handyman required, just a steady hand.
Getting the Right Weatherstrip for Your Door
Picking the right weatherstrip isn’t rocket science, but it’s worth slowing down to avoid a classic newbie mistake: buying a strip that’s too thick, too thin, or not sticky enough. Here’s what to look for:
- Thickness: Most doors have a gap of about 1/8 to 1/4 inch. If the gap is bigger, look for a double-layer or thicker style.
- Width: You want a strip wide enough to cover the area where the door meets the frame, but not so wide that it pops out or gets pinched.
- Adhesive type: Most modern strips use acrylic or rubber-based adhesive, which sticks well to metal. Avoid cheap foam with weak tack—it’ll peel fast.
- Durability: For exterior metal doors, look for “all-weather” or “outdoor rated” strips like the 3M All-Weather or Frost King Supreme.
If you’re still not sure, measure the gap with a coin or folded piece of paper and bring it to the store. And, yes, universal weatherstrips do exist—just double-check for compatibility with metal.
Getting Ready: Tools and Prep Work
Before you dive in, a couple minutes of prep will save you a lot of cursing later. Metal doors hold dust and grease like magnets, so a clean surface is your best friend. Here’s how to get ready:
- Clean the door frame and edge. Wipe with a damp cloth, then use rubbing alcohol or cleaner to remove oil or gunk. Dry it thoroughly.
- Check for damage. If you see rust, chips, or peeling paint, sand it down and touch up if possible. Strips adhere best to smooth, flat metal.
- Assemble your gear. You’ll need scissors or a sharp utility knife, tape measure, and maybe a friend for moral support (optional, but encouraged).
Take your time with prep—adhesive doesn’t forgive lazy cleaning. The key to a snug seal is a dirt-free, totally dry surface.
How To Install a Self-Adhesive Weatherstrip on Your Metal Door
This is where the magic happens. Installing self-adhesive weatherstripping on a metal door is a one-person job, but do it slowly so every section lines up tight. I’ll break it down in steps:
Step 1: Measure the Door’s Edges
Open the door fully and measure the top, hinge side, and latch side—skip the bottom unless your strip is made for thresholds. Add up the numbers; cut your strip to match, or use a little extra for corners (snug seals = happy seals).
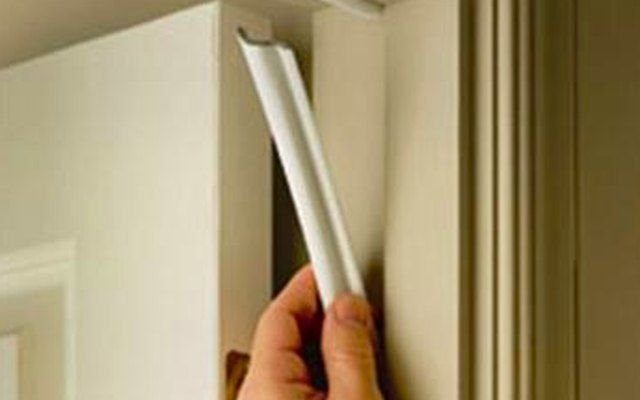
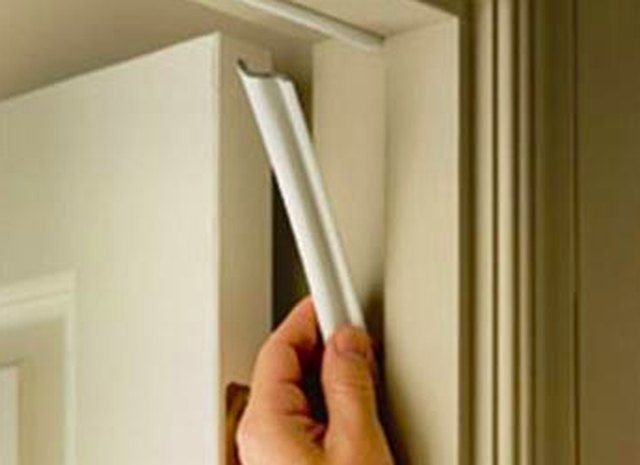
Step 2: Dry-Fit the Weatherstrip
Before peeling the backing, hold the strip up to the door edges to check fit and placement. You want the strip slightly compressed when the door is closed—not so thick it jams, not so thin it’s floppy.
Step 3: Peel and Stick, a Little at a Time
Peel about 6–12 inches of backing, press the sticky side onto the edge, and work slowly. Smooth the strip as you go, pressing firmly. If you run long, trim the excess with scissors.
Step 4: Check the Fit and Press Again
Once it’s fully installed, close the door gently. It should close with a soft “whoosh,” not a slam. If it’s too hard to close, the strip is too thick—or it’s off-center. Press along the whole length again for a solid bond.
If the strip starts peeling in the first day or two, odds are the surface wasn’t clean enough or you didn’t press hard enough. Give it a 24-hour “rest” before running your hand over it or exposing it to lots of moisture.
Common Troubleshooting Tips for Weatherstrip Installations
Even the best self-adhesive weatherstrips can run into problems on certain metal doors. Here are some classic hiccups and what you can do about them:
- The strip keeps peeling off. This usually means the surface was greasy, dusty, or wet. Clean with alcohol, then firmly press a new section into place.
- The door is hard to close. The strip may be too thick, or installed too far inward. Try a thinner style, or reposition closer to the door edge.
- Gaps are still visible. You may need a second layer, or a different shape (like a D-profile for bigger gaps).
- The adhesive isn’t sticking to painted metal. Lightly sand the edges, then try again—sometimes glossy paint blocks adhesion.
If you’re “pairing” your weatherstrip with other sealing methods (like a door sweep for the bottom), install those after the sides and top are set. A tight seal is like syncing separate parts of a team—everything should work together, not fight for space.
Comparing Self-Adhesive Strips to Other Weatherstripping Methods
Let me explain why most homeowners (and renters) love self-adhesive weatherstrips for metal doors:
- Less damage than nailed or screwed-in metal/rubber strips.
- Easier install and removal—great for apartments or quick fixes.
- No guesswork: pre-cut strips and spare adhesive mean fewer mistakes.
The alternatives—like aluminum V-strips or rigid rubber stops—work well on wood doors and for larger gaps, but need careful alignment and more tools. They also risk scratching or rusting metal frames if you’re not careful.
Still, if you find yourself needing a more permanent solution, or your door frame is really irregular, those classic methods might be worth a shot. Just weigh the effort and risk against the simple peel-and-stick method.
How Long Does a Self-Adhesive Weatherstrip Last?
You might be wondering if your new weatherstrip is a short-term fix or built to last. Typically, a quality self-adhesive weatherstrip (like those from 3M or Frost King) will seal a metal door well for 2–3 years—sometimes longer, unless it’s battered by sun, rain, or heavy use.
Here’s what affects its lifespan:
- Sunlight and heat, which can break down the foam or rubber faster.
- Heavy traffic doors—like a busy front entry—may need new strips sooner.
- Poor initial prep. If you didn’t clean or press firmly, expect to replace it quicker.
If you ever need to “reset” or upgrade, just gently peel off the old strip, clean off sticky residue with a little rubbing alcohol or goo remover, and start fresh. Don’t be afraid to try different brands or thicknesses until you get a perfect, lasting seal.
Wrapping Up: Enjoy a Cozier, Draft-Free Home
Installing a self-adhesive weatherstrip on a metal door is one of those tiny home fixes that pays off big. With just a few minutes of prep, the right strip, and a little patience, you’ll block out drafts, save energy, and maybe even muffle street noise. The best part? No special tools, no professional help, just a little common sense and a steady hand.
So next time you feel a chill—or see a sliver of daylight under your door—remember, the fix is sitting in aisle eight at your local hardware store. Just peel, stick, and press your way to a more comfortable home.