What’s neat about pocket doors is that they slide neatly into the wall, which can make them look sleek and modern. However, they often lack a built-in way to lock them, so adding a privacy lock is essential for rooms that need a little more seclusion, like bathrooms or bedrooms. By the end of this guide, you’ll feel confident about installing that lock, as if you just tapped into your inner handyman (or handywoman)!
Let’s dive into how to install a privacy lock on a pocket door, step by step.
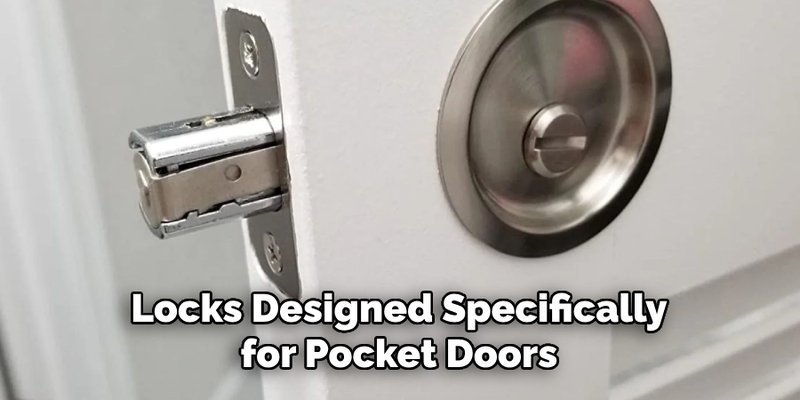
Choosing the Right Privacy Lock
Before you start installing, you need to select the right privacy lock for your pocket door. There are a few main types available, including turn-button locks and sliding bolt locks.
– Turn-button locks are simple to operate. You turn a knob to lock or unlock the door. They’re perfect for most areas where privacy is necessary, offering quick access when you need it.
– Sliding bolt locks provide a bit more security. They utilize a bolt that slides into the door frame, which is great for added safety if you’re considering a pocket door for more sensitive spaces.
When choosing the lock, consider the door’s thickness, as well as the style that matches your home’s decor. You want something functional but also aesthetically pleasing. Once you’ve settled on a lock, read the manufacturer’s instructions, as they can vary from one product to another.
Gather Your Tools and Materials
Now that you have your privacy lock, it’s time to gather your tools and materials. Here’s what you’ll need:
- Measuring tape
- Drill
- Screwdriver
- Chisel
- Pencil
- Level
- Your privacy lock kit (which usually includes screws)
Having everything ready before you start is key. You don’t want to be halfway through and realize you’re missing a tool, right? Think of it like applying for a job; preparation is half the battle!
Measure the Door for Installation
Before any drilling or cutting, you need to accurately measure where the lock will go. Here’s how:
1. Decide on the height: A common height for privacy locks is about 36 inches from the floor. However, you can adjust this based on your comfort.
2. Mark the position: Use your pencil to mark where the center of the lock will go. Make sure it’s straight—this is where your level comes in handy.
3. Check for alignment: It’s essential to ensure the lock aligns well with the latch on the door frame when it’s closed. This will save you a lot of trouble later!
Taking the time to measure accurately ensures your lock operates smoothly, like a well-oiled machine. You don’t want to end up cutting into the door incorrectly!
Drill the Holes for the Lock
Once you have everything measured and marked, it’s time to drill the holes for your privacy lock. Here’s how to do it step-by-step:
1. Drill the cylinder hole: Use your drill to create a hole for the lock cylinder. The size of the hole will depend on the specifications of your lock—check the instructions closely.
2. Create the latch hole: You’ll also need an area for the latch to slide into. This is where the chisel comes into play! Carefully chisel out a shallow recess in the door frame where you marked it earlier.
3. Ensure smooth edges: After drilling, take a moment to smooth out any rough edges around the holes. This helps the lock fit better and look more polished.
Drilling the holes can be a bit nerve-wracking, but once you get started, you’ll find it’s just like any other DIY project. Just take your time!
Install the Privacy Lock Mechanism
Now, it’s time for the fun part: installing the lock mechanism itself!
1. Insert the lock cylinder: Place the cylinder into the hole you created. Make sure it fits snugly.
2. Secure it in place: Use the screws that came with your lock kit to fasten the cylinder. Make sure it’s tight, but don’t overdo it—stripping the screws can be a pain!
3. Install the latch: Slide the latch into the recessed area you chiseled out. Align the screw holes with the frame and secure it tightly.
This step is where everything starts coming together. Watching the mechanism fit into place feels like a mini victory!
Test the Lock Functionality
With the lock installed, it’s time to test its functionality. Open and close the door a few times to make sure everything works as it should.
– Check the lock: Lock and unlock the door several times. The mechanism should feel smooth and reliable.
– Look for gaps: Ensure there are no gaps between the door and the frame when locked. If you notice any, you may need to adjust the latch.
– Make adjustments if needed: If the door doesn’t align well or the lock feels sticky, you may need to make minor adjustments. This is normal and part of the process!
Testing the lock not only ensures your hard work was worth it, but it also guarantees privacy when you need it most.
Final Touches and Cleanup
Once you’re satisfied with the lock’s functionality, it’s time to finish up. Here are a few steps for the final touches:
1. Cover the screws: Sometimes, kits come with decorative covers for the screws. These can give your installation a polished look. If yours came with these, go ahead and install them.
2. Clean up the workspace: Put away your tools and any debris from the installation. A tidy space is not only nice to look at, but it also helps in case you need to do more work later.
3. Enjoy your privacy: Now that you’ve installed your privacy lock, you can enjoy the peace of mind that comes with having a secure space!
Installing a privacy lock on a pocket door might feel overwhelming at first, but you’ve done an awesome job. Just remember to take your time, measure accurately, and follow the steps closely.
Adding that privacy element to your pocket door is like putting the final flourish on a great painting. You now have one more way to enjoy your home, knowing you’ve done it yourself!