These kits are designed to close up those sneaky air leaks, acting like a puffy coat for your door or window frame. They’re simple enough for most DIYers, and you don’t need to be a pro with power tools or have a garage full of fancy equipment. Whether you’re dealing with a drafty front door or a noisy window, installing a perimeter weatherstrip kit can help you seal the deal—literally. Let’s walk through how to do it, why it matters, and a few things you’ll want to keep in mind.
What Is a Perimeter Weatherstrip Kit?
Here’s the thing: a perimeter weatherstrip kit is a bundle of flexible strips—usually made from rubber, foam, vinyl, or silicone—designed to fill the small spaces around the edges of doors or windows. Imagine the soft, compressible gasket you see around your refrigerator door; perimeter weatherstripping works on the same principle. It keeps the good air in and the bad air (or water, or bugs) out.
Most kits include three long strips: one for the top of the frame, and two for the sides. Some brands, like MD Building Products or Frost King, even throw in adhesive or screws for easy installation. These kits can come in different styles, such as V-strip, bulb, or foam tape, so you have options depending on how big your gaps are or what looks best with your door.
If you’re new to this, you might wonder: “Will this really make a difference?” Honestly, yes. Even a gap the thickness of a credit card can let in enough cold air to make a room uncomfortable and bump up your heating bill. Weatherstripping is one of those ‘small investment, big payoff’ projects.
How Does Weatherstripping Work?
Let me explain why weatherstripping is more than just a sticky strip. When you close your door or window, weatherstripping compresses, creating a seal that blocks air flow, dust, moisture, and sometimes even sound. It’s like putting a soft gasket between the moving parts—so things can open and close smoothly, but the gap is sealed when shut.
There are different types of weatherstripping, but perimeter kits are made to run all the way around the frame—hence the “perimeter” part. This means they block drafts on every side. Think of it like putting a fence around your entire yard instead of just one side. If you skip even one edge, air will find its way in, and you’ll end up troubleshooting the same problem again and again.
Some weatherstripping options are self-adhesive, while others need to be nailed or screwed in. Brands like 3M, Duck, and Frost King offer easy-to-install kits that come with detailed instructions, but the process is generally similar for all standard perimeter kits.
What You’ll Need Before You Start
Before you race off to the hardware store, let’s talk about what you’ll actually need on hand for this project. Don’t worry; you probably own most of these already.
- Perimeter weatherstrip kit (match the kit to your door or window size and style)
- Measuring tape (for getting the right length on each strip)
- Pencil or marker (for marking where to cut strips)
- Sharp scissors or utility knife
- Screwdriver or drill (only for kits that use screws)
- Cleaning supplies (mild cleaner, rag, and maybe a brush)
Here’s the thing: don’t skip cleaning the frame before you start. Any dust, old paint flakes, or grease can keep the adhesive from bonding well. If there’s old weatherstripping, now’s the time to remove it. Scrape it off with a putty knife or flathead screwdriver, then wipe down the area. It’s a bit like syncing a new remote—you want to reset the frame to “factory clean” before pairing the new kit.
Step-By-Step Guide: How To Install a Perimeter Weatherstrip Kit
If you’ve ever paired a remote or set up a universal code, you know that following each step in order is key. Installing a perimeter weatherstrip kit works the same way. Here’s how to get a tight, professional-looking seal without any guesswork.
1. Measure Each Side of the Frame
Start by measuring the top and both sides of the door or window frame. It’s best to measure twice, just like you’d double-check a battery before popping it into a remote. Write down each measurement. Most kits come with a little extra length, so you’ll need to trim them to fit.
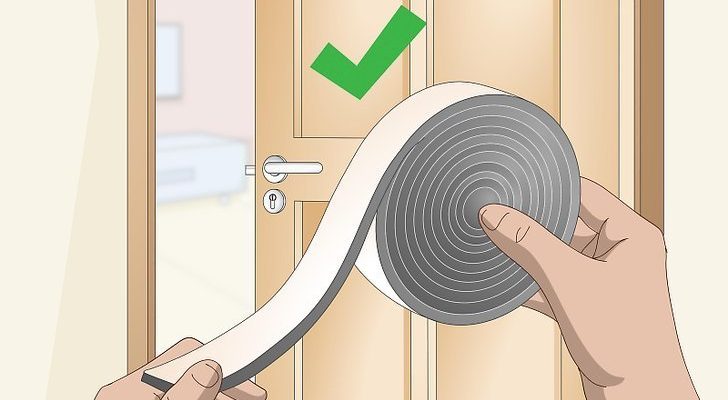
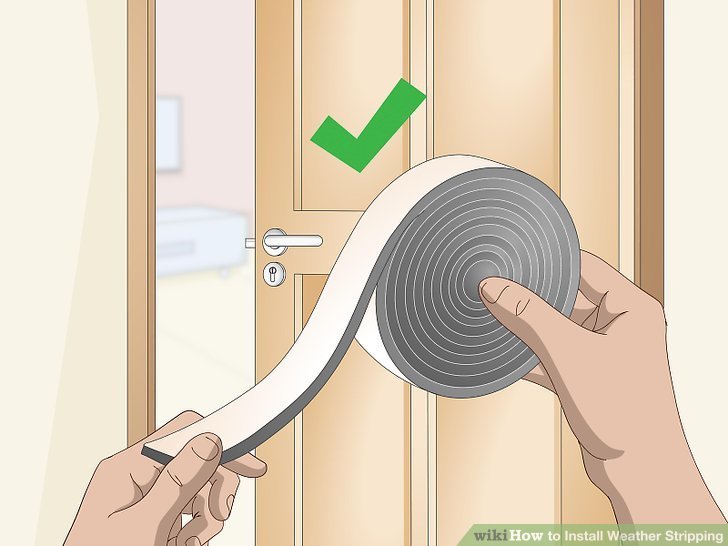
2. Cut the Weatherstripping to Length
With your measurements in hand, use sharp scissors or a utility knife to cut the weatherstripping strips. Try to get a clean, straight edge—crooked cuts can leave tiny gaps, which defeats the whole purpose.
3. Dry Fit the Strips
Before peeling off any adhesive or reaching for screws, hold each strip up to the frame to check the fit. This “test run” lets you spot problems before things get sticky (literally). Adjust as needed.
4. Attach the Strips
If your kit is self-adhesive, peel off the backing and press the strip firmly onto the frame. Start at one end and work your way down, smoothing as you go. If your kit uses screws, line up the strip, and drive the screws in at the recommended intervals (usually every 8–10 inches).
Pro tip: For adhesive kits, press and hold each section for a few seconds to help the glue “sync” and set properly. If a spot doesn’t stick, clean it again or try a little heat from a hair dryer to improve the bond.
5. Check the Seal and Adjust
Once all the strips are in place, close the door or window and look for light sneaking in around the edges. If you see any gaps, adjust the strip or add a tiny piece in that spot. You want a snug seal, but not so tight that the door is hard to close.
Common Problems When Installing Weatherstripping
You might be wondering, “What could possibly go wrong?” Honestly, even simple projects have their troubleshooting moments. Here are a few issues people run into, and how to handle them:
- Adhesive won’t stick: Usually, this means the surface wasn’t clean, there’s leftover paint, or the temperature is too cold. Try cleaning again and warming up the area with a hair dryer before applying the strip.
- Door/window won’t close properly: This can happen if you chose weatherstripping that’s too thick. Try a thinner strip, or reposition what you have so the door seals, but still closes easily.
- Gaps still visible: Sometimes frames aren’t perfectly square, so a standard strip may miss a spot. Add a small piece of foam tape in stubborn gaps.
- Peeling corners: If the ends start to peel, add a small screw or tack, or a dab of strong glue to hold them down.
Most issues are quick to reset or repair, so don’t get discouraged if you have to tweak things after your first try. The goal is a continuous seal that passes the “light test”—no visible gaps or leaks.
How a Perimeter Weatherstrip Kit Compares to Other Options
Maybe you’ve seen weatherstripping “alternatives” at the store, like door sweeps, draft stoppers, or even fancy electronic seals. Here’s a quick comparison.
- Perimeter weatherstrip kits: Best for sealing all four sides of doors or windows. Good for both new installs or replacing old strips. Usually a one-time install.
- Door sweeps: Attach to the bottom of a door—great for stopping drafts under doors, but they don’t cover the sides or top.
- Draft stoppers (like those fabric snakes): Quick fix for under-door gaps, but you have to remember to put them back after opening the door. Not a complete or permanent seal.
- Foam or felt tape: Cheaper and easier for thin gaps, but doesn’t hold up as long or make as tight a seal as rubber or silicone kits.
- Electronic or magnetic seals: Overkill for most homes—better suited for studios, soundproofing, or high-end custom doors.
Honestly, for most people, a perimeter weatherstrip kit strikes the best balance between price, performance, and ease of installation. It’s the “universal remote” of draft prevention: reliable, straightforward, and works in almost every situation.
When Should You Replace or Reset Your Weatherstripping?
Like any seal or gasket, weatherstripping doesn’t last forever. Over time, it can crack, flatten, or peel up at the corners. If you notice any of these signs—or if drafts start creeping back in—it’s time to swap out the strips.
Signs your weatherstripping needs replacing:
- You see light coming in around the edges, even when the door or window is closed.
- You feel drafts or temperature swings near the frame.
- The strip is cracked, brittle, or missing chunks.
- The adhesive is peeling, or you see mold/mildew on the strip.
Checking your weatherstripping is kind of like checking the batteries in your remote—make it part of your regular home maintenance routine. A quick reset with new strips every 2–3 years can keep your home sealed and comfortable.
Tips for a Professional-Looking Finish
Want to make your weatherstripping look like it was installed by a pro? Here are a few tips you might not find in the kit instructions:
- Match strip color to your door or window frame for a clean look. Most brands offer white, brown, or clear options.
- Use a level when installing the top strip, so it’s perfectly straight (especially important on tall doors).
- Trim corners at a 45-degree angle using a miter box or the corner of a cutting board—this helps the side and top strips meet neatly, reducing gaps.
- For painted or stained frames, lightly sand before applying adhesive-backed strips to help them grip.
- If you’re sealing a window, open and close it a few times after installing to make sure everything moves smoothly and nothing jams.
Don’t rush—taking a few extra minutes here can make your seal last longer and look better. It’s a bit like syncing up the buttons on a new universal remote; slow, steady steps get the best result.
Wrapping Up: Enjoy a Cozier, Quieter Home
Sealing your doors and windows with a perimeter weatherstrip kit isn’t just about comfort—it’s about saving money, slashing energy waste, and making your home feel like a true haven. When you take the time to measure, install, and adjust your weatherstripping, you’re setting yourself up for fewer temperature swings, a quieter space, and fewer surprises on your energy bill. Think of it as pressing “reset” on the comfort settings in your living room—suddenly, everything just feels right. And for something you can do in less than an hour, that’s a pretty great deal.