
Honestly, not everyone knows what a “water dam” threshold is until they have a puddle by their doormat (been there myself). Brands like M-D Building Products and Pemko make these nifty, heavy-duty door thresholds specifically to tackle this problem. They come in different lengths and finishes, but the basic idea stays the same: stop unwanted water in its tracks—without making your doorway look like a science experiment.
Let me explain what’s really involved in installing one, step by step, from first toolkit grab to that satisfying “done!” moment. Whether you’re fixing a leaky backdoor or just want to upgrade from the old, flat metal strip, you’ll be able to handle it—even if you’ve never swapped a threshold before.
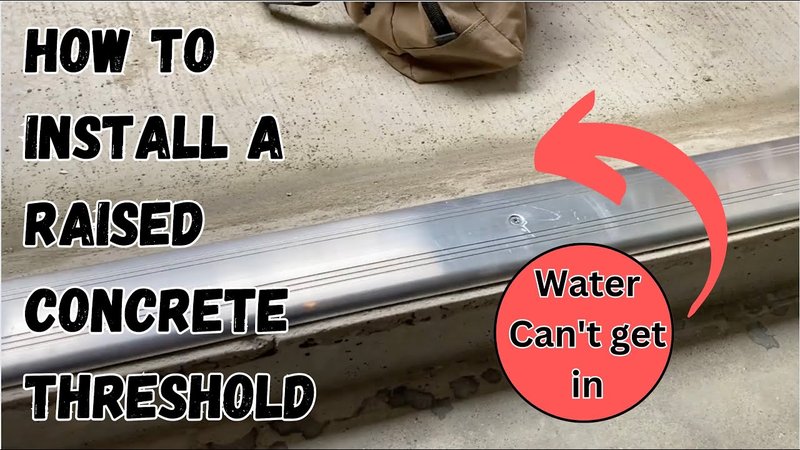
Why Choose a Threshold With a Built-In Water Dam?
You might be wondering, “Isn’t a regular threshold enough?” In some places, sure. But thresholds with built-in water dams offer extra defense for spots where water likes to sneak in—think patios, garages, or doors that face the weather head-on. The raised “dam” is like a bump that sits across your doorway, redirecting water so it can’t creep inside.
The real magic is how it works in all weather. During rain or snow, the dam’s height forces water to flow away from your door, instead of underneath it. This saves your floors, keeps carpets from getting musty, and helps prevent wood rot or mold right at the threshold. It’s especially handy in older houses where the door frame isn’t perfectly tight.
These thresholds come in a few styles, usually aluminum or vinyl, with a rubber strip that forms the water dam. Some even have a replaceable gasket for bonus weather sealing. If you hate fussing with temporary fixes or dealing with soggy entryways, this is a smart, long-lasting solution.
Gathering Your Tools and Materials
Before starting, it pays to get everything ready, just like laying out all your ingredients before you bake. Here’s what you’ll need to install a new threshold with a built-in water dam:
- Threshold with a built-in water dam (match the width of your door)
- Measuring tape
- Hand saw or hacksaw (for metal or vinyl cutting)
- Drill and matching drill bits
- Screwdriver
- Pencil or marker
- Caulk (waterproof, for sealing gaps)
- Caulk gun
- Utility knife
- Vacuum or broom for cleanup
Honestly, these are basic DIY tools—nothing fancy. If you’ve ever put together a piece of IKEA furniture, you can handle this. Just make sure your new threshold matches your door size. Most water dam thresholds can be cut to fit, but getting close with the original size makes your job a whole lot easier.
Removing the Old Threshold
Here’s the thing: To install your new water dam threshold properly, the old threshold needs to go. Sometimes this is as simple as unscrewing a few fasteners. Other times, you’ll need a little elbow grease and patience, especially if yours has been in place for decades.
Start by opening the door wide to get full access. If you see screws holding down the old threshold, remove them using a screwdriver or drill. For thresholds sealed with caulk or paint, gently cut along the edge with a utility knife to break the seal. Wiggle the threshold up and out—some may require a bit of prying.
Take your time here. Rushing can chip your flooring or scratch the door frame, which is a pain to fix later.
Once the old threshold is out, clean up the area underneath. Sweep or vacuum away dust and debris. If there’s leftover caulk or adhesive, scrape it away so you have a flat, clean surface for your new installation. A smooth base ensures your new threshold sits flush and seals tightly against water.
Measuring and Cutting the New Water Dam Threshold
Getting the right fit is crucial. Even a threshold with a built-in water dam won’t help if it leaves gaps at the sides. Use your measuring tape to find the exact width between the interior edges of your door frame. Don’t guess—measure twice for accuracy.
Transfer this measurement to your new threshold. Most water dam models come a little longer than standard doorways, since it’s easier to trim off extra than add it back. Use a pencil or marker to clearly mark where you’ll cut.
For aluminum or metal thresholds, a hacksaw works best. For vinyl, a fine-toothed hand saw or utility knife can do the trick (carefully!). After cutting, use a metal file or sandpaper to smooth the edges—you don’t want sharp bits that can snag feet or shoes.
A tight, custom fit keeps out water and drafts, and honestly just looks more professional when you’re finished.
Test the threshold in place before you move on. It should sit flat, with the water dam centered under the door when closed. Double-check for any high spots or gaps. If needed, trim and test again. Spending an extra few minutes here prevents headaches later.
Securing the Threshold: Screwing and Sealing
Once you’re happy with the fit, it’s time to lock your new threshold in place. Most water dam thresholds have pre-drilled holes, but if yours doesn’t, mark and drill new holes at even intervals—typically at each end and every 8–10 inches along the length.
Lay a bead of caulk along the underside of the threshold. This helps fill gaps and keeps water from sneaking underneath. Set the threshold in place, making sure the water dam faces toward the outside and sits upright.
Drive the screws into place, starting from one end and working your way to the other. Tighten them snugly, but don’t overtighten—you could crack the threshold, especially with vinyl. Wipe away any excess caulk that squeezes out.
Go outside and pour a little water near the door to check your work. If you see water pooling against the dam and not seeping under, you’ve done it right. If there are small leaks, run another bead of caulk where the threshold meets the door frame or floor.
Fine-Tuning for Weatherproof Performance
Here’s where you really get the most from a threshold with a built-in water dam: making sure it’s fully sealed and the door operates smoothly. Close the door and look for light peeking through at the bottom. Light means gaps—exactly what you’re trying to avoid.
If your door has a sweep or bottom seal, check if it brushes gently against the top of the new threshold, especially over the dam. Too tight, and the door might stick or require a big push; too loose, and water and cold air can sneak through. Adjust or replace the sweep if needed for a comfy fit.
For extra insurance, run a thin bead of caulk along the inside and outside edges of the threshold. Smooth it with your finger or a caulk tool for a neat look. Cleanup any squeeze-out so things look tidy.
This last bit feels like overkill, but in my experience, a careful seal pays off whenever the weather turns harsh or the wind picks up.
Comparing Universal and Brand-Specific Water Dam Thresholds
You’ll see both “universal” thresholds and brand-specific models (like M-D Building Products or Pemko) at the hardware store. Universal thresholds are made to fit most door types, so they’re a solid pick if your door is standard-sized or you want something quick that doesn’t require a lot of research.
Brand-specific thresholds, meanwhile, often have features custom-matched to specific door brands—like precise gasket shapes or colors. If your door is an odd size or made by a well-known company, check if they make a matching threshold. The fit may be more precise, and you’ll often get a better long-term seal.
There’s no right or wrong choice here. If you’re on a budget or working on a rental, a universal threshold with a built-in water dam is usually just fine. For forever homes or where leaks are a big concern, the extra investment in a brand-matched model can pay off in fewer headaches down the line.
When to Call in a Pro (and When to DIY)
Installing a threshold with a built-in water dam is a pretty achievable DIY project, but there are times you’ll want a pro. If your subfloor is rotted, warped, or there’s visible mold, it’s best to get it checked and repaired. A new threshold won’t fix bigger structural issues underneath.
On the other hand, if everything’s solid and it’s just a matter of swapping thresholds, most handy folks can handle it in an hour or two. Just be patient and follow each step closely. Remember: measuring twice, cutting once, and sealing everything up tight is the key to staying dry.
The sense of satisfaction when you notice water streaming away from your door instead of inside? Priceless, honestly.
Final Thoughts on Installing a Threshold With a Built-In Water Dam
Sometimes the simplest fixes—like upgrading your threshold—can have the biggest payoff for your home’s comfort and safety. A water dam threshold works quietly, stopping leaks and drafts before they even start. Sure, it takes a little bit of careful measuring, some patience with cutting, and a steady hand with the caulk gun. But when you step inside on a stormy day and the entryway is bone dry, you’ll know it was worth it.
Remember, whether you go with a universal or brand-specific threshold, the real trick is in the details: clean prep, accurate cuts, and careful sealing. If you run into trouble, don’t stress—give yourself time, and don’t be afraid to ask for help. Once it’s done, you’ll have a doorway that’s ready for whatever Mother Nature throws at it.