
A lot of folks worry about pulling out the whole door frame or needing fancy tools. Here’s the thing: for most homes with a standard wood or metal frame, you don’t need to demolish anything. Whether your entryway boasts a classic wood trim or a modern composite threshold, the basic steps for installing a new sill under an existing frame are pretty similar. Even if you’re a first-timer, you can handle this job—and I’ll walk you through each step in plain English.
What Exactly Is a Door Sill—and Why Replace It?
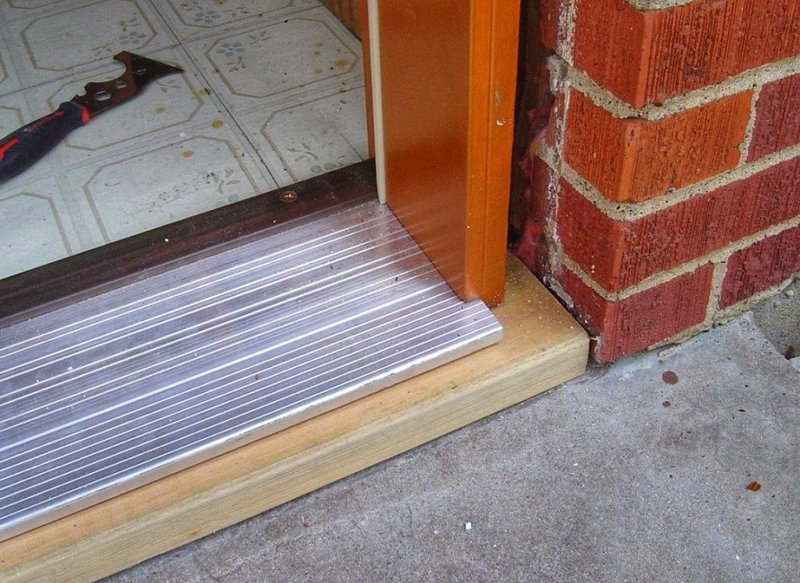
Let me explain: the *door sill* is the bottom strip of material that you step on when walking through your doorway. It sits directly beneath the door and connects the inside of your home to the outside. Over time, wood sills can rot, vinyl can warp, and metal ones can rust or get dented.
Here’s why it matters: an old, damaged door sill is like a crack in your armor. Water can sneak in, bugs can crawl through, and cold air zips under the door. Honestly, if you ignore a bad sill, you’re just inviting bigger headaches later—think ruined floors or sky-high heating bills.
You might be wondering: do you always have to tear out the whole frame just to get a new threshold in? Luckily, no. As long as the frame isn’t damaged, you can swap out just the sill. That saves you lots of work, a fair bit of cash, and your door stays right where it is.
Tools and Materials You’ll Need for the Job
Before you start, gather everything you’ll need so you’re not hunting around mid-project. Here’s the core list:
- New door sill (match the length and material to your old one)
- Pry bar or flathead screwdriver
- Hammer
- Oscillating multi-tool or handsaw
- Tape measure
- Pencil or marker
- Construction adhesive or caulk
- Drill and screws
- Wood filler or weatherproof sealant
- Utility knife
It might sound like a lot, but most of these are pretty standard tools. If you don’t have an oscillating tool for cutting the old sill, a handsaw will work—just go slow and steady. For the new sill, measure carefully. If your entryway is a weird size, you might need to trim the new sill down with your saw.
How To Remove the Old Door Sill Without Damaging the Frame
Honestly, this is the part that scares most beginners: getting the old sill out without wrecking the frame. But here’s a trick—work slowly, and don’t force anything.
- Start by opening the door wide. If the weatherstrip is attached to the sill, use a utility knife to cut through the caulk or sealant.
- Check for screws or nails holding the sill in place. Pry them out gently with your screwdriver or pry bar.
- Use the pry bar to lift the sill, starting on one end and working your way across. If it won’t budge, check for hidden fasteners or more caulk.
- If the sill tucks under the frame (it often does), you’ll need to cut it free. Slide your oscillating tool or handsaw carefully along the edge where the sill meets the jamb. This makes a clean line, so you don’t gouge the frame.
Don’t worry if the old sill crumbles or splinters as you pull it out. That’s totally normal, especially with rotten wood. Just get all the bits out so the area is clean and flat. Scrape away old glue, dirt, and debris with your knife. The smoother the surface, the tighter your new sill will fit—which means fewer drafts later.
Getting the New Sill Ready—Sizing and Trimming
Here’s where a lot of people make their lives harder than they need to. The trick is to measure the opening after you remove the old sill—not before. Houses settle, and doorways shift slightly over the years, so use the actual gap as your guide.
- Measure the width and depth of the sill opening. Write it down or mark it directly on your new sill with a pencil.
- Trim the new sill to fit, using your saw. Take your time and check the fit before making the final cut.
- If the new sill is a bit tall or sticks up, you can shave a little off the bottom or sand it down. Don’t overdo it—better to be slightly snug than too loose.
- Test-fit the new sill by sliding it into place. It should sit flat, with no rocking or wobbling. If your frame has notches or grooves, you may need to cut small notches in the new sill to match.
If you want extra weather protection, now’s the time to pre-fit any gaskets, caulk, or foam strips to the bottom edge. Honestly, you’ll thank yourself the next time it pours rain and your entry stays bone dry.
Installing the New Door Sill Under the Existing Frame
Alright, moment of truth. Installing the new door sill is less about brute force, and more about patience and attention to detail.
- Apply a generous bead of construction adhesive or weatherproof caulk to the spot where the sill will sit. This seals out water and stops the sill from shifting.
- Slide the sill into place, tilting it as needed to tuck it under the frame legs. Press down firmly so the adhesive spreads evenly.
- Check that the sill is level from side to side. If it’s sloping, add thin shims underneath until it sits flat.
- For extra security, drive a few screws through the sill and into the subfloor. Countersink the heads and fill with wood filler or sealant to keep everything waterproof.
Be gentle but thorough as you work. If adhesive oozes out the sides, wipe it up right away. And don’t close the door just yet—let the glue cure for at least a few hours, or overnight if you can.
Sealing, Finishing, and Weatherproofing
Honestly, this last step is what separates a quick fix from a job that lasts. Water is sneaky—it only takes a tiny gap for leaks to start.
- Run a fresh bead of sealant or caulk along every joint where the sill meets the frame and floor. Use your finger or a caulk tool to smooth it out for a neat look.
- If your door has a weatherstrip, make sure it presses snugly against the new sill. If not, install a new one for extra protection.
- Paint or stain the sill (if it’s wood) to match your door frame. This seals the surface and helps it resist rot.
- Once it’s dry, swing your door open and closed a few times to check the fit. The door should move freely, but the gap under the door should be tight enough to keep out drafts.
Let me say: don’t skip these finishing touches. Even the best door sills can fail if water seeps in around the edges.
Common Problems and Simple Troubleshooting
You might be wondering what can go wrong when tackling this project. Here are some of the most common headaches—and how to fix them:
- Sill too short or long: If you accidentally cut it a bit short, fill small gaps with caulk. If it’s too long, trim a sliver off and re-test the fit.
- Door won’t close: If the new sill is too tall, sand or plane down the raised areas. Only shave off a little at a time and keep testing.
- Drafts or leaks after installation: Check that all seams are fully sealed. Add weatherstripping if you see any light under the door.
- Squeaky or loose sill: Make sure you used enough adhesive and that the sill is screwed down securely. Tighten or add screws as needed.
Don’t get discouraged if things don’t go perfectly on the first try. Honestly, troubleshooting is just part of learning how to install a door sill under an existing frame.
Comparing Materials: Wood, Metal, and Composite Sills
If you’re still deciding what type of sill to buy, here’s a quick comparison:
- Wood: Classic, easy to cut, paint, or stain. Looks great on older homes but needs regular sealing to prevent rot.
- Metal (usually aluminum): Durable, water-resistant, and low-maintenance. Best for high-traffic or weather-exposed doors—just watch for corrosion if water pools under it.
- Composite: Made from a mix of materials (often PVC and wood fiber). Won’t rot, resists bugs, and can mimic real wood. A bit pricier, but worth it if you want a nearly maintenance-free option.
Honestly, the “best” sill depends on your climate and how much abuse your entryway takes. I like composites for most folks—they’re tough, they don’t warp, and you only need to install them once.
Wrapping Up: Enjoy Your Fresh, Solid Entryway
Swapping out a door sill under an existing frame is one of those projects that pays off every single time you walk through your front door. You skip the drafts, the leaks, and those creaky boards underfoot. Yes, it takes a bit of elbow grease and patience, but the result—a smooth, sturdy threshold—makes your home feel that much more finished and welcoming.
So, next time you notice a soft spot or a cold breeze under your door, don’t just tape it up or ignore it. Get your tools, measure twice, and tackle that sill replacement. Your entryway (and probably your toes) will thank you for it.