If you’re new to home repairs, swapping out or installing a fresh seal on your door might sound like fiddly work. You’ve probably seen different options at the hardware store—like v-strips and fin-type seals—and wondered which one’s right for your home. Maybe you picked up a Frost King or M-D Building Products brand, but the packaging just makes your eyes glaze over. Honestly, installing a new door bottom seal doesn’t need to be complicated. Let’s break down the basics and get your door sealed up tight—step by step.
Why Door Bottom Seals Matter
You might be wondering why anyone bothers with door bottom seals in the first place. The truth is, those tiny gaps under your door can make a big difference. Every little crack is an open invitation for cold air, dust, bugs, or even water. If you’re like most people, you’ll notice it most in winter—your heat slips out, and you end up with higher energy bills for no good reason.
Here’s the thing: a decent door bottom seal does more than just block drafts. It helps keep your home’s temperature steady, so your heat or AC isn’t working overtime. Over time, this small fix pays for itself by making your house cozier and your bills a bit lighter. And let’s not forget the peace of mind—no more cringing every time you see a bug stroll in across the threshold.
There’s also the noise factor. A proper seal muffles outside sounds, which matters if you live on a busy street or have a barking neighbor’s dog. In short, if you want a comfortable, energy-efficient home, installing the right door bottom seal is a no-brainer.
V-Strip Vs. Fin-Type: What’s The Difference?
When you’re standing in the aisle squinting at packages, the difference between a v-strip and a fin-type seal can be confusing. Let me explain it in plain English.
V-strips (sometimes called tension seals) are made of flexible plastic or metal formed into a V shape. They spring open to fill gaps and press firmly against the door, stopping drafts right in their tracks. You stick or tack them along the edge where the door meets the frame—super handy for odd sizes or crooked doors.
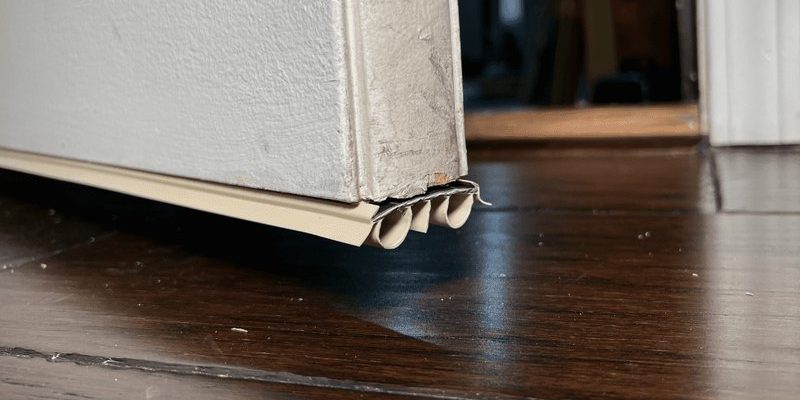
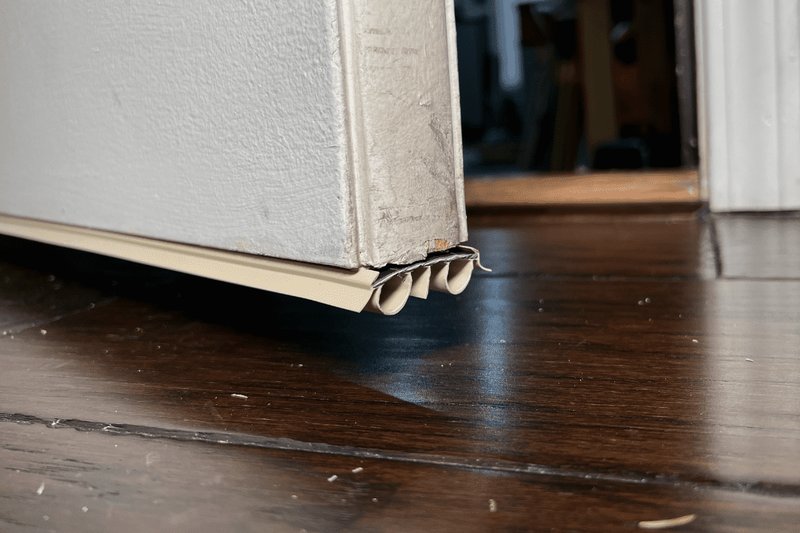
Fin-type seals, on the other hand, usually have a soft rubber or vinyl “fin” that hangs down from a metal or plastic strip attached directly to the door’s bottom edge. The flexible fin brushes along the threshold as you open or close the door, sealing out air and debris while letting the door glide smoothly.
- V-strips: Great for smaller or uneven gaps. Often peel-and-stick, simple to install.
- Fin-type: Best for wider, consistent gaps. Generally screwed or nailed onto the door bottom.
If you want something subtle and easy for minor drafts, v-strips are your friend. If you need a heavy-duty option for a big gap—think garage or exterior doors—fin-type might be the way to go.
What Tools and Materials Do You Need?
Let’s talk about what you’ll actually need before you start. Don’t worry, you won’t have to unpack your entire toolbox. Most seals require just a few basic tools and materials, many of which you probably already have in your junk drawer or garage.
- Tape measure: For getting the width of your door just right.
- Utility knife or scissors: To cut the seal to size—especially with v-strips or rubber fins.
- Screwdriver or drill: Needed only if you’re using a fin-type seal with screws.
- Cleaning rag: Because a clean surface helps the adhesive stick.
- Pencil or marker: To mark where your seal will go.
- Your chosen seal (v-strip or fin-type): Make sure it matches the width and style you need.
Honestly, that’s about it. Try not to overthink it—these seals are designed for home DIYers, not expert carpenters.
How To Install A V-Strip Door Bottom Seal
V-strips are one of the simplest solutions for small to moderate gaps. The process is pretty forgiving, even if you’ve never done this before. Here’s how to get it done:
Pro tip: Always measure twice and cut once. It’s way easier to trim excess than to try and stretch a too-short strip.
- Step 1: Clean the surface. Use a damp rag to wipe down the door’s bottom and frame so the adhesive will stick properly.
- Step 2: Measure the length you need. Most doors are 30 to 36 inches wide, but every home is quirky. Hold the v-strip up and make a small mark where you’ll need to cut.
- Step 3: Trim the strip to size. Use scissors or a utility knife for a clean edge.
- Step 4: Peel and stick. Remove the adhesive backing (if yours comes with one) and press the v-strip along the edge, forming a tight seal where the door meets the frame or threshold. If it’s a metal v-strip, you might need to tack it down with small nails.
- Step 5: Test the door. Open and close it a few times to make sure the seal isn’t too tight or catching anywhere.
You may need to adjust the positioning a bit. The whole point is a snug, not jammed, fit. If you hear scraping or the door feels hard to close, just nudge the strip over.
How To Install A Fin-Type Door Bottom Seal
Fin-type seals work wonders for larger gaps, but they take a bit more elbow grease to install. Don’t worry—it’s still perfectly doable for beginners.
- Step 1: Remove the old seal (if there is one). Use a screwdriver to take out any screws holding it in place, then pull it free. Give the door bottom a good cleaning so you’re not sealing over dust or debris.
- Step 2: Measure and mark. Line up the fin-type seal with your door. Most come a few inches longer than a standard door, so you’ll want to measure and mark your cut lines for a clean, custom fit.
- Step 3: Cut to fit. Use your utility knife or scissors to trim rubber or vinyl. If there’s an aluminum or plastic backing, a hacksaw may help.
- Step 4: Position and attach. Hold the seal flat against the door’s bottom edge, making sure the fin just brushes the threshold. Mark and drill pilot holes if needed, then use screws to secure the seal in place.
- Step 5: Test and adjust. Open and close the door a few times. That fin should brush, not drag. If it’s too tight, loosen the screws and adjust before tightening them back up.
Honestly, take your time with this. A poorly installed seal can make your door hard to open or close—or leave annoying gaps. Adjust as needed until you get it just right.
Troubleshooting Common Door Bottom Seal Problems
Sometimes, things don’t go perfectly the first time around. Maybe the seal keeps peeling up, or your door starts sticking. Here’s how to troubleshoot some common headaches:
- Seal keeps coming loose: Check if the surface underneath is clean and dry. For stubborn spots, a dab of extra-strong adhesive or a couple of finishing nails can help.
- Door won’t close properly: If it’s too tight, you might need to adjust where the seal sits or trim a little extra off. Don’t force the door—fix the fit.
- Still feeling drafts: Shine a flashlight towards the door gap at night and see where the light slips through. Focus on sealing those missed spots.
- Adhesive won’t stick in cold weather: Warm up the strip (a hairdryer helps) or wait for a warmer day—adhesives stick better at room temperature.
If you’re using branded products like Frost King or M-D, their customer service can help with troubleshooting, replacement parts, and warranty issues. Don’t hesitate to reach out if you’re stuck.
Which Option Is Best For Your Door?
Choosing between a v-strip and a fin-type seal comes down to the size of your gap, the kind of door you have, and how much work you want to do. Let’s compare the two in a nutshell:
| Seal Type | Best For | Ease of Install | Durability |
| V-Strip | Small, uneven gaps; light drafts; quick fixes | Very easy—peel and stick or tack on | Medium (can wear out if used on frequently moved doors) |
| Fin-Type | Wider, consistent gaps; exterior and garage doors | Requires screws and careful alignment | High (stands up to heavy use and weather) |
If you’re patching up a bedroom door, v-strips do the job fast. For that drafty old back door or garage entrance, a fin-type seal is worth the extra effort for a tight, lasting fit.
How Long Do Door Bottom Seals Last?
Nothing lasts forever, and door bottom seals are no exception. The lifespan really depends on the type, how much traffic your door gets, and the elements it faces.
V-strips, especially the adhesive kind, usually last a couple of years before they start peeling or flattening out. If they’re on a door that barely gets used, you might forget you even installed them. But high-traffic doors or spots with a lot of moisture (think bathrooms or exterior doors) can wear them out quick.
Fin-type seals are built tougher. They can last five to ten years—even longer if screwed in well and kept out of direct sunlight or constant wet. But you’ll want to check them every now and then for tears, missing screws, or a fin that’s gotten too floppy.
Here’s the thing: if you notice drafts, bugs, or daylight peeking in, it’s time for a swap. Regular checks save you headaches (and heating bills) down the road.
Final Thoughts: Keeping Your Home Sealed And Cozy
Sealing up that drafty gap under your door isn’t just about comfort—it’s about efficiency, savings, and a little peace of mind. Whether you go with a quick, flexible v-strip or a solid fin-type seal from M-D or Frost King, the process is usually straightforward. Measure carefully, line things up, and take your time with the install. If something doesn’t feel right, don’t be afraid to adjust or start over.
Honestly, once you see how much it helps, you’ll wonder why you didn’t do it sooner. With the right door bottom seal, you’ll keep out the cold, block bugs, and make your home a more inviting place for everyone—except the drafts.