Here’s the thing: most doors come with just a knob or lever lock. But if you want the serious security of a proper deadbolt (say, something sturdy like a Schlage or Kwikset), you’ll need to carve out a brand-new spot for it. This project isn’t about fancy electronics or codes—just good old mechanical strength. Getting it right can make you feel like a real DIY pro, but that first step (cutting holes in your door!) can be a little nerve-wracking.
Let me explain everything—tools, steps, and little gotchas—so you can go from “Do I really have to drill my door?” to “Look what I just installed!” Even if you’re a total beginner, with some patience and the right tools, you can do this.
Why Add a Deadbolt to a Door Without One?
You might be wondering why anyone would bother with a new deadbolt when most doors already have a lock. Honestly, a lot of door knob locks are mostly for looks or convenience. They’re easy to pick or force open. If you want real home security—especially for exterior doors—a deadbolt is the gold standard.
Deadbolts use a solid metal bolt that slides deep into your door frame. Unlike spring-loaded locks, they’re way harder to jimmy open, even with tools. When you think about it, installing a deadbolt is less about paranoia and more about peace of mind. Maybe you’re renting an older place, or you just moved in and noticed there’s only a handle lock. Either way, adding a deadbolt means you’re actually taking charge of your home’s safety.
Installing a deadbolt where there’s no existing hole is a bit trickier than swapping one out. You have to measure and drill everything from scratch. But the payoff is huge: you get to pick the exact spot, use a brand and type you trust, and finally feel like your door’s doing its job.
Here’s a quick rundown before we get hands-on:
- Deadbolts = real security (not just for show)
- No existing hole = you’ll need to drill one
- Works on almost any door—wood, metal, or composite
So grab your tape measure; let’s get into the details.
What Tools and Supplies Do You Need?
Don’t worry—installing a deadbolt isn’t like assembling IKEA furniture with a single Allen wrench. You’ll need a few key tools, but most are common in basic toolkits or available for cheap at any hardware store.
Here’s what you’ll need:
- Power drill (corded or strong cordless)
- Hole saw kit (usually 2 1/8″ for the main lock hole, 1″ for the latch hole)
- Chisel (for squaring off the latch plate)
- Tape measure and pencil (accuracy is everything)
- Phillips and flathead screwdrivers
- Safety glasses (trust me—wood chips in your eyes aren’t fun)
- Deadbolt lock kit (Schlage, Kwikset, or whatever brand you like)
Some deadbolt kits come with a paper template, which is super handy for marking your holes. If yours doesn’t, you can always print one from the manufacturer’s website (just make sure it matches the model).
You might be tempted to skip the hole saw and improvise, but don’t. Trying to drill a perfect circle with random bits is a recipe for disaster—not to mention ugly, wobbly locks. Invest in a proper hole saw set, or borrow one if you can.
Where Should You Place the Deadbolt?
Not all spots on your door are ideal for a new lock. Most deadbolts are installed 6 to 12 inches above the handle or knob. This height keeps things secure while avoiding awkward reaches. Plus, most lock brands design their kits for this standard.
Here’s what to check before you make a mark:
- Door thickness: Most deadbolts are made for doors 1 3/8″ to 1 3/4″ thick.
- Backset: This is the distance from the edge of the door to the center of your deadbolt hole. Most residential doors use a backset of either 2 3/8″ or 2 3/4″. Your deadbolt kit will specify which one it fits (some are adjustable).
- Material: Wood doors are the easiest to drill. Metal doors work too, but you’ll want a sharp bi-metal hole saw and a little extra patience. Solid composite doors are drillable if you go slow.
To position your holes, start by measuring up from the center of your existing knob. Mark your height (usually between 6–12 inches above), then use the template to mark the exact spot for both the main hole and latch hole on the door edge.
Quick tip: Open the door before marking or drilling, and make sure you’re working on the correct side!
How To Drill the Main Hole for the Deadbolt
This is the part that makes most beginners nervous. You’re about to drill a big hole right through your door. Take a breath—it’s not as scary as it sounds if you go slowly and measure twice.
Here’s how you do it:
- Stick the template to the door at your marked spot. Double-check the height and backset.
- Use a small drill bit to create a pilot hole through the center mark. This helps guide your hole saw perfectly straight.
- Attach the 2 1/8″ hole saw to your drill. Hold it steady and start drilling from the outside of the door.
- Go about halfway through, then stop. Switch to the other side of the door and finish drilling from there. This prevents splintering and gives you a nice, clean hole.
Some doors have a metal skin over wood. If that’s you, let the saw do the work and don’t force it. A little cutting oil helps keep things cool and smooth.
Honestly, the key here is patience. If you rush, you’ll end up with a crooked or ragged hole—and trust me, that’s tough to hide with a lock plate.
How To Drill the Latch Hole
Next up: making a spot for the actual deadbolt to slide into. This hole goes in the edge of the door, right where your template marks it. Most deadbolt kits use a 1″ hole here.
Here’s the step-by-step:
- Double-check the position with your template. Line it up with the main hole.
- Drill a small pilot hole first, just like before.
- Use the 1″ hole saw or a spade bit to drill straight into the door edge, making sure you end up flush with the main hole you just drilled.
- Go slowly! It’s easy to wander off-center. Keep your drill as straight as you can.
When you’re done, test-fit the deadbolt latch. It should slip in easily, with the bolt mechanism poking out into the main hole. If it’s tight, give the edges a gentle scrape with a chisel—but don’t overdo it. A snug fit is good.
How To Chisel and Install the Latch Plate
With the holes done, you need to fit the metal plate that sits flush on the edge of the door. If you skip this, the latch will stick out and look unfinished (plus it can catch on things). This step takes some care, but it’s what makes your install look pro.
Here’s how:
- Hold the latch mechanism in place and trace around the faceplate with a pencil.
- Remove the latch, then use a sharp chisel to carefully carve out a shallow “mortise” just deep enough for the plate to sit flush.
- Start by outlining the edges with gentle taps, then pare away the material inside the outline. Go slow—better too little than too much.
- Test-fit as you go. The plate should sit flat, without wobbling or sticking out.
Once you’re happy with the fit, screw the latch plate into place. If your deadbolt kit came with longer screws, use those for extra strength. Some folks like to reinforce this area with longer screws that reach into the door frame for even more security.
Pro tip: Keep your chisel sharp, and always work with the grain of the wood—not against it. That’s how you get a crisp, neat mortise.
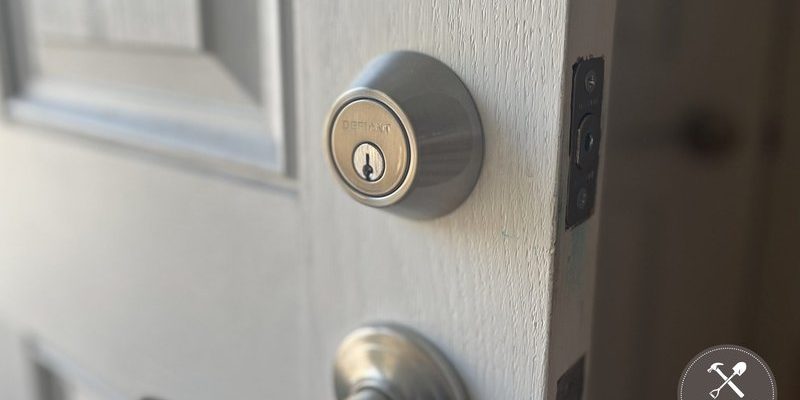
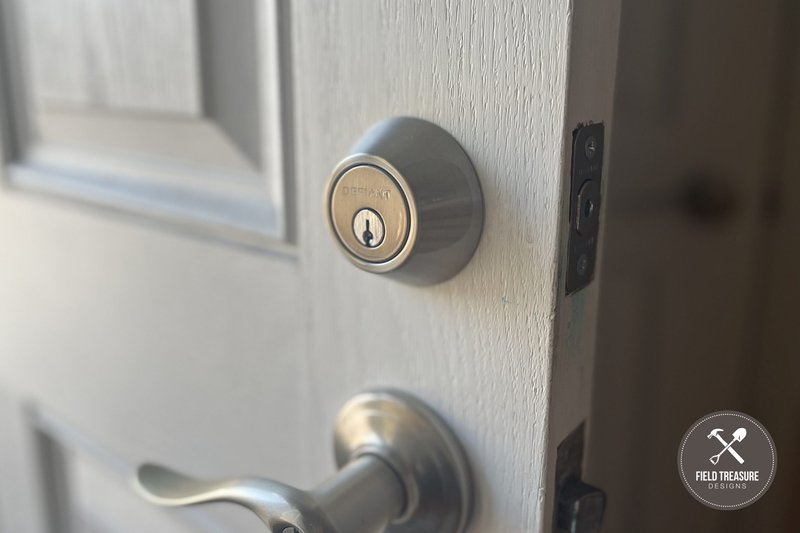
Mounting and Syncing the Deadbolt Lock
Now comes the satisfying part: putting your new deadbolt together. Most deadbolts (Schlage, Kwikset, Yale, and others) have two main parts—an exterior cylinder and an interior thumb-turn. They connect through the holes you drilled.
Here’s what to do:
- Slide the latch mechanism into the door edge, making sure the bolt moves smoothly.
- Hold the exterior side (the key part) in place. Line up the connecting rod and any mounting screws with the holes.
- Attach the interior thumb-turn side, threading the screws through the lock body and tightening them with a screwdriver.
- Test the deadbolt with the key and thumb-turn. It should lock and unlock smoothly—no sticking or rattling.
You might need to “sync” the lock parts—meaning, align them so everything turns freely. Sometimes, if the holes aren’t 100% perfect, parts can feel stiff or rough. Loosen the screws a bit, wiggle the lock straight, then re-tighten.
If you’re using a smart deadbolt (like a Kwikset Halo or Schlage Encode), now’s the time to pop in the batteries, sync the remote keypad, and follow the pairing or reset instructions in their app. For a basic mechanical lock, you’re done—no batteries or codes required.
How To Install the Strike Plate and Finish the Job
The final step is just as important as the rest: installing the strike plate in your door frame. This is what keeps the deadbolt locked tight when you turn the key.
Here’s what matters:
- Close the door and turn the deadbolt to mark where it hits the frame. Use this spot to center your strike plate.
- Hold the plate in place, trace around it, and chisel out a shallow mortise so the plate sits flush—just like you did on the door edge.
- Drill pilot holes for the screws to prevent splitting the frame, then screw the plate in snugly.
- Test the door. The deadbolt should slide into the strike plate smoothly, with no sticking. If not, adjust the position or deepen the mortise a bit.
Some people add a reinforced strike plate for extra security—especially if break-ins are a concern in your area. These use longer screws (sometimes 3 inches or more) that anchor deep into the wall framing, not just the door jamb. If you want next-level security, it’s worth doing.
Finish up by cleaning any dust or wood chips. If you made any marks or dings, a bit of touch-up paint or wood filler works wonders. Step back and admire your handiwork—you just installed a deadbolt from scratch!
Common Problems and Troubleshooting Tips
Installing a deadbolt without an existing hole is usually straightforward, but a few annoyances can pop up along the way. The good news: most of them are easy to fix.
Here’s what might trip you up, and how to handle it:
- Misaligned holes: If the lock feels sticky or doesn’t turn easily, your holes might be off by a few millimeters. Try loosening the screws, adjusting the lock assembly, and retightening. In a worst-case scenario, gently file or sand the holes for a better fit.
- Bolt won’t fully extend: If the deadbolt doesn’t throw all the way, check the alignment between the bolt and the strike plate in the frame. Adjust the strike plate left or right until the bolt moves smoothly.
- Door won’t close properly: Sometimes, adding a deadbolt makes the door feel tight. Double-check that you haven’t installed the latch or strike plate too deeply. Sometimes, a quick adjustment of the door hinges helps.
- Metal doors or frames: Drilling metal takes time and the right bits. Keep your hole saw cool and go slow. If you hit stubborn steel, a drop of cutting oil can help.
- Smart deadbolts not syncing: If you’re using an electronic lock, issues often come down to battery placement, code entry, or the remote not pairing. Double-check the manual—sometimes a simple reset or re-pairing solves everything.
Don’t panic if something doesn’t fit perfectly on the first try. Small tweaks with a chisel or file can save the day, and most “universal” deadbolt kits are designed to forgive a few beginner mistakes.
Alternatives: Should You Consider a Professional Install or Keyless System?
Let’s be honest—not everyone loves the idea of power tools or making holes in their front door. If that sounds like you, there are options that don’t require going full DIY.
- Hire a locksmith: If you’re worried about making a mistake, a local pro can do the job quickly and precisely. You’ll pay for labor (usually $75–$200), but you get peace of mind and a warranty.
- Keyless or retrofit locks: Some smart locks fit over your existing deadbolt or knob, needing zero drilling. They’re great if you rent or want to avoid permanent changes. They might not offer as much physical security as a proper deadbolt, but the convenience is unbeatable.
- Surface-mounted deadbolts: These older-style locks bolt onto the inside of the door—no big holes required. They’re not as sleek or secure as built-in deadbolts, but for sheds, garages, or low-risk spots, they’ll do.
Really, it comes down to your comfort level, budget, and how much you care about maximum security. If you do decide to install a deadbolt yourself, just take your time—there’s no rush.
Closing Thoughts: You’ve Upgraded Your Home Security
Adding a new deadbolt to a door with no existing hole can seem intimidating at first, but it’s completely doable with a little patience and the right tools. You’ve gone from “just a handle lock” to real, heavy-duty security—and honestly, that feels pretty empowering.
Along the way, you learned how to pick the right spot, drill clean holes, and troubleshoot any problems. If you went with a trusted brand like Schlage or Kwikset, you’ve got decades of mechanical know-how backing you up. If you braved a smart lock, you’re living in the future (as long as you remember to change the batteries).
Most importantly, you’ve made your home safer—and picked up a genuinely useful new skill. So, next time someone asks, “Can you install a deadbolt when there’s no existing hole?” you’ll know the answer is a confident “Yes—let me show you how it’s done.”