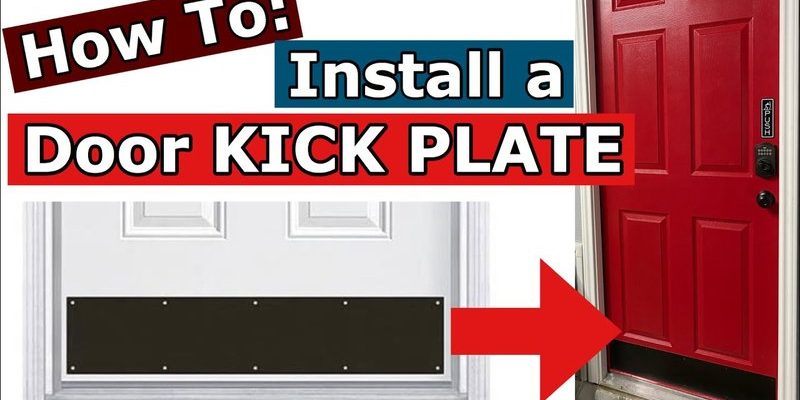
Honestly, installing a kick plate might sound like a job for a handyman, but it’s absolutely doable even for a beginner. Whether you have a Larson, Anderson, or Pella storm door (or even a no-name brand from the hardware store), the process is pretty similar. And once you’ve got it on, you’ll wonder how you ever lived without it. Let me explain how you can add a kick plate to your existing storm door without stress—even if you’ve never held a drill before.
What Is a Kick Plate and Why Do You Need One?
Here’s the thing: a storm door kick plate is just a thin sheet of metal, usually aluminum or brass, installed along the bottom exterior of the door. Its job? Take the brunt of everything that would otherwise damage the door itself—like muddy shoes, foot taps, dog paws, strollers, and sporting equipment bouncing off on their way into the house. Basically, it protects your investment with a layer of armor where it counts.
You might be wondering if a kick plate is really needed, or if it’s just for looks. The truth is, even if you’re extra careful, that area gets the most abuse just through daily use. Storm doors from brands like Larson or Pella are built to last, but scratches and dents at the bottom can happen fast. A kick plate not only stops damage before it starts, but it can also cover up old scrapes and give your door an instant face-lift.
Don’t overlook the style factor, either. Kick plates come in several finishes—brushed nickel, brass, satin, or plain aluminum. Some people even pick a contrasting color to make their entryway pop. It’s practical and gives your home a small but noticeable upgrade.
Gathering Your Tools and Materials
Let’s get real—most kick plate installation projects don’t require fancy tools. If you’ve got a basic toolkit at home, you’re already halfway there. Here’s what you’ll need to install a kick plate on an existing storm door:
- Kick plate: Make sure it’s the right size (usually 6–8 inches tall, as wide as your door).
- Measuring tape: For accurate sizing and placement.
- Drill with proper bits: If your storm door is metal, a metal drill bit is essential.
- Screwdriver: Phillips or flathead, depending on your screws.
- Level: To keep things straight.
- Pencil or painter’s tape: For marking the kick plate’s position.
- Mounting hardware: Most kick plates include screws or adhesive strips.
Pro tip: Some universal kick plates come with adhesive backing if you want to avoid drilling. But honestly, screws give the most secure hold—especially if your door gets a lot of use or if you live somewhere with rough weather.
Measuring and Marking the Kick Plate Position
Here’s where attention to detail matters. You don’t want a lopsided kick plate. Start by measuring the width of your storm door at the bottom. Most standard doors are 32, 34, or 36 inches wide, but always double-check—sometimes there’s a little trim or gasket to work around.
Place the kick plate on the outside bottom edge of your door, centered left to right. Use your level to make sure it’s straight, not tilting up or down. No one wants a crooked look every time they walk in the door.
Now, lightly mark the top edge of the kick plate with a pencil, or put painter’s tape along the line if you want extra visibility. If you’re drilling, mark each screw hole through the kick plate onto the door. This gives you a clear guide for where to put the hardware later.
If your storm door has an existing sweep (the rubber or vinyl strip at the bottom), make sure your kick plate fits without interfering. Sometimes you’ll need to adjust the sweep or pick a slightly shorter kick plate to avoid problems.
Prepping the Door and the Kick Plate
You might be eager to jump straight to installation, but prepping both surfaces is key for a smooth, long-lasting result. Start by cleaning the bottom of your storm door thoroughly. Get rid of any dirt, grease, or old adhesive from previous hardware. A household cleaner will do—just ensure it’s dry before you continue.
If your kick plate is new, remove any protective plastic film on its face so you don’t have to struggle with tiny pieces left after installation. Check the plate’s edges, too—sometimes universal models have rough corners. You can smooth them out gently with fine sandpaper to prevent catching on clothes or skin.
For steel or aluminum storm doors, use a center punch (or even a sturdy nail) to make a tiny dimple at each screw mark. This keeps your drill bit from wandering and helps create clean, accurate holes. Take your time—the prep work here makes the actual install much easier.
How To Install the Kick Plate (Step-by-Step)
Alright, now you’re ready to actually install the kick plate on your existing storm door. Let’s break it down, step by step:
- Position and Hold: Line up your kick plate with the pencil or tape marks you made earlier. Hold it firmly against the outside of the door.
- Drill Pilot Holes: Using a metal drill bit (for steel or aluminum doors), drill small pilot holes at each marked spot. Don’t push too hard—let the drill do the work. For wood-core doors, a standard drill bit is fine.
- Attach the Kick Plate: Place the kick plate in position and secure it with the screws provided, tightening each screw just until it’s snug. Don’t overtighten; this can bend the plate or strip the screw holes.
- Check for Level: Before final tightening, double-check the top edge with your level. Make adjustments if needed, then finish tightening the screws evenly.
- Finishing Touches: Wipe off any fingerprints, and step back to admire your work. If you’re using adhesive strips instead of screws, follow the manufacturer’s instructions, pressing firmly for a smooth bond.
If you ever need to remove or replace your storm door kick plate, these same steps work in reverse. Don’t be afraid to swap it out if you want to update the look down the road.
Troubleshooting Common Problems
Even with a straightforward project like this, small issues can pop up. Maybe the screw won’t bite, or your plate won’t sit flush against the door. Here’s how to handle a few common problems:
- Plate won’t lie flat: Double-check for dirt or protruding edges on the door. Sometimes, an old bump or dent can make the kick plate rock slightly. Tap it flat with a rubber mallet, or sand down rough spots before installing.
- Screws won’t tighten: If your storm door is hollow or the material feels thin, you might need shorter screws or to add a dab of strong adhesive behind the kick plate. Don’t force a screw that spins endlessly—that just makes a bigger hole.
- Alignment issues: Loosen all screws a bit, jiggle the plate until it’s aligned, and then tighten each screw gradually, moving from the center outward. This prevents twists or bows.
- Interference with door sweep: If the bottom gasket doesn’t close smoothly with the kick plate installed, try trimming the sweep (just a tiny bit), or consider a slightly shorter kick plate for your next upgrade.
Here’s an insight from my own experience: Take your time at every step. Rushing usually leads to crooked plates or stripped screws, and nobody wants to redo a simple project twice.
Comparing Screw-On vs. Adhesive Kick Plates
When you’re picking out a kick plate for your storm door, you’ll notice two main types: screw-on and adhesive. Both have their pros and cons, and what works best often depends on your door type and your comfort with tools.
Screw-on kick plates are the tried-and-true classic. They’re more secure and less likely to come loose over years of use. If your storm door is metal or you live somewhere with strong winds, a screw-on plate is the safest bet. It’s also better for heavy traffic areas, active kids, or big dogs.
Adhesive kick plates use super-sticky tape or strips and are much easier to install. If you rent and don’t want to leave holes, or just dread the idea of using a drill, adhesive is the way to go. That said, extreme heat or cold can sometimes weaken the bond over time, so check manufacturer notes about weather resistance.
You might even find a “universal” kick plate that offers both options, letting you decide after you get it home. Here’s my take: If you can, use screws. It’s a one-time effort with long-term peace of mind. But adhesive is a legit option for a quick, no-mess install (just be picky about surface prep and pressure).
Maintaining Your Kick Plate Over Time
You’d think a metal strip wouldn’t need much care. But like anything exposed to weather, grime, and shoes, your storm door kick plate will look best if you give it a little attention.
Every month or two, wipe the kick plate down with a mild soap and water mix—no harsh chemicals or abrasive pads, especially if you want to keep a gloss or brushed finish looking sharp. For brass or decorative finishes, a gentle metal polish can really make it pop. If you spot any loose screws or peeling adhesive, tighten or press them back into place.
If you ever need to replace a damaged plate, just repeat your original installation steps. Kick plates are built to take a beating, but upgrading to a higher quality or more stylish one is a quick DIY win.
Small acts of maintenance like this can make your storm door look newer for years and protect the value of your home. Think of it as a mini-insurance policy for your entryway.
The Bottom Line: Is a Kick Plate Worth It?
After all this, you might still be thinking: is it really worth the effort? For most homeowners, adding a kick plate to their existing storm door is one of those sneaky-smart upgrades. It’s inexpensive, fast, and makes a real difference, especially if you’re tired of cleaning up scuffs or explaining away dings when company comes over.
Once you’ve installed your kick plate, you’ll instantly see how it guards the most vulnerable part of your door and keeps your entryway looking sharp. Plus, it’s oddly satisfying to finish a project that’s both functional and a little bit stylish. Whether you use screws, adhesive strips, or a universal kit, the steps are simple enough for a beginner—no need to call in a pro or overthink it.
So if you’re ready to give your storm door a practical upgrade, don’t hesitate. Gather your tools, pick a kick plate that matches your style, and get started. Your door (and your future self) will thank you for the extra layer of protection.