When choosing a gate latch, consider factors like the design and functionality. You can find options from various brands, like the National Hardware Gate Latch, known for its durability and ease of use. This guide will walk you through the entire process, making sure you feel confident every step of the way.
Gather Your Tools and Materials
Before diving into the installation, it’s essential to gather all your tools and materials. You won’t want to start only to realize you’re missing something crucial. Here’s a simple list:
- Gate latch kit (including screws)
- Drill with drill bits
- Screwdriver
- Measuring tape
- Pencil or marker
- Level
- Safety goggles
Having everything ready will not only save you time but also keep the process smooth. You might be wondering why certain tools are necessary. For example, the drill helps make precise holes, and the level ensures that your latch is straight. A little preparation goes a long way!
Choose the Right Location for Your Latch
Now that you have your tools, it’s time to decide where the gate latch will go. Placement matters! Typically, the latch should be positioned so that it’s easy to reach but not too high or too low. Generally, a height of about 48 to 54 inches from the floor is standard for most adults.
Use your measuring tape to find the ideal spot on the inside of your archway door. Mark this location with a pencil. This is where the latch will be mounted. Keep in mind that depending on your door’s design, you might also want to consider the aesthetics. Does your latch complement the style of your home? Visual appeal is just as vital as functionality.
Mark and Drill Holes for the Latch
Once you’re happy with the placement, it’s time to mark the holes for drilling. Your gate latch will typically come with a template that shows where to drill the holes. If there’s no template, use the latch itself to outline where the holes should go.
Here’s how to proceed:
1. Hold the latch against the door and align it with your pencil marks.
2. Use a level to make sure it’s straight.
3. Mark the screw holes with a pencil.
Next, grab your drill. Put on those safety goggles, and carefully create holes where you’ve marked. It’s important to choose a drill bit that matches the size of the screws included in your latch kit. If you’re unsure, a quick check of the kit will help you choose the right one.
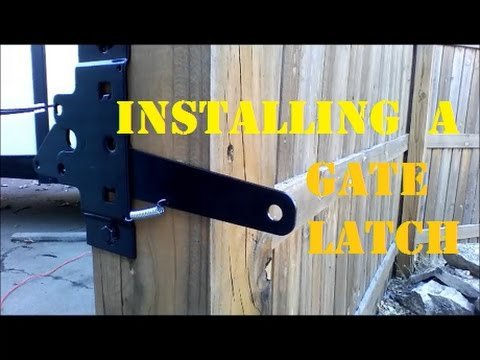
Attach the Gate Latch to the Door
With the holes drilled, it’s time to attach the gate latch to the door. Align the latch over the holes you just made, making sure it’s level. Insert the screws through the holes in the latch and into the drilled holes.
As you tighten the screws, be careful not to overtighten. This can crack the wood or damage the latch itself. Just tighten until it’s secure; it doesn’t need to be a wrestling match. If your latch has multiple components (like a keeper), make sure to install those as well, following the same steps.
Testing Your New Latch
Now, it’s time for the fun part: testing your new latch! Close the door and engage the latch. Does it hold the door securely? You want to ensure that it opens and closes smoothly. If it’s sticking or doesn’t align properly, it may need some adjustments.
Take a moment to make small tweaks to ensure everything fits just right. If there are any issues, don’t worry! Sometimes, all it takes is a little repositioning or loosening a screw to get it right.
Maintenance Tips for Long-Lasting Use
Once your gate latch is installed, you probably want it to last for a long time. Here are some easy maintenance tips to keep it looking and functioning well:
– Regular checks: Make it a habit to check the latch every few months. Tighten any loose screws and ensure that it still operates smoothly.
– Clean it up: Dust and dirt can build up, affecting performance. A simple wipe-down with a damp cloth will keep it clean.
– Lubricate when necessary: If the latch starts to feel stiff, a little lubrication can help. Use a silicone spray or a light oil, but be cautious not to overdo it.
By following these steps, you can enjoy long-lasting security and style in your archway door.
Enjoy Your New Gate Latch
Installing a gate latch on your archway door doesn’t have to be a daunting task. In just a few steps, you’ve created a more private space in your home. This small upgrade can make a big difference, adding charm and functionality.
Whenever you start a DIY project, remember to take your time and enjoy the process. Each step brings you closer to a finished product you can be proud of. So grab your tools, embrace the journey, and enjoy your newly installed gate latch!