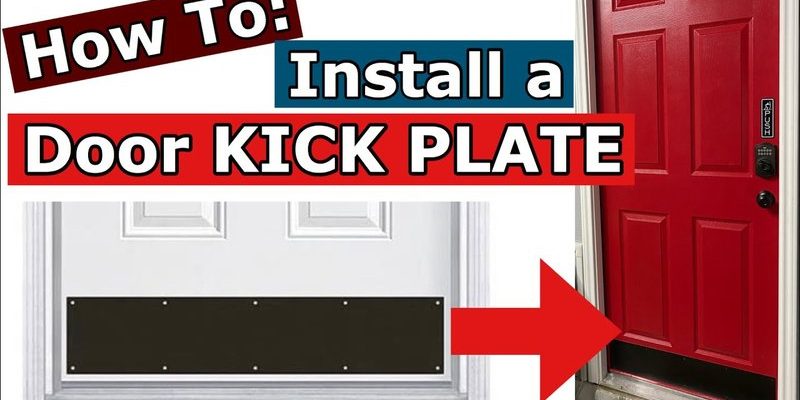
That’s where a full-height kick plate comes in. If you’ve seen those strips of metal or plastic on the bottom of doors—usually in schools, hospitals, or restaurants—you’ve seen a version of a kick plate. But for homes, especially those with children on the move, a *full-height* kick plate offers a wall-to-wall protective shield. These longer kick plates cover the entire height of the lower door, guarding both the wood and the wandering hands or feet. Brands like Rockwood, Don-Jo, and Hager make reliable options for most standard doors, and there are even child-specific models designed for extra coverage and softer impact.
Let me explain how you can install a full-height kick plate to make your home safer for the smallest members of your family. It’s easier than you might think, and honestly, you don’t need pro-level skills—just a bit of patience, a free afternoon, and the right know-how.
Why Install a Full-Height Kick Plate for Child Safety?
You might be wondering, “Isn’t my door fine as it is?” Here’s the thing—once you start paying attention to how often kids bash, kick, and scrape along doors as they play, the need for protection becomes crystal clear. A standard kick plate only shields the lowest 8 to 10 inches of a door. A *full-height* version covers almost the entire lower half (or more), acting like armor.
The big deal is safety and durability. Kids don’t always watch where they’re going—ever noticed how toys, shoes, and even ride-on cars ram into door bottoms? Instead of repainting or repairing, a kick plate takes the brunt of the abuse. Some models come padded or made with no-sharp-edge designs, making them safer for little fingers and knees.
But it’s not just about the door; it’s about your child. A full-height kick plate can prevent splinters, pinched fingers, and those weird little injuries no one sees coming. It gives you that extra bit of protection, especially on doors leading to garages, basements, or outdoors—places where accidents are more likely.
Choosing the Right Kick Plate for Your Home
Not all kick plates are created equal, so picking the best one matters. Here’s my advice: start by measuring the door where you want to install it. *Full-height* models can run from 24 inches up to the full width and height of your lower door panel. Some are metal (great for durability), while others are plastic or vinyl for a softer touch—especially useful in playrooms or nurseries.
Look for brands like Don-Jo, Rockwood, and Hager if you want something sturdy. If you care about color and matching your home’s style, go for powder-coated finishes or even custom-painted options. There are also child-friendly kick plates with rounded corners and soft edges—those are perfect if you’re worried about bumps or scrapes.
Before hitting “buy,” double-check:
- The height and width (make sure it covers the problem area)
- The material (metal for strength, plastic for softness)
- The mounting style (screw-on is more secure, adhesive is quicker but not as durable)
- Any extra safety features (smooth edges, padding, etc.)
If you’re pairing your kick plate with other childproofing tools like door knob covers or safety gates, make sure everything is compatible. The goal is seamless protection—not extra headache.
Tools and Materials You’ll Need
Installing a full-height kick plate isn’t rocket science, but it does need a few standard tools. Here’s what most folks use:
- Kick plate kit (with screws or adhesive included)
- Measuring tape (accuracy saves headaches)
- Pencil (for marking position)
- Drill and appropriate bits (for screw-on plates)
- Screwdriver (manual or electric)
- Level (so your kick plate doesn’t look crooked!)
- Cleaning supplies (to prep the door surface)
Some kits, especially adhesive models, might throw in a cleaning wipe or sticky pads. Don’t skip cleaning the door first—dust and grease can ruin the bond. If your kick plate is metal, consider gloves to avoid fingerprints or sharp edges.
Think of it like prepping for a minor home project: measure, mark, and check twice before you let the drill fly. If you hit a snag (say, a hard-to-drill surface), don’t force it—there’s usually a workaround or a different bit you can use.
How to Install a Full-Height Kick Plate: Step-by-Step
Ready to get hands-on? Here’s how to code, sync, and pair your kick plate to your door—okay, not literally, but if you follow these steps, it’ll be smooth sailing.
Step 1: Measure and Mark
Use the measuring tape to find the exact spot on your door where the kick plate should go. Most people center it vertically along the bottom half of the door, but you can adjust for higher coverage if your kids are particularly ambitious climbers. Mark the outline lightly with a pencil.
Step 2: Prep the Door
Wipe down the area where the kick plate will go. Any dust, grease, or mystery grime can mess up the installation, especially if you’re using adhesive. Let the door dry completely before moving ahead.
Step 3: Position the Plate
Line up the plate with your pencil marks. Grab your level and double-check—nothing looks goofier than a crooked plate. If you’re happy with the spot, move on.
Step 4: Attach the Kick Plate
- For screw-on kick plates: Hold the plate in place and use a drill to drive in each screw. Go slow, and don’t overtighten—just snug enough to hold securely.
- For adhesive kick plates: Peel off the backing, press the plate firmly against the door, and hold for about 60 seconds to set the bond. Watch out for air bubbles—smooth them out as you go.
Step 5: Final Checks
Give the kick plate a gentle tug. Is it set firmly? Great. Wipe away any pencil marks or fingerprints, and you’re all done.
Tips for a Professional-Looking Installation
Honestly, fitting a kick plate isn’t hard once you get the hang of it, but there are a few tricks to make it look less “DIY” and more “pro.”
First, always use a level—even if your eye says it’s straight, trust the tool. If you’re working with screws, pre-drill tiny pilot holes so the wood doesn’t splinter. This is especially important if you have a painted or veneered door that could chip under pressure.
If you’re using adhesive, press from the center outward, smoothing as you go, just like putting a screen protector on your phone. Don’t rush—adhesive takes time to grab, and patience here pays off with no peeling edges later.
For painted doors, touch up any nicks or exposed spots before adding a kick plate. It’ll protect the door and give you a cleaner look.
And here’s something most people forget: if your door is hollow-core or lightweight, go gentle with screws. Heavy-duty plates are best saved for solid doors, or use extra-strong adhesive instead.
Troubleshooting Common Installation Problems
Even the best kick plate kits can throw you a curveball now and then. Maybe the screws won’t bite, or the adhesive just won’t stick. Don’t panic—most issues have a fix.
If screws keep spinning or won’t tighten, you might be up against a hollow-core door. You can use longer screws (with care), or pick up wall anchors for a sturdier hold. For adhesive that just won’t grab, check if the surface is truly clean—sometimes, “clean” means oil-free, not just dust-free. Rubbing alcohol can help here.
Plates sometimes arrive slightly bent or warped, especially after shipping. If it’s metal and has a minor bend, gently flatten it on a hard surface. If it’s badly damaged, contact the seller—it pays to inspect before attaching.
And if the plate sits too high or low, don’t force it off and risk tearing paint. Most adhesive plates can be gently coaxed off with a hairdryer on low heat, then repositioned.
Comparing Full-Height Kick Plates with Other Door Protection Options
Let’s talk about how full-height kick plates stack up against other childproofing options. Door stoppers, corner covers, or even foam bumpers are good for specific hazards. But they don’t protect the actual door surface—or your walls—like a full-height kick plate can.
- Standard kick plates are smaller, cheaper, and fine for minimal scuffing, but they leave a lot of real estate vulnerable to kids’ kicks and toys.
- Adhesive guards are quick and easy, but may struggle over time on high-traffic doors or in humid environments.
- Foam bumpers help cushion impact, but can be unsightly and don’t last as long as metal or rigid plastic plates.
A full-height kick plate offers *continuous protection*—no more repainting every spring. And if you pick the right finish, it actually blends in or adds a bit of style to your door, rather than looking like a temporary babyproofing hack.
Maintenance and Safety Checks After Installation
Once your kick plate is up, don’t just forget about it. Every now and then, do a quick check. For screw-mounted plates, make sure nothing’s wiggling loose. Tighten up as needed—especially after a season of heavy use or wild indoor games.
Adhesive plates might peel at the corners over time, especially if your kids like to “test” things with their fingers. Just press them back or swap out for a fresh adhesive strip. If you notice rust, scratches, or denting, a quick touch-up with matching paint can keep things looking tidy.
It’s also smart to wipe down the plate as part of your regular cleaning routine. Metal plates, in particular, can collect sticky fingerprints or boot scuffs. A damp cloth or gentle cleaner will do the trick (always check the manufacturer’s cleaning code for best results).
And remember—safety isn’t just about hardware. Remind your kids (gently) why the plate is there, and teach them to respect doors. Sometimes a quick reset of family rules is more powerful than any kick plate.
Wrapping Up: Small Upgrade, Big Safety Win
When it comes to childproofing, every small upgrade counts. Installing a full-height kick plate is a simple, affordable way to prevent everyday scrapes, protect your doors, and give yourself peace of mind. The process is straightforward, the tools are basic, and the reward is a home that’s just a bit more resilient against the chaos of family life.
Whether you pick a basic metal model or something softer and kid-friendly, you’ll be glad you took the time. Sometimes, the best safety fixes are the ones you hardly notice—until you realize how many accidents you’ve avoided.