Now, you might be wondering why a drive-in latch instead of a standard one. These latches are designed for easy installation and typically don’t require the additional hole found in traditional latches. Plus, they offer a sleek, modern look that complements many interior styles. So, if you’re ready to enhance the functionality and aesthetic of your doors, let’s dive into the world of drive-in latches!
Understanding Drive-In Latches
Drive-in latches are a popular choice for interior doors because of their simplicity and effectiveness. Unlike other latches that require a separate hole to secure the latch bolt, a drive-in latch fits snugly into a hole drilled into the door. This design makes installation straightforward, even if you’re a beginner.
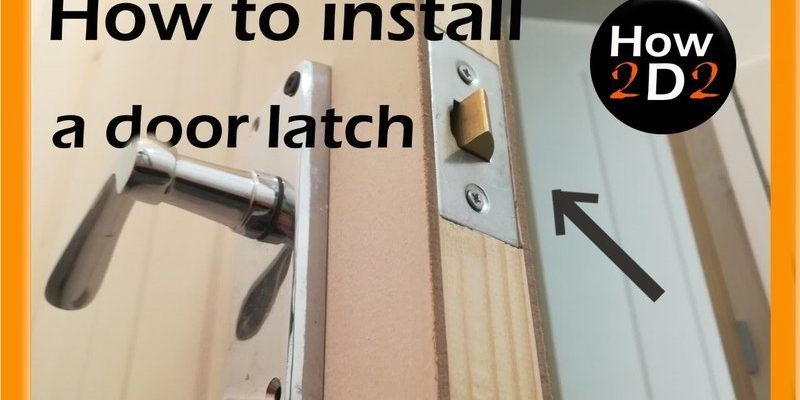
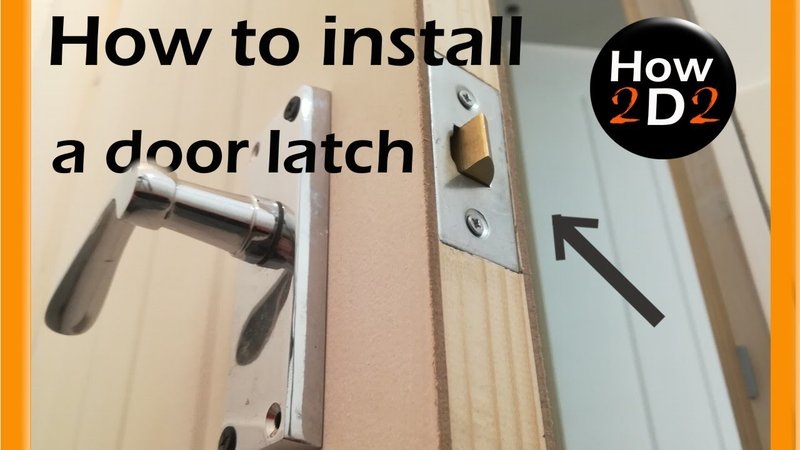
Here’s what you can expect: a typical drive-in latch consists of a cylindrical latch body and a latch bolt that retracts when you turn the knob. When you push the door closed, the latch bolt automatically slides into place, securing the door. If you want to visualize it, think of a well-oiled machine—everything works together to keep your door secure and easy to open.
Installing this type of latch isn’t just about function; it’s also about style. The clean lines of a drive-in latch can enhance the look of your interior, making it an attractive choice for modern homes. With a little effort, you’ll have a door that not only works well but looks great too.
Tools You’ll Need
Before you get to the actual installation, it’s essential to gather all the tools and materials you’ll need. Trust me, there’s nothing worse than starting a project only to realize you’re missing a critical tool. Here’s a quick list of what you’ll need:
- Drill – A power drill with drill bits is crucial for making the hole for your latch.
- Screwdriver – A Phillips or flat-head screwdriver, depending on your latch’s design.
- Measuring Tape – Accurate measurements ensure a snug fit.
- Chisel – If you need to adjust the latch plate, a chisel will be helpful.
- Level – To make sure everything is aligned correctly.
Gather these tools before you start, and you’ll have a smoother installation process. Having everything at your fingertips allows you to focus on the task without interruptions.
Measuring Your Door
Getting measurements right is crucial for a successful installation. You want to ensure the latch fits perfectly within the door. Here’s how to measure:
1. Measure the diameter of the latch: Most drive-in latches require a hole that’s about 1 inch in diameter.
2. Determine the backset: This is the distance from the edge of the door to the center of the hole. Typically, this is either 2 3⁄8 inches or 2 3⁄4 inches. It’s essential for fitting the latch correctly.
3. Check the height: Generally, a good height for your latch is about 36 inches from the floor, but this may vary based on your preferences.
Be meticulous with your measurements. Remember, “measure twice, cut once” applies here. Taking your time now will save you headaches later.
Preparing the Door
Once your measurements are set, it’s time to prepare your door for the latch installation. Start by marking the spots for the holes based on your measurements. A pencil works great for this—just a light mark will do.
Next, use your drill to create the hole for the latch. Drill straight and steady; you don’t want to end up with a crooked hole! If your latch calls for a hole that’s 1 inch in diameter, make sure your drill bit matches this size. After drilling, you might need to chisel out some areas for the latch plate, especially if the latch is a bit bulky.
Afterward, gently clean up any debris inside the hole. This ensures a clean fit and helps the latch function better in the long run.
Installing the Drive-In Latch
Now comes the fun part—installing the latch! Take the latch body and insert it into the hole you’ve just drilled. It should fit snugly without too much force. If it feels loose, you might need to check your measurements again or consider using a slightly larger ring around the latch.
Once the latch is in place, secure it using the screws that come with it. Don’t rush through this step; it’s vital to ensure the latch is firmly secured for the best operation. Use your screwdriver to tighten the screws, but avoid overtightening, as this can damage the latch.
After securing the latch, pop the latch bolt into place. Depending on your model, this might involve turning it or sliding it vertically. Test the mechanism a few times to make sure it operates smoothly.
Testing Your Installation
After installation, it’s time to give your new drive-in latch a test run. Simply close your door and see how the latch engages. It should slide smoothly into place and hold the door securely without any resistance. If it doesn’t, double-check the alignment and screws.
Consider inviting a friend or family member to help you. Sometimes, having a second set of eyes can help catch something you might have missed. If the latch isn’t functioning properly, take a step back. Identify any issues with alignment or tightness on the screws.
If everything checks out and the latch works perfectly—great job! You’ve installed a drive-in latch successfully.
Common Issues and Troubleshooting
Like any DIY project, sometimes things don’t go as planned. Here are a few common issues you might run into and how to troubleshoot them:
– Latch doesn’t catch: If the latch bolt isn’t catching properly, check the alignment. It may need to be adjusted slightly.
– Difficulty turning the knob: This could be due to the screws being too tight or the latch not fitting snugly. Loosen the screws slightly and adjust if necessary.
– Gap between door and frame: If you notice a gap, ensure the latch is installed at the right depth. You may need to chisel out more space to ensure a perfect fit.
Don’t get discouraged. Each problem comes with a solution; just take it step by step!
Final Thoughts
Installing a drive-in latch for your interior door knobs can enhance both functionality and style in your home. While it may seem like a big task at first, breaking it down into manageable steps makes it all the more doable. Remember, taking your time with measurements, preparations, and installation is key.
Now that you’ve got the hang of it, you can tackle other DIY projects with confidence. Not only will you save some cash, but you’ll also boost the overall feel of your space. So grab your tools, and happy installing! You’ve got this!