Here’s the thing: outswing doors are a little different than your standard inswing models. Instead of opening into your home, they swing outward—which means the typical inside-mounted sweep isn’t going to cut it. Brands like M-D Building Products and Frost King make sweeps specifically designed for outswing doors, but the steps to install them are pretty universal. Whether you’re new to DIY or just haven’t tackled this project before, I’ll walk you through everything, from picking the right sweep to troubleshooting tricky spots. No jargon, just real talk.
Why A Door Bottom Sweep Matters On Outswing Exterior Doors
Outswing exterior doors look great and save space inside, but that outward motion means the weather stripping and sweep need to be on the outside, exposed to more of the elements. Without a good door bottom sweep, you’re practically inviting wind, water, dust, and even bugs to sneak in underneath. Over time, this little gap can add up to higher energy bills and plenty of extra sweeping and mopping.
The sweep acts like a mini-shield, hugging the threshold and sealing off those annoying little spaces. You might be thinking, “Is a sweep really that different from regular weatherstripping?” Here’s the difference: weatherstripping lines the sides and top of the door, while a sweep specifically targets the bottom edge. For outswing doors, the sweep needs to be sturdy—able to handle rain, wind, and people accidentally kicking it as they head out.
What’s wild is how many people don’t realize how much heat (or cold) escapes through that gap. If you’ve noticed your floors near the door are always colder or you can hear every sound from outside, that’s probably a sign your old sweep is overdue for replacement—or maybe missing altogether.
Picking The Right Door Bottom Sweep For An Outswing Door
Not all sweeps are created equal, and with outswing exterior doors, it’s even more important to get the right fit. There are a few types: some sweep models *slide into a track* on the bottom of your door, while others *screw directly onto the face* of the door. Most outswing-specific sweeps wrap down and back, creating a tight seal when the door is closed.
- U-shaped sweeps slip over the bottom of the door and fasten with screws on each side. They’re easy to install and offer good protection from rain and draft.
- L-shaped “bracket” sweeps attach to the outside face of the door and have a flexible rubber or vinyl strip that presses down on the threshold.
- Aluminum-and-vinyl combo sweeps are sturdy and commonly used for outswing doors in harsh weather areas.
You’ll want to measure your door’s width and thickness before heading to the store. Also, pay attention to the finish—brushed aluminum, bronze, and white are the most common. The sweep should cover the full width of your door and fit snugly without sticking out awkwardly. If you have a branded door (like Therma-Tru or Pella), you might find a sweep made specifically for that make. Otherwise, a universal door bottom sweep for outswing doors is usually fine as long as you match up the measurements.
Tools And Materials You’ll Need
Don’t worry, this isn’t one of those projects that needs a whole toolbox. Most folks can install a door bottom sweep for an outswing exterior door with just the basics. Here’s what you’ll want to gather:
- Measuring tape—to check the width of your door and the sweep
- Drill or screwdriver—most sweeps attach with a few screws
- Sharp utility knife or hacksaw—for trimming the sweep to fit, if needed
- Pencil or marker—for marking screw holes
- Replacement sweep—outswing-specific, in the right size and finish
- Safety glasses and work gloves—always a good idea when working with metal or tools
A few brands even include screws and instructions right in the package (M-D Building Products usually does), but double-check before starting, so you’re not stuck mid-project. Sometimes you’ll need to remove the old sweep first. If it’s glued on, a putty knife or flathead screwdriver can help you pry it loose.
Step-By-Step: How To Install A Door Bottom Sweep On An Outswing Door
Pro insight: Go slow and dry-fit everything before drilling. The sweep should barely brush the threshold when the door is closed, not drag or jam.
Here’s a straightforward way to install your new sweep:
1. Remove The Old Sweep (If There Is One)
If your outswing door already has a worn or damaged sweep, use a screwdriver or drill to take out the screws. For sweeps that are glued or stuck, slide a putty knife underneath and gently pry until it pops loose. Watch for any leftover adhesive or staples and clean up the door edge—it’ll make installing the new sweep easier.
2. Measure And Mark For The New Sweep
Hold the new sweep up against the bottom of your door. Make sure it’s centered and covers the width evenly. Mark the screw holes with a pencil, using the sweep as a template. If it’s too long, measure and mark where you need to cut. Most sweeps can be trimmed with a hacksaw (for metal) or a sharp utility knife (for vinyl or rubber).
3. Cut The Sweep To Fit
If you need to trim, lay the sweep on a solid surface and cut carefully, making sure the end is straight. Wear gloves to avoid scrapes—some metal sweeps have sharp edges. Always double-check the fit before moving to the next step.
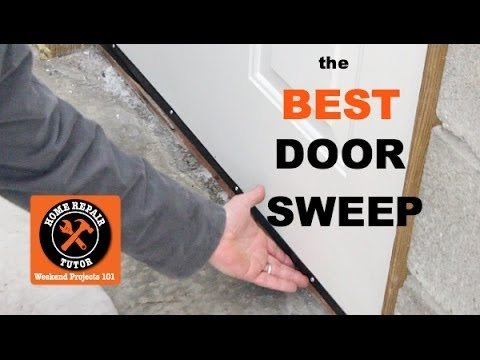
4. Attach The Sweep To The Door
Line up the sweep with your pencil marks. Start by drilling a small pilot hole for each screw (especially if you have a wooden door). Then, screw the sweep in place, working from one end to the other to keep it level. Don’t over-tighten the screws—just snug enough to hold the sweep firmly, but not enough to warp the metal or vinyl.
5. Test And Tweak
Shut the door slowly and watch how the sweep meets the threshold. It should make contact all the way across, with no big gaps—just a gentle seal. If you feel too much resistance or hear scraping, loosen the screws slightly and reposition. Sometimes, just a tiny height adjustment solves the problem.
Troubleshooting Common Issues
It’s normal to hit a few snags when installing a door bottom sweep for an outswing exterior door. Here are a few classic headaches:
- Sweep drags on the threshold—Try loosening the fasteners and raising the sweep just a bit. Some models have slotted holes so you can nudge it up or down easily.
- Too much daylight showing—Double-check your sweep’s fit. If there’s still a gap, you might need a deeper or thicker vinyl insert.
- Screw holes don’t line up—Especially common with replacement sweeps on older doors. Drill new pilot holes, but avoid drilling too close to the edge of the door to prevent splitting.
- Can’t find a universal fit—Sometimes, especially with older or very custom doors, you’ll need to look up the door brand and model for a manufacturer-specific sweep. Many companies (like Pella, Andersen, or Marvin) sell direct replacements if the universal ones don’t quite work.
If you ever need to remove the sweep for repairs or cleaning, it’s usually just unscrewing it and reversing your steps. Most new sweeps last for years, but keep an eye out for torn vinyl or bent metal—those are signs it’s time for a new one again.
Comparing Outswing Door Sweeps: Universal Vs. Brand Specific
You might be wondering: “Should I look for a universal door bottom sweep for my outswing exterior door, or do I need the exact brand part?” Honestly, both can work, but it depends on your door and how much hassle you want to deal with.
Universal sweeps fit most standard doors, especially if your door is a common width (like 32″, 34″, or 36″). They’re usually adjustable, and you can trim them to length. Stores like Home Depot and Lowe’s keep these in stock, and they’re pretty affordable. They’re the best pick if you want something fast and simple.
Brand-specific sweeps are made for doors from manufacturers like Masonite, Therma-Tru, or Pella. These are ideal if you have a newer door and want the original fit and finish. They’re a little pricier, and you might have to order them directly from the company or a specialty supplier, but sometimes the universal sweeps just won’t fit quite right, especially if your door has a unique threshold or unusual shape.
If you’re not sure, check the model number on your door (usually on the hinge side or a sticker on the edge) and see if you can find a matching sweep online. Otherwise, measure carefully and try a universal one first—you can always adjust or swap it out later.
Extra Tips For A Neat, Long-Lasting Installation
Installing a door bottom sweep isn’t rocket science, but taking a little extra care goes a long way. Here’s what I’ve learned after doing a few of these:
- Check the threshold before you start. If it’s damaged or warped, fix or replace it first. Even the best sweep can’t make up for a bumpy threshold.
- Test with the door closed during installation, not just open. You want that gentle seal—but not so tight that the door is hard to shut.
- Replace screws if they’re rusty or stripped out from the old sweep. New hardware means your sweep will stay put much longer.
- Keep extra vinyl inserts handy. Some sweeps have replaceable vinyl strips (like the ones from Frost King or M-D Building Products), so you can swap them out without replacing the entire sweep down the road.
- Weather matters. Try to install the sweep on a dry day, so the adhesive (if used) sets up cleanly and you aren’t fighting rain or mud.
If you have pets, consider a sweep with extra-durable rubber. Dogs love to scratch at doors, and the heavier-duty models hold up better against paws.
How To Maintain And Replace Your Door Bottom Sweep
Once your sweep is in place, keeping it in good shape is pretty simple. Every so often, check for wear or cracks, especially after big rainstorms or if the door gets a lot of use. Debris can build up along the sweep, so brush it off with a broom or vacuum regularly.
If you start noticing drafts, more noise, or water getting by, it’s time to inspect the sweep. Look for tears in the vinyl, loose screws, or bending in the metal. Most sweeps are meant to be replaced every 2–5 years, depending on use and climate. Honestly, it’s a small job, but it makes a big difference for your home’s comfort and energy efficiency.
If you’re troubleshooting stubborn gaps or repeated leaks, double-check the threshold and door alignment. Sometimes, house settling or changes in humidity can throw things off. Adjust or re-install the sweep if needed—but if you’re still stumped, it might be worth calling in a pro to check for bigger structural issues.
Wrapping Up: A Small Fix With Big Benefits
Installing a door bottom sweep on an outswing exterior door is one of those projects that feels almost too simple compared to the benefits you get. You’re sealing out drafts, cutting down on dust, and maybe even saving a bit on your heating and cooling bills. All it takes is a few tools, a well-chosen sweep, and a bit of careful work.
Don’t let the idea of DIY throw you—most folks can handle this task in under an hour, and the comfort pay-off is immediate. If you follow these steps and take your time, you’ll end up with a neat, snug fit that keeps your home cozy, quiet, and protected from whatever the weather throws at your door.