Here’s the thing: installing a deadbolt reinforcer plate might sound like a step best left to pros, but it’s completely doable as a DIY project. Whether you’ve noticed your door feels a bit wobbly, you’ve had an attempted break-in, or you just want peace of mind—this little upgrade works wonders. Most brands, like Defender Security or Prime-Line, make universal plates that fit almost any standard exterior door. You won’t need tons of tools or advanced skills—just a bit of patience and a willingness to learn.
Why Add a Deadbolt Reinforcer Plate?
You might be wondering, “Do I really need this extra hardware?” That’s a fair question. Truth is, many doors—even solid ones—have a structural weak spot right where the lock sits. Burglars know that. With a well-aimed kick, the wood around your deadbolt can splinter, letting them in with scary speed. A deadbolt reinforcer plate wraps around the damaged-prone area, spreading any force out and making it much harder to break through.
It’s not just about brute strength. These plates also conceal existing cracks or previous repairs, tightening up doors that have seen better days. If you’ve ever come home to find your lock feels loose, or you can see daylight around your deadbolt, that’s a major red flag. Honestly, even if your door feels sturdy, a little extra security never hurts. It’s a small investment—usually less than $20—that can help keep your family, pets, and valuables safe.
Some people compare these plates to putting a case on your phone. The phone might work fine without it, but why risk it? Just like dropping your phone without a case, you don’t want to test your luck with a vulnerable lock. Plus, with so many brands making easy-to-install versions, there’s really no excuse not to beef up your door’s security.
What You’ll Need to Install a Deadbolt Reinforcer Plate
Before you dive into the actual installation, let’s get organized. Having all your tools and materials ready makes this job much smoother—trust me, you don’t want to have half your door taken apart only to realize you’re missing a screwdriver.
- Deadbolt reinforcer plate (make sure it matches your door width and deadbolt bore size)
- Flathead and Phillips screwdrivers
- Electric drill (optional, but handy for starting screws)
- Measuring tape
- Pencil or marker for marking holes
- Chisel (if your plate requires deepening the mortise)
- Hammer (for light adjustments)
Check your plate’s package for any specific instructions or included hardware. Some kits even come with longer, more secure screws—don’t skimp on those. If you’re replacing a damaged lock, make sure you have the right code or model for your deadbolt; universal plates fit most standard locks, but if you have something unusual, double-check compatibility. Keeping batteries or remote entry systems away from dust and debris during this project is smart, too—no one wants to accidentally reset or pair their smart lock because they dropped something inside the mechanism.
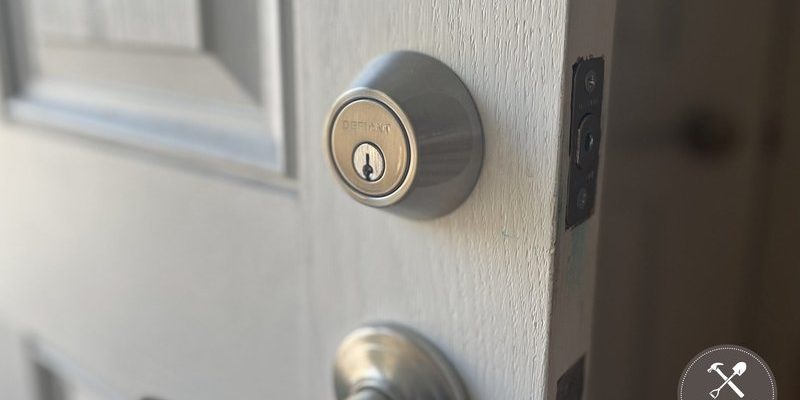
Removing the Old Deadbolt and Preparing the Door
First things first: you’ll need to take out your existing deadbolt lock. This sounds intimidating, but it’s really just a few screws and a bit of patience. Start by opening the door wide so you can work without the latch getting in the way. Locate the two screws on the interior side of the lock, right by the knob or thumb-turn. Use your Phillips screwdriver to remove them.
Once those are out, you should be able to pull the inner and outer parts of the lock straight out of the door. Set them aside somewhere safe. Next, take out the screws holding the bolt mechanism in the edge of the door (the part that slides in and out to lock). Gently wiggle and slide it out. Now, give the entire area around the hole a quick inspection. Look for splintered wood, stripped screw holes, or any debris that could get in the way of your new plate.
If there’s a lot of damage, this is the perfect time to clean things up. You can fill stripped holes with wood filler and sand down rough edges so your reinforcer plate sits flush and secure.
Grab your measuring tape and check the thickness of your door (most exterior doors are 1-3/4 inches, but some are 1-3/8 inches). Make sure your plate fits snugly—too tight can crack the door, too loose and it won’t protect as well. If your plate is a wrap-around style, it might need a small mortise (a shallow groove) so it doesn’t stick out. Here’s where your chisel and hammer come in handy, but go slow. Too much force can split the wood and make things worse.
How To Install the Deadbolt Reinforcer Plate Step-By-Step
Now comes the satisfying part—actually putting your deadbolt reinforcer plate on. Start by sliding the plate over the area where the old deadbolt sat. If it’s a two-piece plate, fit the front and back together so they sandwich the door snugly. You’ll see screw holes line up with the existing bore in your door.
Grab your pencil and mark any new screw holes needed—don’t assume they’ll all match up with your old lock. Set the plate aside and, if necessary, pre-drill tiny pilot holes. This makes driving in new screws much easier and prevents the wood from splitting. If your kit includes longer screws, use those. They’re designed to drive all the way into the door frame, offering much more security than the short ones that just bite into the edge of your door.
With everything lined up, use your screwdriver (or drill, on a low setting) to attach the plate firmly. Don’t over-tighten, but make sure it doesn’t wiggle. If your plate is a wrap-around design, double-check that both sides are flush and that nothing blocks the lock hole.
Finally, reinstall your deadbolt. Slide the bolt mechanism back into the edge of the door, making sure it sits in the reinforced opening. Screw it back in tightly. Then assemble the lock cylinder and thumb-turn as before, tightening those two main screws. Turn the lock a few times to make sure everything lines up. If anything feels stiff, loosen the screws just a hair.
Tips to Get the Best Out of Your Reinforcer Plate
A few details can make or break your installation. First, always use the longest screws included with your kit—preferably 3 inches. Why? Because they reach deep into the door frame, not just the door itself. This adds a whole other layer of security. If your existing screw holes are stripped or loose, fill them with wood glue and toothpicks, let it dry, then re-drill fresh pilot holes.
Here’s another tip: when pairing a deadbolt reinforcer plate with a smart lock or a remote entry system (like the Schlage Encode or August Wi-Fi Smart Lock), double-check that the plate doesn’t interfere with batteries or wiring. It’s rare, but sometimes a universal plate can block certain sensors or cause issues with the reset code if not installed carefully. If you run into sync or troubleshooting problems, consult the smart lock’s manual before removing the plate—it’s usually a quick fix.
After installation, test everything several times. Lock and unlock from both sides, use your key, thumb-turn, or remote. Make sure the bolt slides smoothly and the door closes without resistance. If something feels off, don’t force it; go back and adjust the plate until movement feels natural.
Common Problems and How to Fix Them
Let’s be honest: no DIY project is immune to hiccups, and reinforcing your deadbolt is no exception. Sometimes the plate won’t sit flush, or the lock won’t fit back into the hole. Don’t panic! If you hit a snag, here’s what to check:
- Plate Doesn’t Fit: Double-check your measurements. If it’s too tight, sand the edges of the door slightly until everything fits snugly but not forced. Too loose? Add a layer of thin cardboard or shims until the plate sits firmly.
- Lock Won’t Function: If the deadbolt won’t turn or feels sticky, the plate might be slightly out of alignment. Loosen the screws a bit, reposition, and try again. Often, just a millimeter makes a difference.
- Screw Holes Don’t Line Up: This is common with older doors or non-standard locks. If you can’t reuse existing holes, use the plate as a template to mark and drill new ones. Always pre-drill to avoid cracking the wood.
- Smart Lock Sync Issues: If your lock has a battery or remote sync feature, installing a plate sometimes interrupts wireless signals or power. Remove batteries before working, and after installation, reset and pair your lock as the brand manual describes.
If you end up with stripped screws—or worse, a cracked door—don’t feel defeated. Kits are pretty forgiving, and a bit of wood glue and patience can salvage most minor mistakes. The key is not to rush and to double-check everything as you go.
Choosing the Right Deadbolt Reinforcer Plate
Not all reinforcer plates are made the same. You’ll see universal deadbolt reinforcer plates that claim to fit any door, as well as brand-specific options from names like Defender Security, Prime-Line, and Schlage. Universal plates are usually a safe bet for most pre-hung exterior doors. They come in various finishes—brass, nickel, bronze—so you don’t have to sacrifice style for safety.
If your door has a smart or coded deadbolt, check for compatibility. Some plates are designed with little cutouts or extra clearance for electronic components or batteries, so you won’t accidentally block a reset button or jam the electronics. Brand-specific plates are ideal if you want a perfect match for a certain lock model, but they’re a little pricier.
Price-wise, you’re looking at $10–$25 for a solid, steel plate that’ll last for years. Honestly, it’s one of the most cost-effective security upgrades out there. If you’re comparing alternatives, skip the cheap, thin plates—they’ll crumple under pressure. Always go for a plate at least as thick as your door’s original metal reinforcement.
Alternatives and Extra Steps for Maximum Security
Maybe a deadbolt reinforcer plate isn’t quite enough for you—or you want to go the extra mile. There are other upgrades worth considering:
- Strike Plate Reinforcers: These go on the door frame side, making it much harder for anyone to kick the lock loose. Using extra-long screws here is a must.
- Door Jamb Armor Kits: These are full reinforcement kits for both the lock and hinge sides of the door. They’re a little pricier and trickier to install, but if you want bank-level security, they’re worth a look.
- Smart Locks With Alarms: Some coded or remote entry deadbolts include built-in alarms that sound if someone tries to force the door.
Every add-on helps, but don’t forget about the basics: solid wood or metal doors, strong hinges, and regular checks on all screws and hardware. A reinforcer plate is the quickest “bang for your buck” move, but layering security pays off in the long run. If you’re handy, pairing a plate with a strike reinforcer and smart lock system gives you a truly tough, modern entryway.
Wrapping Up: Peace of Mind in Under an Hour
Tackling the installation of a deadbolt reinforcer plate might feel like a big leap, but it’s a simple project with huge benefits. Giving your front, back, or even garage door this extra layer of steel means burglars have to work a lot harder to get in—and most won’t bother trying. Plus, if you’re using a modern coded or remote lock, you’ll keep all your smart features while adding good old-fashioned strength.
Take your time, measure twice, and don’t be afraid to pause and adjust if something feels off. Honestly, you’ll feel a lot more confident locking up at night knowing your door’s got that extra armor. Small upgrades like this don’t just protect your home—they bring a real sense of safety, and that’s worth every screw and screwdriver turn.