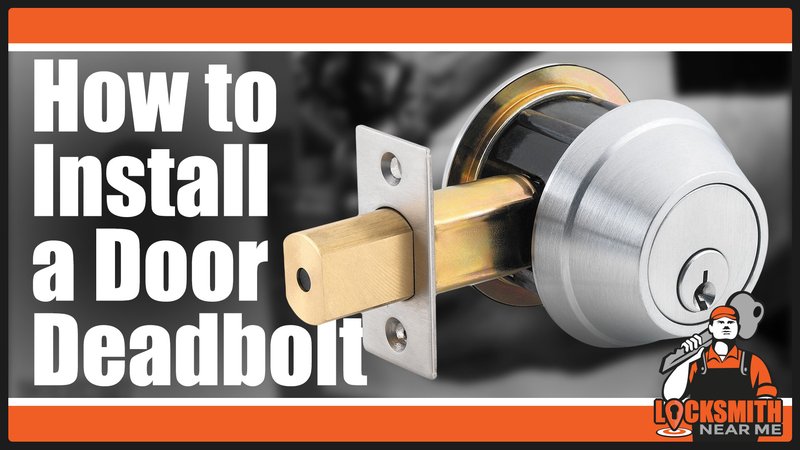
Let’s be real: the last thing you want is to go through the trouble of adding a deadbolt, only to find out your door’s still vulnerable. Outswing doors have hinges on the outside, which can make folks a bit nervous about break-ins. But with the right deadbolt—think brands like Schlage or Kwikset that offer models rated for outswinging setups—you can seriously boost your home’s security. I’ll walk you through the process, step by step, so you end up with a sturdy, professional-looking install that keeps your place—and your peace of mind—locked down.
Why Outswing Doors Need Special Attention For Deadbolts
Outswing doors have a different setup than the more common inswing doors. Instead of opening inward, they swing out toward the person entering. This design can actually be really secure because a forced entry pushes the door tighter against the frame. But here’s the thing—outswing doors also place the hinges on the outside, which can be a weak point if you don’t address it.
A typical deadbolt works just fine on most inswing doors, but for outswing doors, you’ve got to think about more than just the lock. The exposed hinges can (in cheaper setups) be removed by someone determined enough, so adding security pins or non-removable hinge pins is critical. And since you can’t use most regular deadbolts on thin or metal door frames, it helps to choose a model specifically rated for outwards opening doors—Schlage and Kwikset both make good options.
So, before you start drilling, take a quick look at your door’s hinges. If they seem easy to knock out, swap them for security hinges or add hinge bolts. This way, your new deadbolt won’t just look the part—it’ll actually do its job protecting your home.
Tools And Materials You’ll Need For A Deadbolt Install
Let me break it down: installing a deadbolt on an outswing door isn’t rocket science, but having the right tools makes all the difference. Here’s what you’ll want to gather before you start:
- Drill & drill bits: You’ll need these to make holes for the deadbolt and screws.
- Hole saw attachment (usually 2-1/8″ for the lock body): This cuts the main hole in your door.
- 1″ spade bit: This creates the latch hole on the edge of the door.
- Phillips screwdriver: For tightening everything together without stripping screws.
- Chisel: Helps you get a snug fit for the strike plate and latch.
- Tape measure & pencil: For marking your spots accurately.
- Masking tape: Let’s you avoid splintering when you drill.
- The deadbolt itself: Pick one made for outswing doors. Schlage, Yale, and Kwikset have solid, well-reviewed options.
- Optional: Security hinges or hinge bolts if your current hinges are just standard.
It’s easy to want to skip a tool or substitute with what you have on hand, but honestly, this is one of those projects where cutting corners makes the work harder. I always keep my tools within arm’s reach so I’m not running back and forth—trust me, it’ll save you some frustration.
How To Choose The Right Deadbolt For Your Outswing Door
You might be wondering if you can just grab any deadbolt and start drilling. Not quite. Outswing doors have their own quirks, so you want a deadbolt that’s up to the challenge. Here’s what really matters:
- Backset measurement: Most doors use either a 2-3/8″ or 2-3/4″ backset (that’s the distance from the door edge to the center of the hole you’ll drill for the lock). Double-check yours before buying.
- Deadbolt rating: Look for ANSI Grade 1 deadbolts if you want top security. They’re tougher and more resistant to brute force than cheaper options.
- Bore size: Outswing doors (especially metal ones) can have slightly thinner or reinforced edges. Make sure your deadbolt kit fits the thickness of your door—usually 1-3/8″ to 1-3/4″.
- Strike plate design: A reinforced strike plate with extra-long screws is a must. For outswing doors, you can even get special strike plates or latch guards to prevent prying.
I personally like using the Schlage B60N or Kwikset 660 series for outswing doors, but Yale’s commercial models are no slouch either. If you’re working with a metal door, check that your lock comes with all the hardware for metal frames—it makes the install way less of a headache.
Marking And Drilling The Door: Getting It Right The First Time
Here’s the part where you really want to slow down and double-check your measurements. Installing a deadbolt can feel a little intimidating if you’ve never cut into a door before, but with the right steps, you’ll avoid crooked holes and weird fits.
Start by measuring up from the bottom of your door, usually about 6″ to 12″ above the handle. Most folks aim for the 6″ mark—it’s a comfortable reach and far enough from the handle for security. Mark the spot with your pencil right in the center of the door’s thickness. Use the template that comes with your deadbolt for guidance, or line things up by eye if you’re confident.
Next, tape off the area with masking tape to stop the door from splintering when you drill. Go slow with your hole saw—let it do the work, and drill from both sides if possible to keep the wood clean. After the main hole, use your 1″ spade bit to make a hole in the edge for the latch. The key here is keeping everything lined up: if your holes aren’t straight, the deadbolt might stick or not reach the strike plate.
If you’re nervous, grab a spare piece of wood and practice a few holes first. Honestly, the extra ten minutes can save you a lot of stress.
Installing The Deadbolt: Step-By-Step
Alright, once your holes are drilled, it’s time to put everything together. Take a deep breath and follow these steps:
- Fit the deadbolt latch: Slide the latch into the hole on the door’s edge. It should sit flush with the door surface. If it doesn’t, use your chisel to carefully shave away a bit of wood until it fits perfectly.
- Attach the bolt mechanism: On outswing doors, make sure the bolt extends fully into the frame. Place the exterior and interior halves of the lock on either side of the door and thread any connecting screws through as directed.
- Screw down the plates: Tighten all screws firmly, but don’t overtighten—stripping the holes makes everything less secure.
- Install the strike plate: For outswing doors, install the reinforced strike plate onto the door frame with long, heavy-duty screws. Some people use 3″ screws to anchor into the house framing, not just the thin trim.
- Test the lock: Close the door and work the deadbolt. It should slide and lock smoothly without any sticking or hanging up. If it doesn’t, check your alignment and adjust as needed.
If you’re working with a smart deadbolt or electronic model, follow the code and sync instructions from your lock’s manual—each brand is a little different, but the basics stay the same. Don’t forget to check the battery and pair your remote or keypad before calling it done.
Strengthening Security: Hinges And Latch Guards Matter
Let me explain why hinges and latch guards are so important for outswing doors. Sure, the deadbolt keeps the door closed, but if someone can pop the hinges, it’s game over. Many modern outswing doors come with non-removable hinge pins or security studs that make this kind of attack almost impossible. If your door doesn’t, it’s worth upgrading.
Look for security hinges with a small tab or stud that fits into a hole when the door is closed. Or, you can get hinge bolts—short metal pins that slide into the frame when the door is shut. Both stop intruders from removing the door, even if they take the hinge pins out.
On the latch side, consider adding a latch guard—a piece of metal that covers the gap where the deadbolt enters the frame. This stops someone from wedging a crowbar into the gap and popping the door open. Honestly, for a few extra bucks, these add-ons make a world of difference.
Troubleshooting Common Issues With Deadbolt Installs
Some problems pop up more often than you’d think, especially with outswing doors. Here are a few you might run into, and how to handle them:
- Deadbolt won’t turn smoothly: Most of the time, this means your holes aren’t aligned perfectly. Take the lock back out and realign the holes, or adjust the strike plate to match the bolt better.
- Door won’t close fully: If the deadbolt hardware is too thick or sticking out, use your chisel to recess it further. Outswing doors sometimes have tighter clearances—don’t force anything or you’ll risk damage.
- Exposed screws: On outswing doors, make sure exterior screws can’t be easily removed. Use tamper-proof screws or mount the plate so the fasteners are only accessible from inside.
- Smart deadbolt won’t sync: If you’re using a remote or app-controlled lock, make sure the batteries are fresh, and follow the pairing and reset instructions from the manual. Sometimes you need to reset the code or hold a key button to start the synchronization process.
Take your time and double-check each step. It’s better to fix an issue now than leave your door half-secure and hope for the best.
When To Call A Professional Locksmith
DIY projects are great, but there are times when it makes more sense to bring in a pro—especially if your door is expensive, antique, or metal. Some metal outswing doors need specialty bits and hardware. If you’ve got a steel door or unusual frame, a locksmith can drill precise holes and make sure everything is code-compliant.
You might also want professional help if your door is especially heavy or out of square, which can make alignment tricky. And, if the lock you’ve bought has complicated sync or remote pairing features (like smart deadbolts from Schlage or August), a pro can help with setup, troubleshooting, and battery or code resets, so everything works smoothly from the start.
Honestly, if you’re doubting your measurements or worried about voiding a warranty, calling in a pro gives you peace of mind. It’s better to spend a little extra than risk messing up your door or ending up with a lock you can’t trust.
Wrapping Up: Secure, Simple, And Worth The Effort
Getting a deadbolt on your outswing door is one of the best moves you can make for home security. It takes some careful measuring and a bit of elbow grease, but once it’s in place, you’ve got real peace of mind. Remember those little tweaks—like upgrading hinges and adding a latch guard—make your setup even tougher. Whether you’re using a classic lock or a smart deadbolt with code and sync options, every layer of security helps.
Don’t rush the job, follow each step, and be patient with the details. When your outswing door closes with a solid, satisfying “clunk,” you’ll know you did it right—and your home’s a whole lot safer for it.
