Honestly, *installing a concealed exterior door hinge* isn’t as intimidating as it sounds, but it does take some careful planning and patience—especially if you’re used to the basic pin-and-barrel hinges that have been around forever. Brands like SOSS and Sugatsune are popular for these hardware upgrades, and the basic principles of installation are similar no matter which brand you use. The real trick is accuracy: everything has to line up perfectly, or your door won’t close right. Here’s how to get it done step by step, with all the little secrets and troubleshooting tips included.
What Makes Concealed Exterior Door Hinges Different?
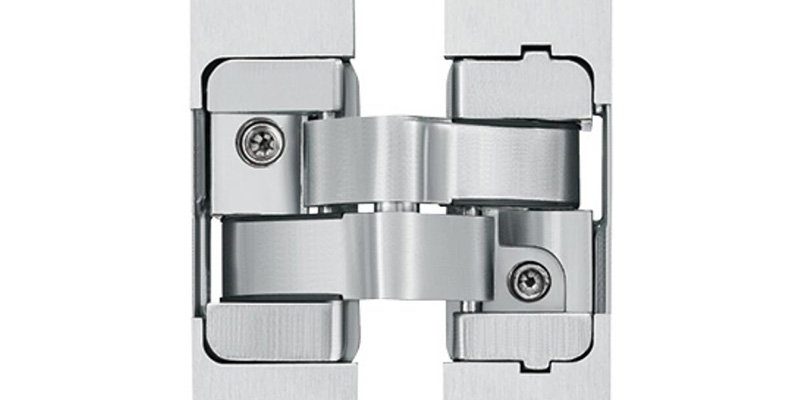
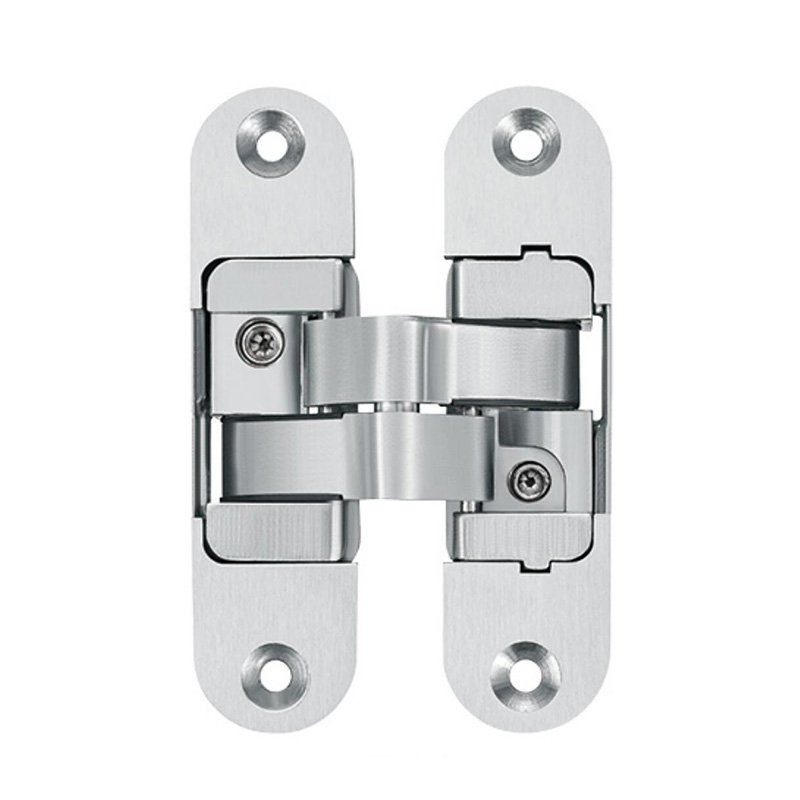
You might be wondering: why switch to concealed hinges in the first place? Well, the obvious answer is aesthetics. These hinges sit entirely inside the door and frame, so there’s no visible hardware when the door is closed. It’s an instant update for anyone pursuing that *minimalist* or *modern* look—think clean lines, uninterrupted surfaces, and a kind of architectural “wow” factor that regular hinges just can’t match.
But it’s not just about looks. Concealed exterior door hinges can also improve *security*. Since the hinge pins aren’t accessible from outside, it’s nearly impossible for someone to tamper with your door using basic tools. For exterior doors, this is a big plus, especially on gates or entryways. Some brands, like SOSS and Tectus, even add extra features like built-in security pins or high-load ratings, making them ideal for heavy wood or metal doors.
Here’s the thing: installation is a little more demanding. Unlike traditional hinges that just screw onto the surface, concealed hinges require you to cut precise pockets (called *mortises*) into both the door edge and the jamb. If you’re comfortable with a chisel and router, it’s totally doable with a bit of patience and the right measurements.
Choosing the Right Concealed Hinge for Your Exterior Door
Before you get to work, it’s crucial to pick a *concealed hinge* designed for exterior use. Not all hidden hinges are created equal, and using the wrong one could lead to issues like sagging doors, air leaks, or even water damage. Brands like SOSS, Sugatsune, and TECTUS all offer models specifically rated for outdoor or high-traffic use.
Here are the main factors to check before you buy:
- Load capacity: Make sure the hinge can support the weight of your door. Exterior doors are often heavier than interior ones.
- Material: Look for stainless steel or weather-resistant finishes to handle rain, humidity, and temperature changes.
- Adjustability: Some concealed hinges let you fine-tune the alignment after installation. This is a lifesaver if you’re new to precise woodworking.
- Security features: For extra peace of mind, pick hinges with anti-tamper designs or security pins if that’s a concern.
You might be tempted by lower-cost universal hinges you find online, but honestly, when it comes to your main entry door, stick with a reputable brand. You’ll thank yourself later—especially if you ever need to *reset* or replace a part, as the manufacturer’s support is usually better.
Tools and Materials You’ll Need for Installation
Let me explain what you’ll need. Installing a concealed exterior door hinge isn’t a job for your average Phillips head screwdriver alone. You’ll want to be ready with these essentials:
- Router and hinge template (or a sharp chisel if you’re old-school)
- Drill and bits for pilot holes
- Measuring tape & straight edge for accurate marking
- Pencil & marking gauge for outlining mortises
- Screwdriver (manual or powered, depending on the screws provided)
- Level to check hinge alignment
- Safety goggles and gloves for protection
Gather everything before you start—you don’t want to realize you’re missing a router bit with a half-opened door. Most concealed hinge manufacturers (like SOSS) include a paper or metal template in the box. If you don’t have one, you can often *sync* your process by downloading a template from their website, which helps with accuracy.
Measuring and Marking: The Secret to Getting It Right
Here’s where things get a bit technical, but don’t sweat it. It’s all about patience and double-checking your *code* (your marks and cuts, that is). Start by holding the closed hinge up to the edge of your door at the spot where you want it installed. Most exterior doors use two or three hinges, spaced evenly from top to bottom—usually about 7 inches from the top and 11 inches from the bottom for a standard setup.
Use a sharp pencil or marking knife to carefully outline the hinge body on both the door edge and the jamb. Strong advice: use a measuring tape to make sure both mortises will line up perfectly. Any small difference here can throw off the entire installation, so take your time.
Next, mark the *depth* of the mortise. The hinge template should tell you the required depth, which is usually 1⁄2 inch to 1 inch, depending on the model. Marking the depth all around the inside of your outline helps keep your router bit or chisel from wandering.
If you rush these steps, you’ll run into annoying troubleshooting later—think doors that stick, hinges that won’t close, or alignment that always seems off by a hair.
Cutting the Mortises for Concealed Hinges
Ready for the fun part? Cutting mortises is where your patience pays off. If you have a router, attach the hinge template securely to the door edge using clamps or double-sided tape. Set the router to the right depth and slowly follow the outline, clearing away the wood inside the lines. Go slow to avoid accidents.
If you don’t have a router, you can use a sharp chisel instead. Here’s how:
- Score the outline with a marking knife for crisp edges.
- Use the chisel to carefully remove thin layers of wood, checking depth as you go.
- Keep the chisel perpendicular for the cleanest results.
Once the mortises are cut, test fit the hinge. It should sit flush, not sticking out or recessed too far. If it wobbles or the fit is sloppy, reset your marks and trim a little more—don’t force the hinge in. Take a deep breath and check your work before moving to the next step.
Attaching the Concealed Hinge to the Door and Frame
With your mortises perfectly cut, it’s time to install the concealed hinge. Place the hinge into the door mortise first and use a level to make sure it sits straight (a cheap torpedo level works fine for this). Mark the pilot holes for the screws, then drill them freehand or with a guide so the screws don’t wander.
Screw the hinge body into the door using the hardware provided. Most brands, like SOSS, include special screws designed for the weight of exterior doors. Don’t overtighten—just snug is enough, or you might strip the holes.
Now repeat the process for the frame side. Use your measurements to align the hinge exactly with the one in the door. If you’re worried about things not *pairing* up, you can temporarily insert the hinge into both mortises and close the door gently to check the fit before screwing anything down.
Pro tip: If something doesn’t line up, don’t panic. Back out the screws, adjust your mortise, and retry. Even pros run into small tweaks during installation.
Testing and Adjusting Your New Concealed Exterior Door Hinge
Here’s where all that measuring and prepping pays off. With both sides secured, *sync* the hinge action by slowly opening and closing the door a few times. Listen for any squeaks or binding, and check that the door sits straight in the frame.
Some concealed hinges, especially higher-end models, let you fine-tune the alignment after install. You’ll find small set screws or adjustment points—usually with a hex key—on the body of the hinge. If your door rubs, sags, or doesn’t close flat, tweak these adjustments until everything feels buttery smooth.
What if the door still isn’t right? Here are some quick troubleshooting tips:
- Door won’t close fully: Mortise might be too shallow or offset. Remove, deepen, and retry.
- Hinge is binding: Check alignment with a level and adjust the mortise width if needed.
- Screws won’t hold: For stripped holes, use wood filler or slightly thicker screws.
Once everything feels right, double-check all the screws for tightness—especially if your climate changes a lot. That’s it! Your modern, invisible hinges are ready for years of smooth, secure service.
How Concealed Hinges Compare to Traditional Exterior Hinges
Before you wrap up, it’s worth thinking about why concealed hinges stand out, and whether they’re right for your situation. Traditional exterior door hinges do the basics well—they’re simple, easy to replace, and reliable. But they’re visible, which can be a deal-breaker for anyone craving a modern look.
Concealed hinges, on the other hand, bring a really clean finish you just can’t get otherwise. The installation is a little more involved, sure, but the result is often worth it for the style boost. Plus, you get peace of mind knowing there’s no easy way for someone to pop the hinge pins from outside—a neat side effect for security.
Still, if you move often or don’t have the right tools, you might prefer a more universal hinge design. Some universal hidden hinges offer easier installation but may not have the same weather resistance as branded exterior models.
If you truly want your entryway to stand out and stay secure, installing a concealed exterior door hinge is one of those rare upgrades that look expensive but are totally DIY-able if you plan ahead.
Maintaining and Troubleshooting Concealed Exterior Door Hinges
Like any moving part, your new concealed hinge will need a little TLC over the years. Luckily, maintenance is simple. First, check every few months that all screws remain tight—seasonal temperature changes can sometimes loosen them.
If you spot any squeaks, apply a small drop of exterior-grade lubricant to the moving parts, but keep it away from wood or painted surfaces to avoid staining. You might also need to *reset* the hinge alignment if your door warps slightly with the weather. Just loosen the set screws, adjust as needed, and retighten.
For more serious issues—like a hinge that won’t *pair* properly with the frame or a hinge body that seems damaged—reach out to the manufacturer for troubleshooting help. Branded hinges like those from SOSS and Sugatsune often come with warranties or helpful customer service.
Take five minutes to check your hinges once in a while, and you’ll avoid most headaches—and keep that modern look fresh for years to come.
Final Thoughts: Enjoy Your Modern, Seamless Look
Swapping out your old hinges for a concealed exterior door hinge isn’t just about looks—it’s about rethinking how you want your home to feel. Sure, the process can be meticulous, but with some careful planning, the right tools, and a couple of hours, you’ll transform a standard entry into a modern statement. Plus, every time you open that door and see smooth edges instead of hardware, you’ll know you didn’t just follow a trend—you set the bar higher.
If you’re still deciding, trust your gut. For many DIYers, this is the kind of project that pays off every time guests comment on how “clean” and “architectural” your front door looks. And if you ever need to upgrade or troubleshoot in the future, you’ll have the know-how to handle it yourself.