Let’s break down how to install a bypass barn door system step-by-step. For this guide, I’ll use a popular system, like the Zekoo Barn Door Kit, as an example. But the principles you learn here can apply to many brands. You might be wondering if it’s difficult to do it yourself. Honestly, as long as you follow the steps carefully, you’ll be fine!
Understanding Bypass Barn Door Systems
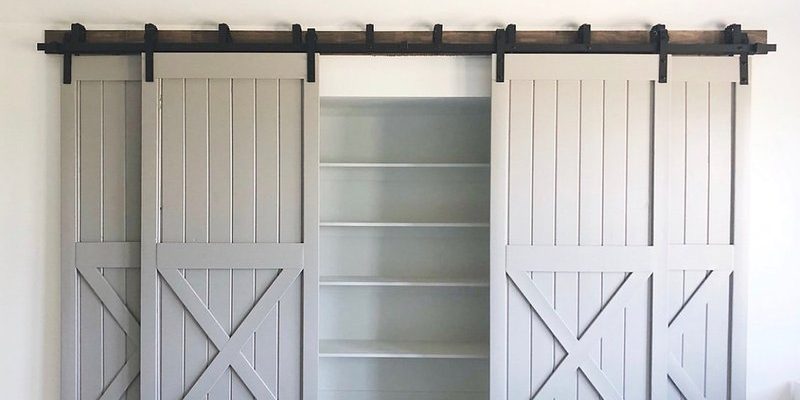
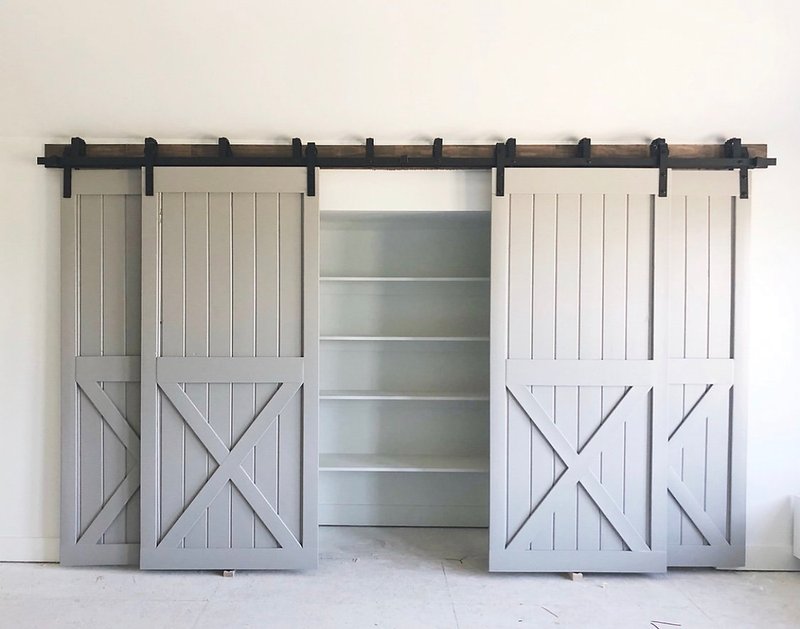
Before diving into installation, it’s important to understand what a bypass barn door system is. Basically, it consists of two doors that slide past each other on a track. This setup is different from a traditional sliding door, where the door only moves in one direction. With this design, you can access the entire closet space without needing extra room to swing a door open.
Here’s the thing: when properly installed, a bypass barn door system can create a beautiful focal point in your room. Plus, it’s a great solution if you’re tight on space. Imagine a narrow hallway where a traditional door would be a nuisance. A bypass system allows you to simply slide both doors open, revealing your closet while avoiding clutter!
Tools and Materials Needed
Now that we have a clear picture of what a bypass barn door system is, let’s talk about what you’ll need to get started. Here are the essential tools and materials:
- Barn Door Kit: Choose a kit that fits your style—wood, metal, or a combination.
- Doors: Two doors that match your kit’s dimensions.
- Drill: A power drill will save you a lot of time.
- Screwdrivers: Both flathead and Phillips will come in handy.
- Level: To ensure everything is perfectly aligned.
- Measuring Tape: Measure twice, cut once! It’s a classic rule for a reason.
- Stud Finder: This will help you locate the wall studs for secure installation.
With this checklist in hand, you’re one step closer to installing that stylish bypass barn door system for your closet!
Measuring Your Space
Getting the measurements right is crucial before you start the installation. You wouldn’t want to find out that your beautiful new doors don’t fit, right? Start by measuring the width of the closet opening where you want to install the barn door system. Make sure to include a bit of extra space for the door to slide freely.
Next, measure the height of the opening. Most barn doors are about 84 inches tall, but you need to check your specific kit and find out what works best for the space. Don’t forget to account for the height of the track system, which might add a couple of inches above the door.
After that, take note of where the studs are in your wall. Using a stud finder is the easiest way to locate them. Marking these will help you attach the mounting hardware securely, ensuring your doors don’t come crashing down.
Preparing the Doors
Once you’ve measured everything accurately, it’s time to prepare the doors. If you purchased unfinished wood doors, you might want to sand them down and apply your desired stain or paint. Here’s a quick tip: using a primer first can help the paint adhere better and create a more polished finish.
If your doors are already finished, give them a good inspection for any damages. Make sure the edges are smooth so they slide easily on the tracks. You could also add some felt pads to the bottom of each door to prevent scratching the floor. A little preparation goes a long way in ensuring a smooth operation!
Installing the Track System
Now comes the fun part—installing the track system! Start by holding the track level against the wall where you want to mount it. You’ll want to position it about 6 inches above the top of the door. This height allows enough clearance for the door to slide without obstruction.
Once you’re satisfied with the position, use your level to mark where the brackets for the track will go. Drill pilot holes into the wall at these marked points, then screw the brackets to the wall. Remember to secure them into the studs for stability. Attach the track to the brackets according to the manufacturer’s instructions.
After all the brackets are attached and the track is secure, give it a little shake. It should feel firm. If it wobbles, take a step back and check that everything is aligned properly.
Hanging the Doors
With the track system secured, it’s time to hang the doors! Start by lifting the first door and aligning it with the track. Slide the rollers onto the track until they’re fully seated. You may want to have a friend help you with this part to make it easier.
Once the first door is in place, repeat the process for the second door. Again, ensure that both doors slide easily and don’t get stuck. This is also a good time to check that the doors are level. If one is hanging lower than the other, you might need to adjust the roller brackets.
After confirming everything is working well, you can add any protective hardware included in your kit, such as stops or anti-jump brackets. These keep the doors securely in place while allowing easy access to your closet.
Final Adjustments & Troubleshooting
Once your doors are hung, take a step back and admire your work! But before you call it a day, it’s important to make final adjustments. Open and close the doors several times to check for smooth operation. If they’re sticking or sliding off track, you may need to adjust the roller brackets or the alignment of the track.
Here are a few quick troubleshooting tips if things don’t go as planned:
1. Doors Sticking: Try adding more felt pads or adjusting them slightly to see if that helps.
2. Doors Jumping Off Track: Ensure the anti-jump brackets are tight and positioned correctly.
3. Uneven Closing: Check that both doors are hung at the same height, adjusting if necessary.
These minor adjustments can really make a difference in how well your barn door system operates in the long run.
Enjoying Your Bypass Barn Door System
Congratulations! You’ve installed your bypass barn door system. Enjoy the sleek design and the functional space it offers. Not only does this enhance your closet’s accessibility, but it also adds a touch of rustic charm to your home. It’s a conversation starter and a functional piece of art rolled into one.
Next time someone asks how you transformed your closet, you can proudly say, “I did it myself!” There’s something really satisfying about completing a project like this. Plus, every time you slide those doors open, you’ll be reminded of your handy work.
In the end, installing a bypass barn door system may seem daunting, but with the right tools and a little patience, you can achieve a fantastic result. Whether it’s for aesthetic appeal, improved access, or simply to save space, you’ve made a selection you won’t regret. So go ahead, slide those doors open and enjoy the beautiful new passage to your closet!