
Think of stripped screw holes in wood as a pair of shoes with laces that won’t stay tied. The screw hole is meant to hold the screw securely, just like laces hold your shoes in place. When that hole gets worn out or damaged, it can feel like everything is off-kilter. Luckily, there are several easy methods to secure screws in those pesky holes and get your doors and frames back in working order.
Whether you’re dealing with a door latch, hardware, or just hanging a picture, knowing how to fix stripped screw holes can save you time and money. Let’s dive into the steps you can take to conquer this common household problem.
Understanding Stripped Screw Holes
Before we jump into solutions, it’s important to understand why screw holes get stripped in the first place. Over time, any wood can get a bit worn out, especially if screws are removed and replaced frequently. This wear and tear can cause the hole to lose its grip on the screw, making it useless.
You might notice that stripped holes often happen in high-traffic areas—doors that are constantly swung open and shut or frames that hold heavy items. When screws are tightened too forcefully, or if the wrong size or type of screw is used, this can also contribute to the problem. The wood fibers can become damaged, leading to a bigger headache down the line.
Recognizing the signs of stripped screw holes is key. If a screw spins freely or doesn’t hold tight anymore, it’s time to take action. But don’t worry, fixing these holes is easier than you might think!
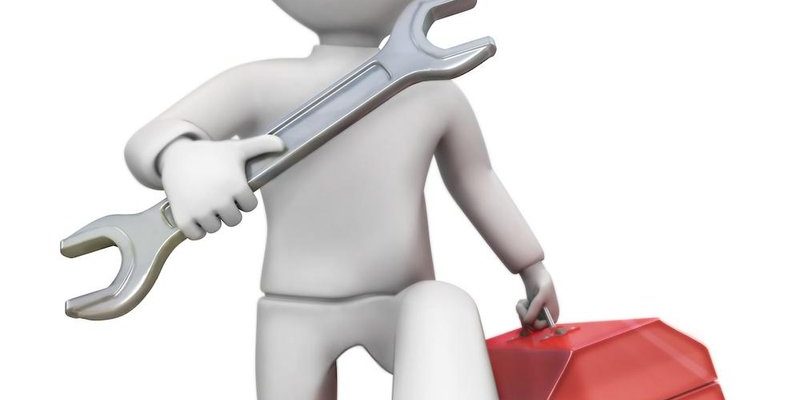
Gathering the Right Tools
Before you start your repair journey, it’s crucial to have the right tools at hand. Think of this as preparing for a trip—you wouldn’t want to leave without your essentials.
Here’s a quick list of what you’ll need:
- Wood filler or epoxy: These materials help fill in the gaps.
- Screws: Make sure you have the right length and type for your project.
- Drill and drill bits: A power drill makes the job much easier.
- Screwdriver: A reliable one is a must for insertion and removal.
- Sandpaper: Helps smooth out the filled area.
Having these tools ready will make the process smoother and more efficient. And remember—sometimes the smallest tool can make a big difference!
Method 1: Wood Filler
One of the most common ways to fix stripped screw holes is by using wood filler. It’s like giving your wood a little makeover. Here’s how to do it:
1. Clean the Hole: Start by removing any loose debris around the hole. You want a clean surface for the wood filler to grab onto.
2. Apply the Filler: Using a putty knife, fill the hole with wood filler. Make sure you press it in firmly, so it reaches the edges.
3. Let It Cure: Allow the filler to dry completely. The drying time can vary based on the product, but usually, it takes a couple of hours.
4. Sand It Smooth: Once dry, take some sandpaper and smooth out the area. You want it to be flush with the surrounding wood for a neat finish.
5. Reinsert the Screw: After sanding, you can reinsert the screw into the newly filled hole. It should grip much better this time.
This simple method works wonders for small to medium-sized holes and is a go-to for many DIY enthusiasts.
Method 2: Using Epoxy
If you’re facing larger or more critical repairs, epoxy might be your best friend. It’s stronger than wood filler and can handle more stress. Here’s how to use it:
1. Prepare the Area: Just like with wood filler, clear out any debris from the hole.
2. Mix the Epoxy: Follow the instructions on your epoxy kit. Typically, you’ll mix a resin and a hardener together until it’s well combined.
3. Fill the Hole: Use a small tool to pack the mixed epoxy into the hole. Like painting a wall, cover all areas, and smooth it out.
4. Allow It to Cure: Give the epoxy time to harden completely. This could take several hours, or sometimes even overnight, depending on the product.
5. Sand and Screw: After it’s cured, sand it down for a smooth finish, and then reinsert the screw as you did with the wood filler.
Using epoxy can be a game-changer when it comes to ensuring that screws hold firmly, especially in high-stress applications.
Method 3: Toothpicks and Glue Trick
This method is a bit quirky, but it works! If you’re looking for a quick fix, consider this toothpick and glue method:
1. Gather Toothpicks: Grab a few toothpicks and some wood glue.
2. Insert Toothpicks: Dip the toothpick in glue and insert it into the stripped hole. You can use one or two—just make sure they’re snug!
3. Break Off the Excess: Once inserted, break off any excess toothpick that sticks out of the hole.
4. Let It Dry: Allow the glue to dry before reinserting the screw.
This method might feel a bit unconventional, but it’s surprisingly effective for small holes that need a little extra grip.
Method 4: Oversized Screw or Lag Bolt
Sometimes, the simplest solution is to use a different screw altogether. If the hole is significantly stripped, you can opt for a larger screw or a lag bolt.
1. Select the Right Size: Choose a screw that’s bigger in diameter than the original. Make sure it’s long enough to grip the wood securely.
2. Re-drill the Hole (if needed): If the hole is too damaged, you may need to drill a new hole slightly larger to accommodate your new screw.
3. Insert the New Screw: Carefully insert the new screw and tighten it. You should feel a snug fit.
4. Test the Stability: Once in place, give it a gentle tug to ensure it’s secure.
This method is useful when all else fails, and it’s often the quickest fix for a stripped hole.
Preventing Future Issues
Once you’ve fixed those stripped screw holes, it’s wise to take steps to ensure they don’t happen again. Here are some proactive tips:
1. Don’t Over-tighten: Be mindful when securing screws. Over-tightening can lead to stripping, so aim for a firm grip without going overboard.
2. Use the Right Size Screw: Always match screws to the job. Using the appropriate size and type can prevent damage to the wood.
3. Check Regularly: Periodically check screws in door hardware and frames. If you notice any loosening, address it right away.
4. Consider Washers: Using washers can distribute the load more evenly, reducing the chances of stripping when tightening screws.
Taking these steps can save you both time and effort in the long run, making your home a bit more secure.
Dealing with stripped screw holes in wood doors and frames might feel annoying, but learning how to fix them can be a rewarding DIY task. Whether you use wood filler, epoxy, the toothpick trick, or opt for larger screws, each method is an opportunity to strengthen your home and gain some handy skills.
Remember, just like tying those shoelaces, a little attention to detail will keep everything in place. The next time you encounter a stubborn screw hole, you’ll know exactly what to do. So gather your tools, pick a method, and get to fixing—your doors and frames will thank you!