Let’s dive into the steps you can take to fix a damaged door latch. Whether you’re dealing with a flimsy latch on a bedroom door or a more complex one on a bathroom door, the ideas here apply across the board. Plus, I’ll share some tips on how to prevent future latch mishaps. Grab a cup of coffee, and let’s solve this together!
Assess the Damage to the Door Latch
Before you jump into fixing the door latch, it’s crucial to assess the level of damage. Take a good look at the latch itself. Is it just misaligned, or is something actually broken? Sometimes, all it takes is a simple adjustment. Other times, you might need to replace parts or the entire latch.
Start by checking if the door can still close properly. If it doesn’t latch at all, you’ll need to investigate further. Look for:
- Misalignment: Is the latch not catching on the strike plate?
- Loose screws: Are any screws on the latch or hinges loose?
- Visible damage: Is there any breaking or bending on the latch itself?
Once you’ve done your assessment, you’ll have a clearer picture of what needs fixing. It’s like looking at a car before deciding if it just needs a little tune-up or a whole new engine.
Gather Your Tools for the Repair
Now that you know what you’re dealing with, let’s gather the tools you’ll need for the repair. Most repairs can be done with some common household tools, and having everything on hand will make the process smoother. Here’s a quick list:
- Screwdriver: Most latches use screws that require either a Phillips or flathead screwdriver.
- Replacement parts: Depending on what you discovered, you may need a new latch or screws.
- Lubricant: A regular door lubricant can help if the latch is sticking.
- Utility knife: Useful if you need to trim away any excess material around the latch area.
Collecting these items ensures you won’t have to run to the store mid-repair, saving you time and frustration. Plus, it makes you feel like a DIY superhero ready to tackle whatever comes your way!
Fixing a Simple Misalignment
If your door latch is simply misaligned, the fix is usually straightforward. First, check the strike plate on the door frame. Sometimes, all you need to do is adjust it slightly to get everything back in line. Here’s how:
1. Loosen the screws on the strike plate using your screwdriver. Don’t remove them yet; just loosen them enough to shift the plate.
2. Close the door gently and adjust the plate so that the latch aligns perfectly with it.
3. Tighten the screws back down to hold everything in place.
If you need extra help, consider adding a few small washers under the plate to raise it slightly. This alignment process can often be the solution when the latch isn’t catching properly, much like adjusting the height of a table leg that wobbles.
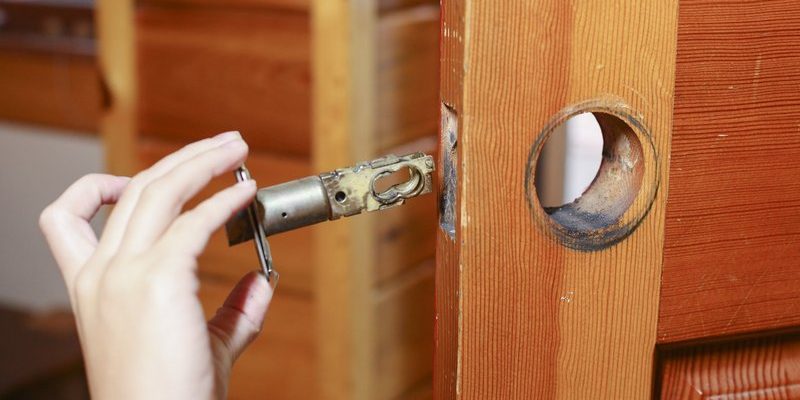
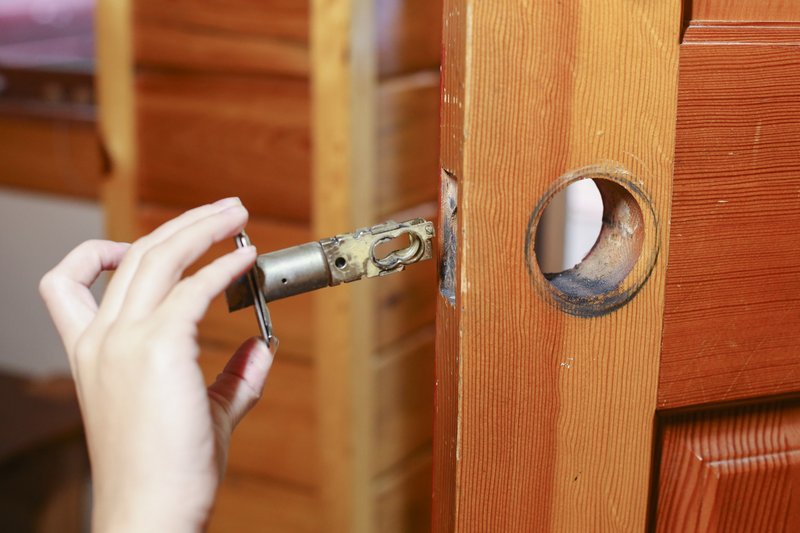
Replacing a Broken Latch
In some cases, the latch may be damaged beyond repair. This is where replacing it comes into play. Don’t worry; it’s easier than it sounds. Here’s a step-by-step guide:
1. Remove the old latch: Start by unscrewing the screws that hold the latch mechanism in place. Keep these screws handy; you might be able to use them for the new latch.
2. Take the old latch to the hardware store: This way, you can find an exact match. Look for a latch that fits the same measurements.
3. Install the new latch: Follow the reverse of removal. Position the new latch in the same spot, ensuring it lines up with the existing holes. Secure it with screws.
4. Test the new latch: Close the door and make sure the latch catches properly.
Replacing a latch can feel like putting together a new puzzle piece—once it fits, you’ll be surprised at how well it holds up!
Lubricating the Latch Mechanism
Sometimes, all a latch needs is a little bit of love in the form of lubrication. A sticking latch can be just as annoying as a broken one. Here’s how to handle this:
1. Apply lubricant: Use a silicone-based lubricant on the latch itself. Spray a small amount and operate the latch a few times to work it in.
2. Wipe off excess: Be careful—too much lubricant can attract dirt and dust, which will lead to more problems down the line.
3. Test the door: Make sure it opens and closes smoothly.
Regular maintenance can help prevent latches from sticking due to wear and tear. Think of it like oiling a squeaky hinge—it doesn’t take much to keep things running smoothly!
Preventing Future Damage from Rough Play
Now that you’ve gone through the repair process, it’s time to think ahead. How can you prevent kids from damaging door latches in the future? Here are some practical tips:
– Teach gentle use: Remind kids to open and close doors softly. Sometimes, a gentle reminder can do wonders.
– Install door stoppers: Adding door stoppers can prevent them from swinging open too hard, which may cause latch issues.
– Childproofing the latch area: If you notice a certain door getting more wear than others, consider adding a cover or a protective plate around it.
This proactive approach is like building a fence around a garden to keep out the wandering goats—you protect what’s important while letting the good stuff grow!
Fixing a door latch damaged by kids’ rough play doesn’t have to be a hassle. With a little inspection, the right tools, and a straightforward approach, you can tackle this task easily. Remember, it’s all part of the parenting adventure, and with every challenge, you’re gaining skills to handle future mishaps. From assessing the damage to making necessary repairs and taking preventive measures, you now have the know-how to keep your doors in good shape. Plus, you can feel great about taking these steps—after all, being a hands-on parent is what it’s all about!