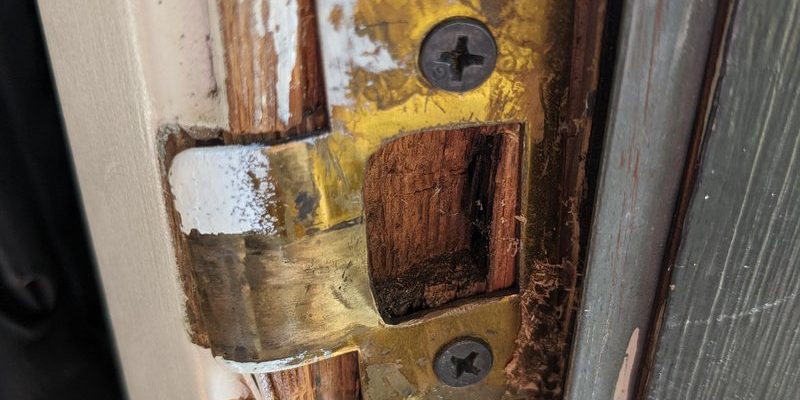
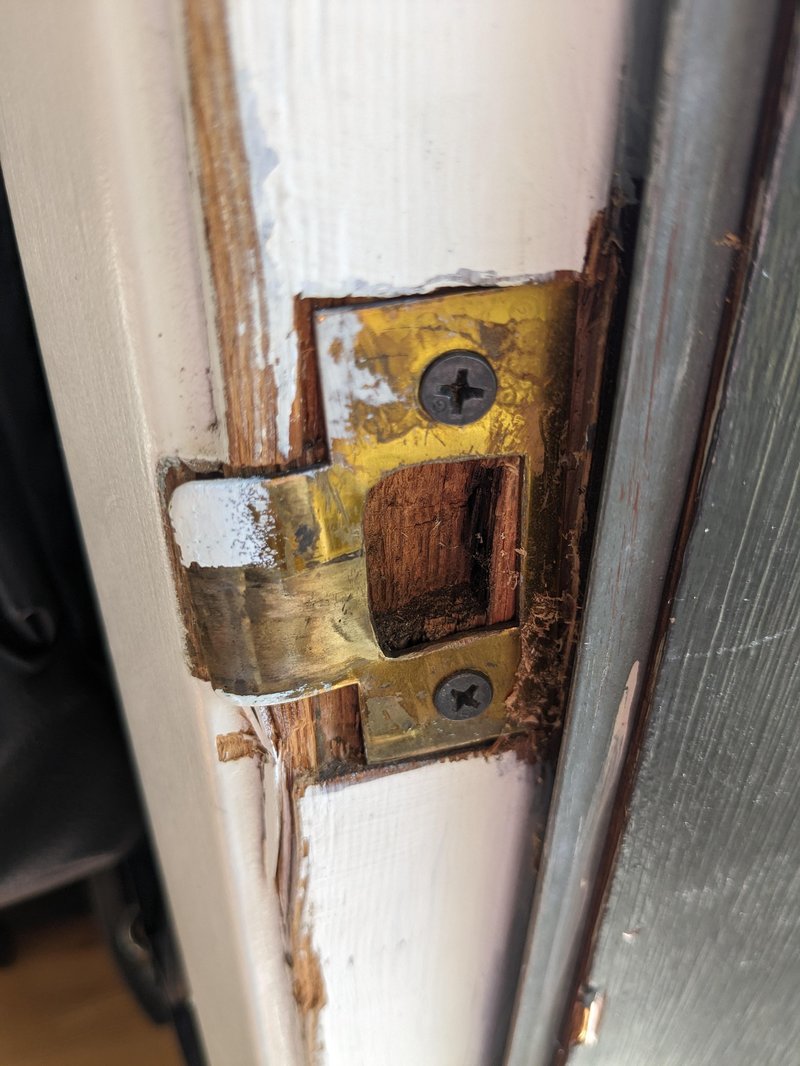
You might be wondering what exactly a strike plate is. Simply put, it’s the metal piece installed on the door frame that the locking mechanism clicks into. If the strike plate hole isn’t big enough or isn’t correctly positioned, your door may not close or lock properly. In this guide, we’ll walk you through the steps to enlarge that opening so your door works like a charm again. Ready to dive in? Let’s get started!
Understanding Your Strike Plate and Its Function
Before you grab your tools, it’s important to understand what a strike plate is and how it fits into the whole locking mechanism. When you turn your door handle, the bolt extends into the strike plate, which is mounted on the door frame. Its job? To keep the door firmly in place and provide security against intruders.
Now, let’s visualize this. Imagine a door trying to hug its frame. If the arms (the bolt) can’t reach the strike plate (the embrace), the door flops open or won’t latch at all. If your bolt isn’t fully engaging with the strike plate, you may find yourself struggling to close the door or in some cases, the door won’t lock at all.
You might also find that your strike plate is too high or too low, or perhaps it’s just not wide enough to accommodate the bolt. Whatever the case, enlarging the door strike plate opening can often solve these issues, leading to a more secure door.
Gathering Your Tools and Materials
You can’t just jump in without knowing what you need. To enlarge your door strike plate opening, you’ll require a few basic tools. Here’s a quick list to get you started:
- Drill – A power drill will make the job smoother and quicker.
- Chisel – This will help reshape the edges of the opening.
- Screwdriver – For removing the existing strike plate.
- Measuring Tape – You’ll want to measure carefully.
- Pencil – For marking your lines before cutting.
Having these items at hand will set you up for success. If you’re missing any, a quick trip to your local hardware store should do the trick.
Honestly, taking the time to gather your tools ahead of time will save you a lot of frustration later. Imagine starting to work only to find you’re missing the one thing you desperately need. That’s the kind of situation we want to avoid!
Removing the Existing Strike Plate
Now that you have your tools ready, let’s dive into the process. The first step is to remove the existing strike plate. This is pretty straightforward. Here’s how to do it:
1. Unscrew the Strike Plate: Using your screwdriver, carefully remove the screws that hold the strike plate in place. Set the screws aside; you will need them later.
2. Pull Away the Plate: Gently wiggle the strike plate until it comes off. If it’s stuck, a little tap with your chisel can help loosen it.
3. Examine the Surrounding Area: Once the strike plate is off, take a good look at the area. This is where you’ll decide how much to enlarge the hole.
Measuring for the New Opening Size
Once the strike plate is removed, you need to measure where to enlarge the opening. Accuracy is key here.
1. Measure the Bolt: First, measure the width and height of the bolt that engages with the strike plate. This will give you a reference for how much you need to enlarge the hole.
2. Mark Your Measurements: Use a pencil to mark the new dimensions on the door frame. Use a straight edge to draw lines for guiding your drilling and chiseling.
3. Double-Check: Before you make any cuts, double-check your measurements. It’s better to be precise now than to fix mistakes later.
You might be wondering why measuring is so important. Think of it like making cookies: if you don’t measure the ingredients correctly, your cookies might not turn out as delicious as you hoped. The same goes for the strike plate opening!
Enlarging the Strike Plate Opening
Now comes the fun part: enlarging the opening! There are a couple of methods you can use, depending on how much you need to adjust.
Using a Drill:
– Pick a drill bit that matches the width of the bolt. Start by drilling at the marked location to create a new opening.
– Drill slowly to avoid making the hole too large or irregular.
Using a Chisel:
– If you need to make the opening taller or wider, use your chisel. Position it along the marked lines and gently tap with a hammer.
– Take your time—small adjustments can make a big difference.
Here’s the thing: if you go too fast, you risk making a mess. Take a deep breath and go slowly. Sometimes, less is more.
Testing the Fit of the New Strike Plate
After you’ve enlarged the opening, it’s time to test your work.
1. Place the New Strike Plate: Position the strike plate over the newly created opening to see if it fits properly.
2. Check the Alignment: Make sure the bolt aligns well with the new hole. If it doesn’t, you may need to adjust some more.
3. Secure the Strike Plate: Once you’re satisfied with the fit, secure the strike plate back onto the door frame using the screws you set aside earlier.
Testing the fit is crucial. Imagine you’ve just done a bunch of work only to find that the door still won’t close properly. That’s definitely not the goal!
Finishing Touches
With the strike plate in place, you might want to consider a few finishing touches to ensure everything looks polished and functions well.
– Fill Any Gaps: If there are gaps around the new strike plate, consider using wood filler or caulk to seal them up. This will help with insulation and improve the overall look.
– Paint Touch-Up: If you’ve chipped the paint while working, a quick touch-up can make everything blend seamlessly.
– Final Testing: After it’s all secured and tidied up, give your door one last test. Open and close it several times to make sure it latches and locks smoothly.
Honestly, taking care of these small details can make a huge difference in how satisfied you are with your finished work.
Common Issues and Troubleshooting
Even when you follow these steps, you might run into a few hiccups. Here are some common issues and what to do about them:
– Bolt Still Doesn’t Latch: If after your adjustments the bolt still doesn’t fit, you might need to enlarge the hole a little more or adjust the position of the strike plate slightly.
– Uneven Surface: If the surface where the strike plate sits isn’t even, use additional wood shims to level everything out before securing it back in place.
– Painting Issues: If there are paint blemishes after all that work, a quick touch-up with matching paint can help hide any cosmetic flaws.
These troubleshooting tips can save you a lot of frustration and help you maintain a smooth operation of your door.
In conclusion, enlarging a door strike plate opening for a better fit is a manageable DIY project. With the right tools, a clear understanding of the process, and a little patience, you can ensure your door operates smoothly and securely. Remember, the key is in the details. Happy DIYing!