Disassembling a door knob may sound intimidating, but think of it like taking apart a piece of furniture. With a few basic tools and some patience, you can get to the root of the issue. Kwikset knobs are designed for easy access, so let’s roll up our sleeves and dive into the steps!
Understanding Your Kwikset Door Knob
Before we get into the nitty-gritty of disassembling your Kwikset door knob, it’s important to understand its structure. These knobs typically consist of several key components: the outer knob, the inner knob, the spindle (which connects the two), and the locking mechanism.
The mechanism is what allows it to lock and unlock, providing security for your space. Knowing how these parts interact can help you identify the issue when the knob isn’t working right. For example, if the knob turns but doesn’t engage the lock, you might need to check the spindle or the locking mechanism.
It’s also wise to have a quick look at the design specifics of your model. Some Kwikset knobs may vary slightly in design, and different models might have unique features—like smart locks with extra components. This will come in handy as we move forward!
Gathering Your Tools
Before starting the disassembly, you’ll want to gather a few basic tools. Here’s a quick list to help you:
- Screwdriver: A flathead or Phillips screwdriver, depending on your knob type.
- Allen wrench: Some models may require this tool for screws.
- Pen or paper: Use this to jot down steps or sketches if needed.
- Flashlight: Helpful for seeing into dark spaces of the knob.
Having everything ready will make the process smoother. Picture it like getting your ingredients lined up before you start cooking—preparation is key!
Removing the Knob from the Door
Now, let’s get to work. The first step is to remove the knob from the door. Here’s how you do it:
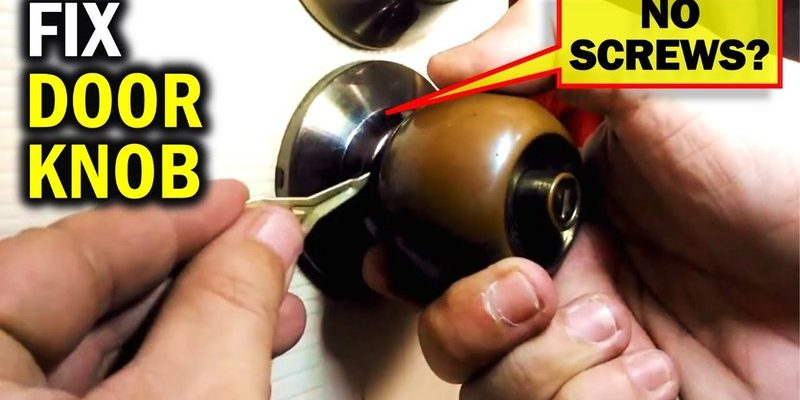
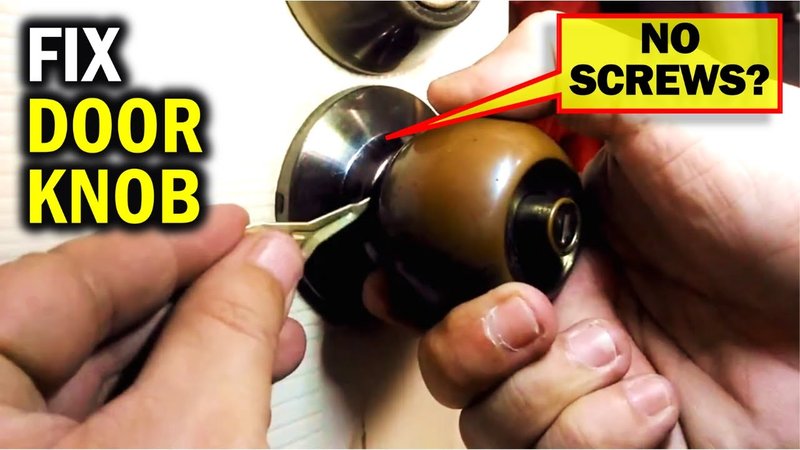
1. Locate the screws: Look for screws on the side of the knob or under the decorative plate. Some knobs have hidden screws that are accessible through a small hole.
2. Unscrew the knob: Using your screwdriver, remove the screws. Keep these in a small bowl so they don’t get lost.
3. Pull off the knob: Gently pull the outer knob away from the door. If it doesn’t budge, double-check for any hidden screws.
Once it’s off, take a moment to admire your handiwork! You’re already on your way to understanding how this whole mechanism works.
Disassembling the Inner Mechanism
With the knob now off, it’s time to dive deeper. This is where you’ll access the inner workings of your Kwikset knob. Follow these steps:
1. Remove the retaining clip: If your knob has a retaining clip holding the inner parts in place, carefully pry it off. Be gentle, as these clips can be a bit fragile.
2. Take apart the inner knob: Once the clip is off, you should be able to pull the inner knob away. If it feels stuck, wiggle it gently—don’t force it.
Now that you can see inside, you might notice the spindle and the lock mechanism. This insight will help you diagnose your issue, whether it’s a misaligned spindle or a faulty lock.
Inspecting for Issues
At this point, you should have access to the inner components of your knob. Take a moment to inspect everything closely. Here are some common things to look for:
– Worn or broken parts: Check for any signs of wear or damage, especially on the spindle and locking mechanism.
– Loose screws: Sometimes, screws come loose over time. Tightening them can restore functionality.
– Debris buildup: Dirt or grime can hinder operation. A quick cleaning might do the trick!
If you see any damaged parts, it might be time to replace them. Most hardware stores carry Kwikset replacement pieces, so you won’t have to search far.
Reassembling the Knob
Once you’ve resolved any issues or performed necessary repairs, it’s time to put everything back together. Here’s how to reassemble your Kwikset door knob:
1. Reattach the inner knob: Slide it back into place and secure it with the retaining clip. Make sure it’s snug but not overly tight.
2. Put the outer knob back on: Align it with the inner knob and push it back onto the spindle.
3. Screw everything back together: Reinsert any screws you removed and tighten them. Don’t overdo it—just enough to hold everything in place.
Congratulations! You’re almost done.
Testing Your Door Knob
Before you call it a day, it’s time to test your hard work. Here’s what to do:
1. Turn the knob: Make sure it turns smoothly without any resistance.
2. Check the locking mechanism: If your knob has a lock, test it out. It should engage and disengage easily.
3. Reinstall the knob: If you removed it completely, reattach it to the door.
If everything’s working well, you can sit back and enjoy your success. However, if there are still issues, you might need to reassess the components or consult a professional.
When to Seek Professional Help
Sometimes, despite our best efforts, things don’t go as planned. If you’ve followed all the steps and your Kwikset knob still isn’t working properly, it might be time to call in an expert.
Look for signs like:
– Persistent sticking: If the knob is still jamming after repairs.
– Unusual noises: Grinding or clicking sounds can indicate deeper issues.
– Inability to unlock: If the lock fails to function, it’s best to seek professional assistance.
Remember, it’s okay to ask for help when it’s needed. Your door deserves a reliable knob!
In wrapping up, disassembling a Kwikset style interior door knob for repair might seem daunting at first, but understanding the process can empower you! Whether it’s a pesky stuck knob or a lock mechanism acting up, following these steps can guide you through repairs effectively. So next time you face a stubborn door knob, you’ll know exactly what to do!