
Let me explain it this way: if your door handle were a seesaw, the lever return spring would be the kid pushing it back to the middle every time. When that spring weakens, gets gunked up, or snaps, suddenly your door doesn’t feel right. Stuck levers, floppy handles, and that annoying “hang” when you let go? Yep, those are often signs your return spring needs a little troubleshooting.
Diagnosing the exact problem might feel intimidating, especially if you’ve never peeked inside a lock. But I promise, with a little patience and some basic steps, you can figure out whether you’re dealing with a tired spring, a misaligned mechanism, or something else entirely—even if your handleset is smart, coded, or just a regular mechanical model.
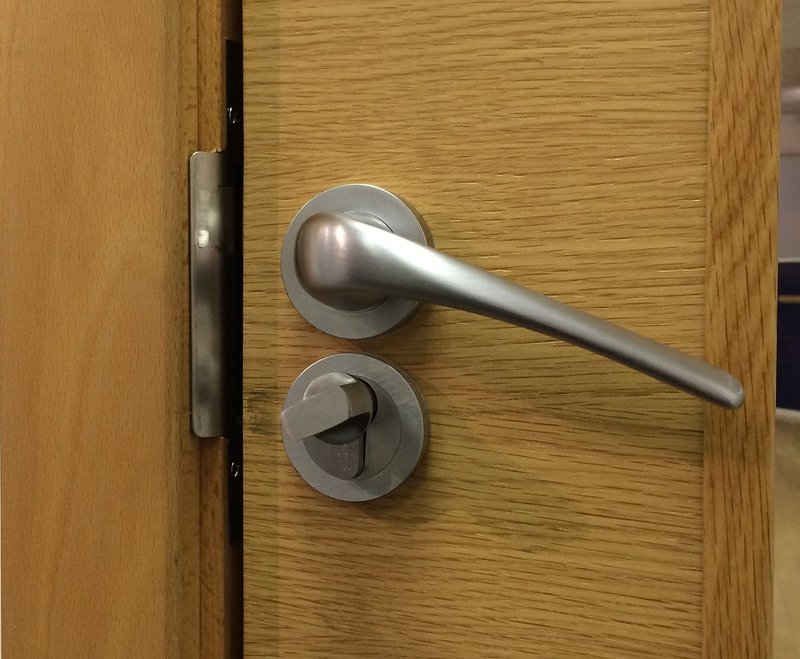
What Is a Lever Return Spring and Why Does It Matter?
The lever return spring is a small, coiled piece of metal tucked inside the main body of your handleset. Its job is simple: after you press the lever down or lift it up, the spring snaps it right back to its original, horizontal position. This *return action* is what makes a handle feel smooth and responsive, no matter how many times you use it.
Here’s the thing—a handleset without a working return spring feels “off” in a way you can’t always describe. You let go, and the lever just sags or gets stuck, leaving your door looking sloppy and awkward. Worse, if your lock uses a code or battery-powered mechanism, a bad spring can even mess with the way the internal electronics or latch work. That’s why diagnosing spring problems is crucial before you jump to resetting, repairing, or replacing the whole handleset.
On most brands—whether you’re looking at a Yale electronic deadbolt, a Schlage keypad, or a classic Kwikset—this spring is easy to identify once you open the cover. It sits around the spindle or core rod the lever attaches to, and it’s usually held in by small notches or plastic guides. Understanding this setup is step one in any good troubleshooting process.
Sometimes, the lever return spring is mistaken for a regular tension spring or mixed up with the latch spring. But trust me—they’re not the same. The lever return spring specifically controls the handle’s “resting” position, while other springs in your hardware have different jobs (like pulling the latch back in or controlling codes in smart locks).
Common Signs Your Handleset’s Lever Return Spring Is Malfunctioning
You might be wondering, “How do I know if the spring is to blame?” There are a few telltale signs that almost always point to a lever return spring issue—no sync, no reset, just weird lever behavior that’s hard to ignore.
- Lever sags or droops — When you let go of the handle, it hangs down instead of popping back to the center.
- Stiff or sticky movement — The lever feels like it’s fighting you, or it doesn’t move as smoothly as it used to.
- Lever won’t return fully — The handle only goes partway back and stops, leaving your door looking “half-done”.
- Loose, rattly feel — It’s as if something inside the handleset is disconnected or not holding tension.
Let me give you a quick story: a friend of mine called about his Kwikset handleset—he thought it needed a full reset after his smart lock started acting up. Turns out, it wasn’t the code or battery issue at all. The lever would just hang there, limp, because the return spring had snapped in two. Once we swapped in a new spring, his “malfunction” was history. Sometimes, the smallest part makes the biggest difference.
Of course, unrelated issues can look similar. A dead battery, misaligned code mechanism, or stuck latch can also cause lever problems. But if everything else (like the locking and unlocking) still works and only the lever misbehaves, the return spring should top your troubleshooting list.
How To Safely Access the Lever Return Spring Inside a Handleset
So you think the lever return spring might be the problem. Where do you even start? First things first, safety is key—don’t force anything or you could damage the lock, especially on electronic or coded handlesets. Here’s how you can safely get a look at the return spring in most common brands:
- Remove the handleset from the door. Unscrew the fasteners that keep the exterior and interior parts together. For Yale, Schlage, or Kwikset, this usually means two or three screws.
- Take off the lever. There may be a set screw or a latch you need to press using a thin screwdriver or Allen key.
- Gently separate the backplate. This is where the inner workings live. Pry it off carefully, watching for any wiring if you have a smart or battery-powered model.
- Locate the spring. It should be sitting either around the spindle or held in by tabs. It’ll look like a small coil or curly “C”.
Here’s a tip: keep a bowl or bag handy for screws and tiny parts. Trust me, the last thing you want is to lose a proprietary screw under the couch.
Some handlesets—especially coded or electronic models—may have extra steps, like disconnecting a battery, unplugging wiring, or even entering a reset or pair mode. If you run into a stuck part, don’t muscle through. Check your specific brand’s instructions or look up your model number. It’s better to go slow than snap a clip or strip a screw.
Insight: If the lever or backplate feels glued on, double-check for hidden screws. Handlesets from Schlage or Yale sometimes have them tucked under decorative covers or behind the lever.
Inspecting and Testing the Lever Return Spring
After you’ve cracked open your handleset, it’s time to get hands-on with the lever return spring. You might feel a little nervous poking around—don’t worry, this is where a gentle touch pays off.
First, take a close look at the spring itself. Is it still shaped like a tight coil, or does it look stretched out, rusted, or even broken in half? A healthy spring should hold its shape and feel strong when you press on it. If you see any cracks, bends, or if the spring is just hanging loose, that’s almost certainly the cause of your lever problem.
Test it out by gently pushing the lever mount (where the handle attaches) back and forth. Watch the spring as you move it. If it pops the mount right back in place, the spring is doing its job. If it just sags, feels mushy, or moves with almost no resistance, it’s time for a replacement.
Sometimes, the spring is simply out of alignment or has jumped out of its little slot. Carefully reset it by nudging it back into place. If your handleset is electronic or says it needs to “sync” or “pair,” make sure you haven’t disconnected any wires in the process—or you’ll have a whole new troubleshooting adventure on your hands.
If everything looks normal with the spring, but the lever’s still weird, check for debris or gunk stuck between moving parts. Old grease, dust, or even a rogue wood chip can jam up the mechanism and keep the lever from resetting.
Replacing or Repairing the Lever Return Spring
Let’s say you’ve found the culprit: a busted or stretched spring. Fixing it isn’t rocket science, but it does require a little patience—and possibly a trip to the hardware store (or a call to your handleset’s manufacturer).
To replace the lever return spring:
- Find the exact type and size for your handleset. Brands like Kwikset and Schlage often use specific springs you can’t swap with a random part from another set.
- Carefully unhook the old spring from its mounts. Remember how it’s oriented—take a quick phone photo if you need a memory aid.
- Install the new spring by matching the orientation to the old one. Fit each end into its slot. The spring should feel tight, not loose.
- Reassemble the handleset, making sure no parts are left behind, and the lever resets crisply every time you move it.
You might be tempted to “hack” a universal spring from a hardware kit. Here’s my honest advice: unless you’re in a pinch, stick with your handleset’s brand-specific part. Universal springs sometimes don’t give the right amount of tension, and that can lead to future problems—or a lever that never feels quite right.
If you’re dealing with a smart lock or code model, don’t forget to reset or re-sync any electronics if you unplugged wires, changed a battery, or interrupted power. Most modern Yale and Schlage models have a simple pairing or reset process (usually a button or code entry). Check your manual just in case.
Comparing Handleset Brands and Models: What to Expect
Handleset brands aren’t all built the same. If you’ve ever swapped between a basic Kwikset and a high-end Yale or Schlage, you’ve probably noticed differences in feel, springiness, and even how easy it is to take apart.
- Kwikset: Known for straightforward, DIY-friendly designs. Springs are easy to reach, but sometimes feel a bit “springy” or light.
- Schlage: Slightly heavier construction. Springs are strong, but disassembly can involve hidden screws or extra steps. Great for durability.
- Yale (especially keyless/coded models): Often uses integrated modules for the lever return and code system. Be careful with electronics; some models require a battery or reset after reassembly.
Some universal handlesets do claim cross-compatibility, but honestly, it’s usually better—and less headache—just to match your spring to your brand. The fit and return action will be smoother, the install usually simpler, and you’ll avoid weird compatibility issues with coded or electronic locks.
Here’s a quick comparison if you’re shopping for a replacement:
| Brand | Ease of Spring Replacement | Common Pitfalls |
| Kwikset | Easy | Accidentally losing screws, misaligning spring ends |
| Schlage | Moderate | Hidden screws, over-tightening on reassembly |
| Yale (Smart/Code Models) | Difficult | Disconnecting/resetting electronics, battery sync needed |
What If a New Spring Doesn’t Fix the Problem?
Now, let’s say you’ve replaced the lever return spring and your handle’s still not working right. That’s frustrating, but it can happen. Here’s how to keep troubleshooting:
- Check the spindle: If the spindle (the rod the lever turns) is bent, stripped, or worn, it won’t transfer tension correctly, and your lever might still hang limp.
- Look for internal blockages: Sometimes debris, old grease, or broken plastic parts jam up the mechanism, making the new spring useless.
- Examine electronic or coded parts: Especially on smart handlesets—if the lever’s return relies on battery power or a code “sync,” you may need to re-pair or reset the system after repair.
- Double-check assembly: If any tiny part is out of place or you missed a screw, the lever won’t move as designed.
In rare cases, the problem isn’t the spring at all. Maybe the lever or latch mechanism is the real source of trouble. If you’ve tested everything, and it’s still acting up—even after a sync or code reset—it might be time for a full replacement or a call to a locksmith.
Pro tip: Take photos at each step when you disassemble your handleset. It’s easy to forget which way a spring goes after a coffee break!
Maintaining and Preventing Lever Return Spring Problems
Now that you know how finicky the lever return spring can be, you’re probably wondering how to keep it happy (and your door handle feeling new). Honestly, most people ignore their handleset until something goes wrong, but a little bit of care can go a long way.
First, every few months, give your lever a quick test. Open and close it a few times. Does it bounce back with energy, or is it getting sluggish? Early signs of a weak spring mean you can fix it before you’re stuck with a floppy handle.
Next, avoid spraying harsh lubricants (like WD-40) directly into the lock. Instead, use a graphite lock lubricant or a silicone spray designed for handlesets. This keeps things smooth without gumming up the spring or electronics.
If your lock is a smart model—requiring a code, battery, or sync—make sure to change batteries and update firmware when suggested. Battery leaks and firmware bugs can mimic or hide return spring problems, especially on Yale or Schlage connect models.
Finally, keep the handleset clean and dry. Dirt, moisture, or pet hair (!) can make their way inside over time, messing with both mechanical and electronic parts. Quick wipe-downs and a yearly check inside the mechanism are usually all it takes.
Closing Thoughts: Handle With Care
Diagnosing a problem with a handleset’s lever return spring might sound technical, but once you know what to look for, it’s a pretty logical process. The humble return spring is easy to overlook but makes all the difference in how your door feels and functions—whether you’re using a simple mechanical lock or a high-tech smart model.
If your lever’s lost its pep, don’t rush to replace the whole lock or reset your code—start by checking that spring. With a careful inspection, the right part, and a patient hand, you’ll have your handleset working like new again. And who knows? Next time, you’ll be the one helping a friend diagnose their own droopy lever over a cup of coffee.