Many doors, whether it’s your front door or a closet door, rely heavily on these hinge bearings to function properly. When they start causing issues, it can feel like a silent alarm ringing in the background. So, let’s walk through everything you need to know to pinpoint the problem with your door hinge bearing and get it back on track.
Recognizing the Signs of an Invisible Hinge Problem
Before diving into diagnosis, it’s essential to recognize the signs that something’s not right. If your door is sticking, creaking, or misaligned, these could all be signs of a hinge issue. But here’s the thing: the problem isn’t always upfront. Sometimes, it’s about what you can’t see.
– Creaking Sounds: If your door makes a squeaky noise, it’s like the hinge bearing is begging for attention, similar to a dry joint on a bike. This is often the first indication that something’s off.
– Sticking or Dragging: When a door sticks, it might be due to the hinge bearing not allowing for smooth movement. Think about it like trying to run with shoes that are too tight—it just doesn’t work well!
– Misalignment: If your door isn’t sitting flush in the frame, one of the hinge bearings could be damaged or misaligned. This might feel like a puzzle piece that doesn’t quite fit.
Understanding these signs can save you a lot of time and headaches down the line.
Gathering Your Tools for Diagnosis
Once you’ve recognized potential symptoms, it’s time to gather your tools. You don’t need a full toolbox for this—just a few essentials to help you get started.
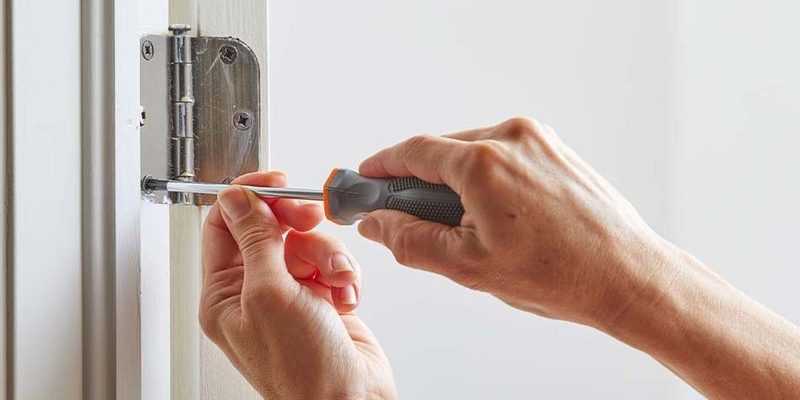
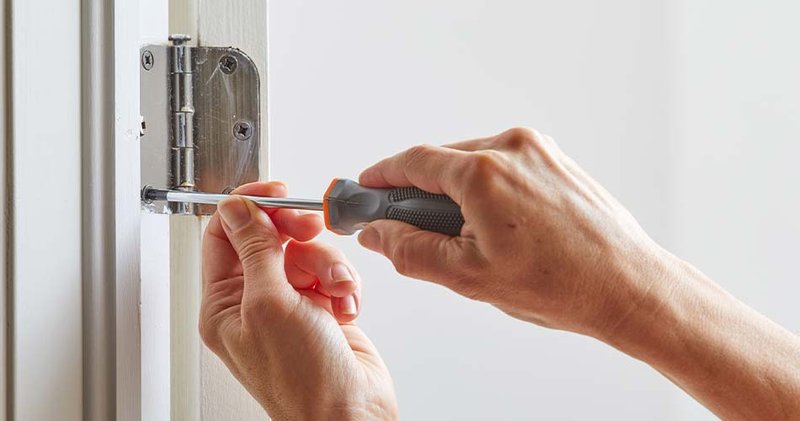
– Screwdriver: Depending on your hinge type, a Phillips or flathead screwdriver will be crucial for removing screws and adjusting hinges.
– Lubricant: A good lubricant can work wonders. You might use a silicone spray or even WD-40 to eliminate any sticking.
– Level: This tool helps check if your door is appropriately aligned. A level can reveal if the door is hanging at an angle due to a faulty hinge.
– Flashlight: Sometimes, those invisible issues could be hiding in dark corners. A flashlight helps you see everything clearly as you inspect the hinge.
With these tools in hand, you’ll be ready to dive deeper into diagnosing the problem.
Inspecting the Hinge and Bearing
Now for the nitty-gritty! Inspecting the hinge and bearing closely is crucial. What exactly do you need to do? Here’s a step-by-step guide:
1. Remove the Door: If possible, take the door off the hinges. This lets you see the hinge bearing up close. It might feel like unscrewing a bike tire to check the spokes.
2. Look for Damage: Check if the hinge is rusted, bent, or cracked. Any visible damage can indicate that the bearing needs replacing.
3. Check the Lubrication: Sometimes the issue might just be a lack of lubrication. If the hinge looks dry, that’s an easy fix. Apply your lubricant generously and wiggle the hinge back and forth to work it in.
4. Inspect the Bearing: If the hinge has a bearing that feels rough or doesn’t spin freely, it might be the culprit. You can replace the bearing entirely if necessary.
This step is about being thorough. As you assess the hinge, think about how every part works together, like family members contributing to the household.
Adjusting Misalignment Issues
If your door was sticking or dragging, it might be suffering from misalignment. Here’s how you can address that:
– Loosen the Hinge Screws: Using your screwdriver, gently loosen the screws on the hinge. This allows you to adjust how the door sits.
– Shift the Door: Carefully adjust the door up, down, or sideways to ensure it fits into the frame correctly. Think of it as adjusting the sails on a boat to catch the wind just right.
– Retighten Screws: Once you’ve got the door in the right position, retighten the screws. Don’t overdo it, though; overtightening can cause more problems down the road.
This adjustment process can make a world of difference. If you notice any improvement after making these changes, it’s a clear sign you’re on the right path.
Testing Everything Thoroughly
After you’ve completed your adjustments and repairs, it’s time for some thorough testing. You’ll want to ensure everything’s working as it should. Here’s how to do a proper test:
1. Open and Close the Door: Do this several times to check for smooth operation. If it glides effortlessly, you’re likely in the clear.
2. Listen for Noises: Pay attention to any squeaking or grinding sounds. Silence is golden, so if it’s quiet, that’s a good sign!
3. Check Alignment Again: Use your level to ensure the door remains straight after your adjustments. This final check helps confirm that all is well.
Taking the time to test your work helps you proudly say, “I fixed it!”
When to Call in a Pro
So, what happens if you’ve followed all the steps and the problem persists? Sometimes, despite our best efforts, it’s necessary to call in a professional. Here are signs that it’s time for expert help:
– Severe Damage: If the hinge is broken or the frame is warped, it’s often more than a simple repair. Professionals can assess and fix structural issues safely.
– Repeated Issues: If you keep facing the same problems, it might signify a deeper issue, like underlying alignment problems, that require expert tools and skills.
– Lack of Confidence: If you’re feeling unsure, it’s better not to risk making things worse. Sometimes it’s best to let the experts handle it.
Knowing when to step back can save you time and money in the long run.
Maintenance Tips for Future Reference
Now that you’ve tackled diagnosing a door hinge bearing issue, let’s talk maintenance to avoid future headaches. Here are some straightforward tips:
– Regular Lubrication: Make it a habit to lubricate your door hinges every few months. It’s like giving your door a little spa day.
– Inspect Periodically: Set a reminder to check door operations. Just a few minutes every few months can prevent bigger problems.
– Watch for Changes: If you notice any unusual noises or difficulties, address them early. It’s often easier to fix small issues than wait for them to escalate.
By following these tips, you can prolong the life of your door and its hinges, ensuring smooth and quiet operation.
In conclusion, diagnosing a problem with a door hinge bearing that’s invisible might seem tricky, but with a little attention and the right tools, you can often pinpoint and fix the problem yourself. Remember to listen to your doors, inspect regularly, and give them the care they need. You’ll save money in repairs and enjoy the simple pleasure of smooth, quiet operation every time you walk through.