Here’s the thing: diagnosing a leaking threshold isn’t always straightforward. Water doesn’t announce itself. It can sneak in around edges, underneath weatherstripping, or even through tiny cracks that are hard to see. Sometimes the leak only shows up during a heavy rain or after you wash the porch. You don’t need to be an expert or own a fancy toolkit—just a little patience and the right steps.
Why A Door Threshold Might Leak Even When Closed
Let me explain why water gets through even when you think everything is sealed. A door threshold is the strip at the bottom of your door frame—the part you step on when you enter or leave. It’s designed to keep outside elements like wind, dirt, and moisture out. But thresholds can wear down over time. Think about all the shoes, paws, and deliveries that pass by. Small gaps grow bigger, and even a minor misalignment can let water sneak inside.
Weatherstripping—the spongy or rubber seal that runs along the bottom of most doors—is another important player. If it’s cracked, flattened, or missing chunks, water can dribble through. And it doesn’t help that older doors often weren’t built with the tight tolerances of today’s models, like those from Pella or Andersen. Combine that with warped wood or a settled house, and you’ve got a recipe for leaks.
It’s also possible the leak isn’t coming from below at all. Sometimes rain blows sideways or puddles accumulate outside, finding their way through the tiniest cracks between the door and frame. I’ve seen cases where the real problem was a clogged porch drain, not the door itself. Water always follows the path of least resistance, so if it finds a tiny entry point, it’ll use it.
How To Spot Signs Of A Leaking Door Threshold
You might be wondering: how can you tell if your threshold is actually the culprit? Water doesn’t always leave an obvious puddle. Instead, look for subtle clues:
- Water stains or discoloration on the floor near the door—this often shows up as dark lines along hardwood or warped laminate.
- Soft or swollen wood in the threshold, door frame, or molding—run your fingers along these areas to check for mushiness.
- Mildew or musty smells, especially after rain—moisture trapped under a rug or mat is usually a giveaway.
- Drafts or cold spots by the bottom of the door—if air is getting in, water probably can too.
Sometimes, you’ll only see evidence during or after a storm. If you suspect a leak, try laying down a paper towel or dry rag right inside the door before the next rain. If it gets damp, you’re on the right track. Don’t overlook edges, corners, or the seams where the threshold meets the frame.
Testing For Leaks: Simple At-Home Methods
Honestly, you don’t need any fancy equipment to diagnose a leaky threshold. There are a few hands-on tricks that work well:
- The flashlight test: At night, have someone shine a flashlight along the outside bottom of the closed door. If you see light coming through cracks from the inside, water can get in too.
- The water hose test: Gently spray water (not a power-washer!) along the bottom edge of the door. Check inside immediately for drips or moisture. Work section by section—start at one end and move slowly across.
- The dollar bill test: Close the door on a dollar bill or slip of paper. If you can pull it out without any resistance, that seal isn’t tight enough to keep water out.
If you notice spots where water is getting through, mark them with tape so you don’t lose track. Easing into this like detective work gives you the best shot at finding the root cause—not just chasing symptoms.
Common Causes of Leaking Door Thresholds
Here’s where things get interesting. Not all leaks are caused by the same issue, and sometimes it’s a mix of small problems that add up. Here’s what I see most often:
- Worn weatherstripping: Over time, the soft seal under your door gets compressed or breaks down. When it’s no longer springy, it can’t block out water.
- Warped or damaged threshold: Wood thresholds can rot, swell, or crack, especially if they’re exposed to moisture. Metal ones can develop corrosion or gaps over time.
- Improper installation: A threshold that isn’t level, or is set too low or high, can’t create a proper seal when the door closes.
- Poorly sloped entryway or porch: If water pools against the door, even the best threshold might lose the battle—think of a sandbag against a rising river.
- Missing or damaged door sweep: That skinny strip at the bottom of the door does more than you’d think. If it’s torn or missing, fix that first.
You might find your leak is a combination—maybe the weatherstripping is shot and there’s a small dip in the porch slab. Start with the most obvious issues and work your way down the list.
Step-By-Step: Diagnosing Your Leaking Threshold
Let’s walk through a clear, step-by-step process to figure out exactly where your leak starts:
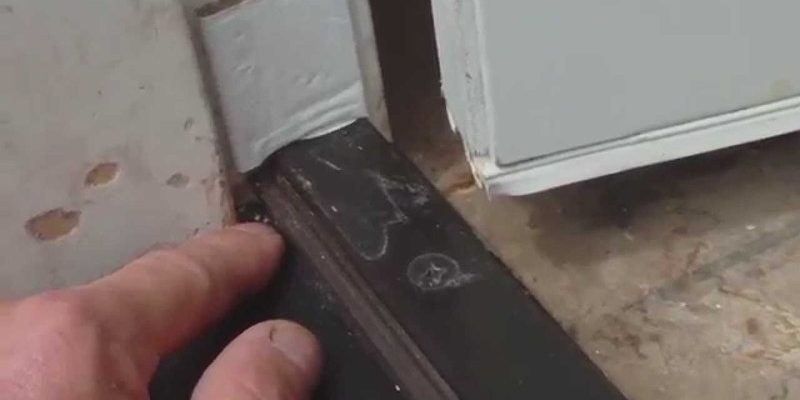
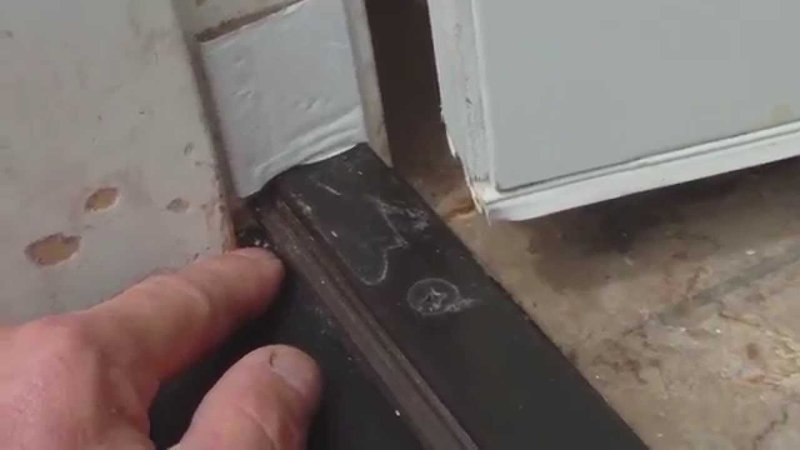
- Step 1: Inspect The Area
Open the door and look closely at the threshold, the weatherstripping, and the bottom of the door itself. Use a flashlight to spot worn areas, cracks, or missing pieces. - Step 2: Clean The Threshold
Dirt and debris can hide trouble spots. Sweep and wipe down the area so you’re not missing anything important. - Step 3: Run The Hose Test
With someone inside, gently spray water along all parts of the threshold and bottom frame. Watch for leaks or drips on the inside. Go slow—sometimes water takes a minute to show up. - Step 4: Check The Slope And Exterior
Stand outside and look at how the ground or porch slopes towards or away from the door. If water pools up right against it, you’ll need to address drainage to solve the problem for good. - Step 5: Test The Seal
Use the dollar bill trick or your hand to feel for drafts. A tight seal should grab onto the paper or stop air movement entirely.
Keep notes as you go—if one section seems especially leaky, you’ll know where to focus your repair efforts.
Fixing vs. Replacing: What’s The Right Move?
You might be thinking, “Does this mean I need a new door?” Not necessarily. Small leaks are often easy DIY fixes. For example:
- Replace weatherstripping: Most brands, including Andersen and Masonite, offer replacement kits that are cut-to-fit. Peel off the old strip and press the new one into place.
- Install a new door sweep: This is a thin rubber or bristle strip that screws onto the bottom of the door—not expensive or hard to swap out.
- Seal gaps with caulk: For minor cracks between the threshold and the frame, a bead of exterior-grade caulk can block water. Make sure to use the right kind for the material (wood, metal, or composite).
If the threshold itself is rotten, warped, or loose, replacement is the way to go. It’s a bit of a project but not impossible for a handy homeowner. Universal thresholds are easy to find at hardware stores, but if you have a branded door system (like from Therma-Tru), look for a direct replacement to match color and fit.
When To Call A Pro (And Why It Might Save You)
Sometimes, leaks are stubborn or the fix is beyond what you want to tackle. If you’ve tried all the basic troubleshooting steps and water still gets inside, or if you see major wood rot or mold, bring in a pro. A licensed contractor can figure out if the leak is caused by hidden framing issues, improper door installation, or bigger drainage problems outside.
Honestly, paying a little for a professional diagnosis can save you a lot of headache (and money) in the long run. I’ve seen folks replace their weatherstripping three times before realizing the slab under their porch was tilted the wrong way. Don’t be afraid to ask for help if you’re stuck or worried about making things worse.
Preventing Leaks After Repair: Easy Maintenance Tips
Once you’ve solved the leak, a little preventative care goes a long way. Here are a few habits that help:
- Inspect weatherstripping twice a year—before rainy seasons and after winter.
- Clean thresholds and channels regularly so dirt doesn’t jam up the seal.
- Check that door sweeps are snug and undamaged. Replace them at the first sign of wear.
- Keep gutters and drains clear so water never pools up outside your door.
If you ever notice the telltale signs—musty smells, a damp floor, or a draft—don’t wait. Quick troubleshooting can often stop a small problem from turning into a big (and expensive) one.
Water will always find the easiest path. With a little attention and the right troubleshooting, you can make sure that path isn’t through your front door.
Wrapping Up: Staying Dry, One Threshold At A Time
Dealing with a leaking threshold can feel like an unsolvable puzzle, especially when your door looks closed up tight. But armed with a little patience and some simple troubleshooting techniques, you’ll be able to figure out where the water is sneaking in—and stop it for good. Whether you’re working with a universal door setup or navigating the quirks of your favorite brand, the key is to move step by step, watching for clues and double-checking your work. Your floor (and your socks) will thank you.