
Cutting a kick plate might sound intimidating, but with the right tools and a bit of patience, it’s actually pretty straightforward. You don’t need a full woodworking shop or fancy metalworking equipment. Most folks tackle this project with simple tools found in a well-stocked garage. Whether you’re working with brass, aluminum, or stainless steel, the process is about measuring twice, cutting once, and giving your door that sturdy, polished look. Let’s break down how you can cut a kick plate to the exact size you need—and avoid the usual headaches along the way.
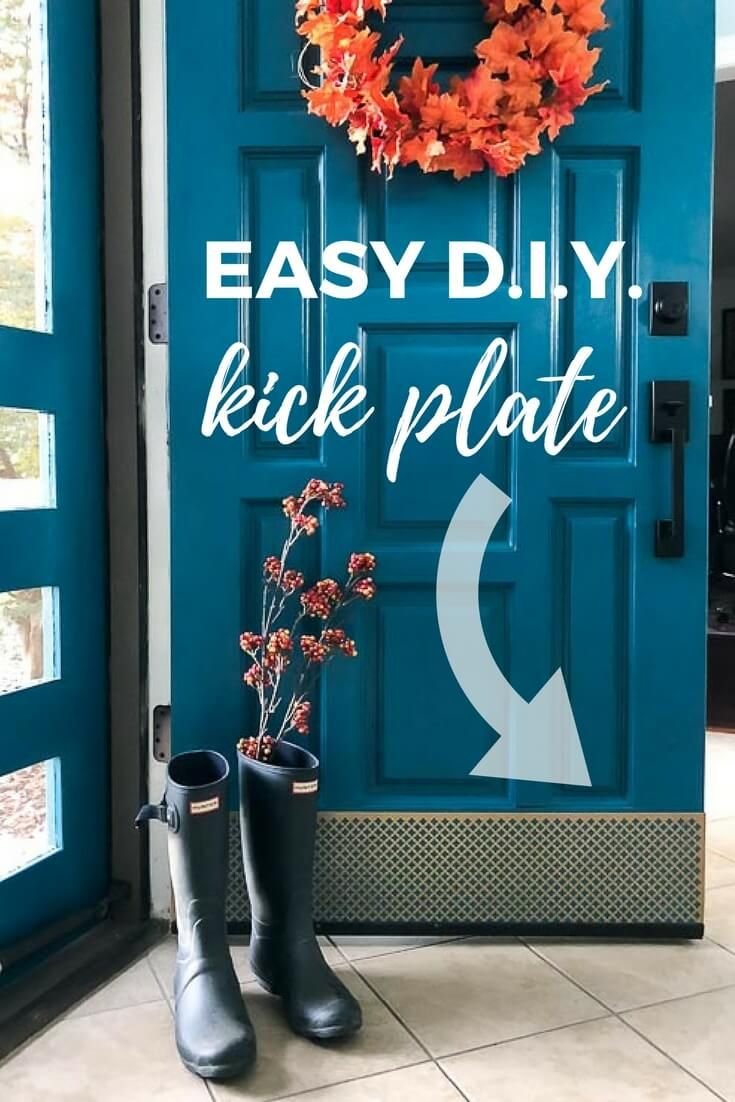
Why Would You Need a Custom-Sized Kick Plate?
You might be wondering why anyone would bother cutting a kick plate instead of just buying a standard size. Well, many doors—especially older or custom-built ones—don’t follow modern size rules. That means a store-bought kick plate might be too tall, too short, or just not wide enough to cover all the scuffs and scratches you want to hide. Gaps and overhangs don’t just look awkward; they can let in water or trap debris, which defeats the whole purpose.
Honestly, it’s about making the plate fit *your* door, not the other way around. A custom-sized kick plate matches your door’s exact width and height, so it sits flush and looks like it was designed with the door from day one. If you’re picky about details (and most DIYers are, let’s be real), this kind of precision matters. Plus, cutting your own lets you choose the metal and finish you prefer—brushed brass, shiny stainless, sleek aluminum—rather than settling for whatever is on the shelf.
Some people also want a kick plate for unique shapes or decorative cutouts, especially if you have a door with panels or raised moldings. In these cases, only a custom cut will do the trick. You’re not just protecting your door; you’re giving it a little bit of personality, too.
Choosing the Right Material for Your Kick Plate
Before you reach for your saw, you’ll need to pick which metal to use for your kick plate. Here’s the thing: each material has its own pros, cons, and cutting quirks.
Brass is the classic choice. It’s sturdy, corrosion-resistant, and adds a warm, golden look to your entryway. However, brass can scratch if you use the wrong tools, so you’ll want to be gentle when cutting and handling it.
Stainless steel is the go-to for modern homes. It’s tough, shiny, and shrugs off rust and weather. But let me warn you—it’s harder to cut than brass or aluminum. If you’re trying this for the first time, aluminum might be friendlier. It’s lightweight, easy to cut, and resists corrosion.
If you’re feeling adventurous, you might even consider copper for a bold, reddish look, though it’s not as popular for high-traffic doors. No matter what you choose, make sure the metal isn’t too thick; most ready-made kick plates are only about 1/16-inch thick, which is plenty strong without being a nightmare to cut.
Remember, the finish matters, too. A brushed or matte finish hides small scratches and fingerprints, while polished metals show every little mark. If you want low maintenance, stick with brushed stainless or anodized aluminum.
Measuring Your Door for a Custom Kick Plate
Let me explain—measuring is the most important step, hands down. Even a perfect cut won’t save you if the plate ends up too big or too small. Start by closing your door completely. Use a tape measure to get the full width of the door at the bottom, from edge to edge.
- Width: Subtract about 1/8 inch from the actual width you measure. This gives you a little wiggle room so the plate won’t get caught on the door frame.
- Height: Most kick plates are 6″, 8″, or 10″ tall. Pick what looks right for your door and the amount of coverage you want. If you’re hiding lots of old dings, don’t be shy—go taller.
Once you have your numbers, mark them clearly on the metal (use painter’s tape for a temporary guideline). Double-check everything before you even think about cutting. Honestly, it’s worth measuring twice—or three times—just for peace of mind.
If your door has panels or special moldings at the bottom, lay the kick plate material against the door and trace the outline. That way, your custom cut will fit snugly around the raised parts. Always mark which side will face out. It’s easy to get turned around and cut the wrong end, especially if you’re working late or listening to a podcast while you work.
Which Tools Do You Need to Cut a Kick Plate?
You don’t need a professional metal shop to cut a kick plate, but the right tools make all the difference. Here’s a breakdown of what works best:
- Tin snips: These are like heavy-duty scissors for thin metals. Get a sharp pair; they’re ideal for aluminum and thin brass.
- Hacksaw: For thicker metals, a hacksaw with a fine-tooth blade gives you more control and makes straight cuts.
- Jigsaw with a metal-cutting blade: If you need to cut curves or unusual shapes—say, for a paneled door—this is your best bet.
- File or sandpaper: Metal edges after cutting can be sharp or rough. Use a metal file or coarse sandpaper to smooth everything out so you won’t snag socks or fingers.
- Clamps and a sturdy work surface: Clamp the metal down before cutting. A workbench or a couple of sawhorses are ideal.
- Safety gear: Don’t skip the safety glasses and gloves. Metal shavings can be nasty, and sharp edges don’t play nice with skin.
Honestly, if you only have basic tin snips and some sandpaper, that’s enough for most DIY jobs. Specialty tools like rotary cutters aren’t necessary unless you’re working with really thick or decorative metals.
Step-By-Step: How To Cut a Custom-Sized Kick Plate
Let’s walk through the whole process together, from unwrapping the metal to making that final, satisfying cut.
- Mark your cut lines: Place painter’s tape along where you’ll cut—it’s easier to see and helps prevent scratches. Mark your measurements directly on the tape.
- Clamp the metal down: Set the kick plate material on a solid, flat surface and clamp it securely. This keeps things steady and stops the metal from flexing while you work.
- Make the first cut: If you’re using tin snips, start at one corner and make long, even cuts along your line. For a hacksaw, go slow—short, smooth strokes work better than rushing. With a jigsaw, keep a steady hand and don’t force the blade.
- Check the fit: After your first cut, hold the kick plate up to the door. If it’s a little too big, you can always trim more, but you can’t add metal back once it’s gone.
- File sharp edges: Run a metal file or sandpaper gently along the edges. Take your time—smooth edges look professional and prevent injuries later on.
If you need to add notches or curves for moldings, go slowly with a jigsaw and test-fit as you go. It might take a few tweaks to get everything lined up, but that’s all part of the custom process.
If you make a mistake, don’t panic! You can usually sand away rough spots or hide tiny gaps with caulk or trim. DIY is about progress, not perfection.
How To Attach Your New Kick Plate
Cutting the plate is half the job; installing it is the real test. You can use either screws or heavy-duty adhesive. Here’s how to do both:
- With screws: Most metal kick plates come pre-drilled, but since you cut yours, you’ll need to drill holes about every 8 inches. Mark the spots, then use a metal bit and drill slowly to avoid scratching the finish. Hold the plate in place, insert the screws, and tighten until snug—but don’t overtighten, or you could warp the plate.
- With adhesive: For a clean look with no visible fasteners, use a strong construction adhesive (like Liquid Nails for metal). Spread a thin, even layer on the back, press the plate onto the door, and hold it in place with painter’s tape until it sets. Check the adhesive’s instructions for drying time.
Pro tip: Stick little rubber bumpers or thin foam tape behind the bottom corners. This cushions the plate and keeps moisture from seeping behind it. It also helps avoid any annoying rattling when the door closes.
Common Problems and Easy Fixes
Even a simple DIY job can throw a curveball sometimes. Here are a few common issues with custom-sized kick plates and some quick troubleshooting tips:
- Uneven cuts or wavy edges: Don’t stress if your cuts aren’t ruler-straight. Use a metal file to even things out, or cover rough edges with a slim length of metal trim.
- Scratched or marred finish: Some scratches polish out with a fine abrasive pad, especially on brushed metals. For deeper marks, try a metal polish or touch-up paint (just check for color match first).
- Kick plate doesn’t sit flat: If the plate bows out, remove it and gently bend it back against a flat tabletop. For stubborn warps, adding a few more screws or smearing extra adhesive can help hold it in place.
- Drilled holes too large: If you made a drilling error, use a washer behind the screw head or fill the hole with a dab of adhesive before tightening.
Patience goes further than perfectionism. Most small flaws won’t show once the plate is installed and in daily use. As long as it protects your door and looks the way you want, consider it a win.
Is Cutting a Custom Kick Plate Worth It?
You might be thinking: “Why bother cutting a kick plate myself when I could just buy a pre-cut one?” Here’s my take—customizing your kick plate means you get a perfect fit, the look you want, and some solid DIY satisfaction. Store-bought plates might be a shortcut, but they rarely match up to a carefully measured, hand-cut solution.
Honestly, the process is pretty forgiving. You’ll pick up some basic metalworking skills, learn how to handle tools safely, and end up with something you made yourself. That’s hard to beat. If you ever switch doors, you’ll know how to cut and install a new plate in no time.
If you’re short on time or tools, a local hardware shop can usually cut metal to size for a small fee. But doing it yourself is straightforward and budget-friendly, and it’s one of those home improvement projects that pays off every time you kick the door open with a muddy boot.
Aftercare: Keeping Your Kick Plate Looking Sharp
Once your custom-sized kick plate is installed, it’ll take care of your door—but it also needs a little TLC now and then. Here’s how to keep it looking good for years:
- Wipe it down with a soft, damp cloth every couple of weeks. This removes dirt, dust, and salt if you live in a snowy area.
- If you chose brass or copper, an occasional polish will keep it shiny. For stainless steel and aluminum, just stick to mild soap and water.
- Avoid harsh chemicals or abrasive scrubbers—they can scratch or dull the finish. If scuffs appear, a magic eraser or non-scratch sponge usually does the trick.
- Check for loose screws once a year, especially if your door gets a lot of action. Tighten as needed to avoid rattling or shifting.
With regular care, even a basic metal kick plate can handle years of foot traffic and still look brand new. It’s one of those tiny improvements that actually makes daily life easier and your home a little bit brighter.
If you went the DIY route, you’re not just protecting your door—you’re showing off a bit of handiwork every time someone visits. Whether you went with sleek aluminum or classic brass, your door’s armor is ready for anything.