You might be wondering why someone would want to make this change. Well, modern bore hole knobs are generally easier to install, offer a cleaner look, and often come with better security features. Plus, if you’re looking to boost your home’s style, this conversion might just do the trick. Imagine walking through your front door and feeling proud of that sleek, eye-catching knob welcoming you home. Doesn’t that sound nice?
Understanding Mortise Locks and Bore Hole Knobs
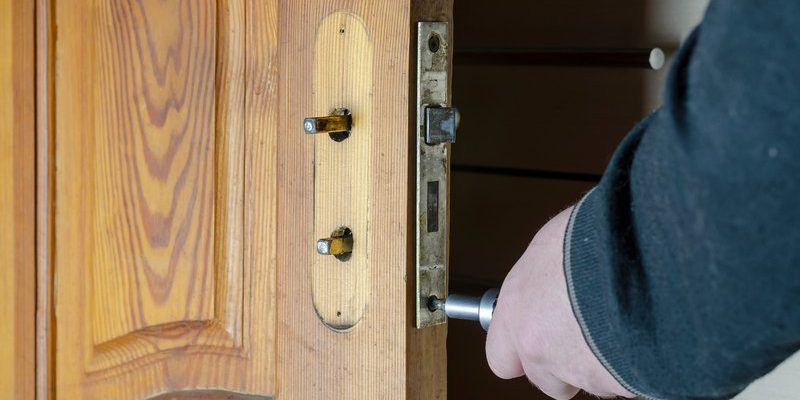
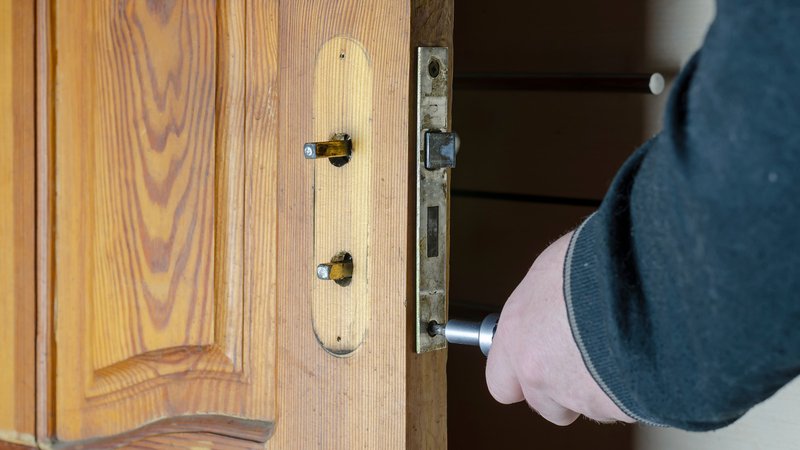
Before we start the conversion, let’s clarify what we’re dealing with. Mortise locks are rectangular boxes that sit inside the door. They usually have a flat keyhole and a thumb latch on the other side. This design is incredibly secure but can make it tricky when you want to switch to a modern knob. In contrast, bore hole knobs are simple—typically round knobs that fit into a single hole in the door and secure with screws.
The difference comes down to design and functionality. Mortise locks require a bit more work to install because they’re built into the door. Bore hole knobs, on the other hand, are straightforward—just drill a hole, insert the knob, and you’re set. It’s pretty much like upgrading from a flip phone to a smartphone, with all the bells and whistles included.
Tools and Materials Needed
To make this conversion, you’ll need some tools and materials. Here’s a quick list to get started:
- Screwdriver (flathead and Phillips)
- Drill with appropriate drill bits
- Chisel (for any additional adjustments)
- Bore hole knob set (make sure it matches the look you want)
- Measuring tape
- Safety goggles (to protect your eyes while drilling)
Gather these items before you start. You certainly don’t want to be hunting for a screwdriver halfway through the project. It’s best to be prepared, just like bringing along snacks for a road trip—you never know when you’ll need them!
Removing the Mortise Lock
Now, let’s get to the fun part—removing that old mortise lock. Here’s how you can do it:
1. Unscrew the Lock: Locate the screws on the faceplate and use your screwdriver to carefully remove them. Keep these screws handy; you never know when you might need them later.
2. Detach the Handle: Once the screws are out, gently pull the handle from each side of the door. You might need to wiggle it a bit, but be patient; it should come free.
3. Pull Out the Mortise Lock: After you’ve detached the handle, you should see the mortise lock. Carefully slide it out of the pocket in the door.
4. Fill the Old Holes: You may need to fill the old screw holes with wood filler if they’re exposed. This helps create a clean surface for your new knob.
Removing the mortise lock is like peeling off an old band-aid—it may take some tugging, but the relief of having a clean slate is worth it!
Preparing the Door for the Bore Hole Knob
With the mortise lock out, it’s time to prepare the door for the bore hole knob. Here’s what to do:
1. Measure the Height: Typically, bore hole knobs are placed around 36 inches from the ground. Use your measuring tape and mark this height on the door.
2. Mark the Center: Once you have your height, measure and mark the center for the bore hole. This is crucial for a straight, professional-looking installation.
3. Drill the Bore Hole: Using your drill, carefully create a hole at the marked center. Start with a smaller bit to create a pilot hole, then switch to a larger one that matches the knob’s specifications.
4. Chisel for Clean Edges: If the hole needs to be a bit larger or cleaner, use your chisel to make adjustments. This step helps ensure that the knob fits snugly and doesn’t wobble.
This preparation stage is like getting your canvas ready before you paint—taking your time here will pay off in the final result.
Installing the Bore Hole Knob
Now that the door is prepped, let’s install your new bore hole knob. Follow these steps:
1. Insert the Knob Mechanism: Take the inner mechanism of the knob and slide it through the hole from the inside of the door.
2. Attach the Exterior Knob: Once the inner part is in place, push the outer knob onto the mechanism. Make sure everything is aligned correctly; it should feel smooth when you twist it.
3. Secure with Screws: Use the provided screws to attach both sides of the knob securely. Give them a good tighten without overdoing it; you don’t want to strip the screws.
4. Test the Mechanism: Before you finish up, test the knob to ensure it turns smoothly and the latch engages correctly. You want to confirm it works before calling it a day.
Installing the knob is like putting the cherry on top of a sundae—satisfying and rewarding!
Final Adjustments and Tips
You’ve done a fantastic job so far, but there are a few final adjustments and tips to keep in mind:
– Align the Latch Plate: Ensure the latch plate on the door aligns correctly with the strike plate on the door frame. You may need to adjust the position of the strike plate slightly to achieve a perfect fit.
– Lubricate the Mechanism: It’s a good idea to add a little lubricant to the moving parts of the knob. This helps everything operate smoothly over time.
– Check for Security: After installation, double-check that the latch engages fully when you close the door. You want to make sure it’s secure to prevent unwanted entry.
Thinking about these final touches is like giving your favorite dish some extra seasoning—small things can make a huge difference in the overall experience!
Enjoy Your Modernized Door
Congratulations, you’ve successfully converted your mortise lock door to a modern bore hole knob! Take a moment to admire your work. Not only does it look great, but you’ve also improved the functionality of your door.
By making this change, you’re blending the charm of the past with the sleekness of modern design. Every time you walk through that door, it’ll feel like a little victory. Whether you’ve done this for practical reasons or just to freshen up your space, you should feel proud of your handiwork.
Now, sit back, enjoy the view, and know you’ve carried out a project that not only enhances your home but also boosts your DIY skills. Happy home improving!