Honestly, cleaning out debris from underneath a threshold insert isn’t something most folks plan for. It’s not glamorous DIY, but it makes a big difference: less mess, fewer drafts, and doors that actually close like they’re supposed to. If you’ve got a standard steel or aluminum threshold—think Pemko, M-D Building Products, or the countless off-brands from Home Depot—you’re in the right spot. Let me walk you through the whole process, step by step. No fancy tools or repair tech skills needed—just a little patience and a couple of household items.
Why Debris Collects Beneath Threshold Inserts
You might be wondering, “Why does junk even end up under there?” Here’s the thing: door thresholds are on the front lines of your home. Every time you open the door, dust, pebbles, and even rainwater can slip underneath—especially if there’s a gap or the weatherstripping isn’t perfect. Over time, all that stuff piles up like dust bunnies but sneakier, hidden out of sight.
Threshold inserts, especially the adjustable kind, often have tiny spaces or channels beneath them by design. These channels help drain water or allow for a tight door seal, but they also love catching debris. If you live somewhere with sand, snow, or lots of foot traffic, you’ll spot the problem sooner. Suddenly, your entryway feels a bit off—maybe the door bumps or hangs.
What makes it tricky is that debris under a threshold isn’t always visible from above. You might notice the symptoms—cold air, bugs getting in, or that telltale crunchy feeling underfoot. But the source is sneaky, almost like your home’s version of a sock stuck behind the dryer.
Ignoring it doesn’t make the problem go away, either. Dirt can warp the insert, mess with your seal, or even damage the floor underneath. So it’s worth learning how to find and fix the gunk before it causes bigger headaches.
Signs You Need To Clean Your Threshold Insert
Most people don’t set their weekend plans around threshold cleaning, so it’s easy to overlook. But your threshold will usually give you a few hints when it’s time to deal with the debris underneath.
- Your door isn’t closing like it used to. Maybe it sticks, makes a strange noise, or won’t seal up tight. That’s classic debris build-up causing interference.
- You feel drafts or see light coming under the door. Gaps mean junk is holding things open—or your old weatherstripping is suffering.
- There’s a gritty, crunchy sound when you step on or over the threshold. That’s never normal. Even with shoes on, you’ll notice it after a while.
- You spot dirt, leaves, or sand collecting near the threshold—especially after storms or heavy foot traffic.
Here’s a weird one: if you notice bugs crawling right through the base of your door, they might be using debris as a ramp. And if you try to code, sync, or reset an electronic threshold (smart home folks, I see you), sometimes built-up dirt under the insert can interfere with sensors or the battery compartment.
The bottom line is, if your door area just feels messier or breezier than it used to, it’s probably time to check underneath that threshold insert.
Tools You’ll Need For Cleaning A Threshold Insert
You don’t need a pro tool kit—honestly, a few basics will do the trick. Most threshold inserts come out easily and snap right back in. But having the right stuff on hand makes the job faster and cleaner.
- Flathead screwdriver or small pry bar—for gently lifting out the insert without scratching your floor or frame.
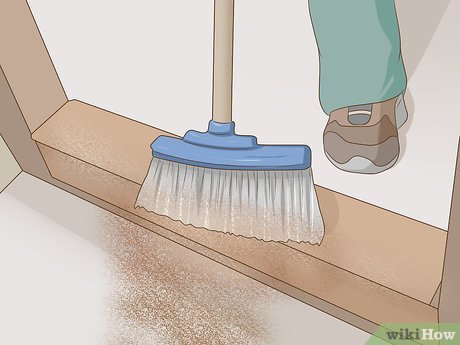
- Handheld vacuum or shop vac—to suck up loose dirt, crumbs, and sand right away.
- Old toothbrush or small wire brush—for scrubbing channels and tight spaces.
- Damp rag or paper towels—to wipe away any leftover grime or sticky residue.
- Household cleaner (optional)—for really stubborn dirt or mildew on the metal or rubber parts.
If you’ve got an adjustable threshold (with screws on top), keep a Phillips screwdriver nearby. Some newer brands like Pemko or M-D even let you remove inserts without any tools, which is a small win for all of us.
You definitely don’t need fancy cleaning code, a special battery, or electronic gadgets for this job. Just use gentle pressure and patience, and you’ll get a professional result every time.
Step-By-Step: How To Clean Out Debris Underneath A Threshold Insert
Let’s break it down so you know exactly what you’re doing. If you’ve never cleaned a threshold insert before, don’t stress—all it takes is a little time and attention. Here’s a no-nonsense walkthrough.
Tip: If you’re worried about damaging your door, lay a towel nearby to catch small debris and protect paint or flooring.
1. Remove the threshold insert.
Most inserts lift right out. Use your flathead screwdriver to gently pry up a corner, starting at the edge nearest to the door’s hinge. If it’s stubborn, wiggle the tool back and forth—just don’t force it. Some inserts have visible screws; loosen these first.
2. Clean out the debris.
Now you’ll see where all that dirt’s been hiding. Use your handheld vacuum to suck up dust, sand, and bigger bits first. For stubborn junk stuck in grooves, grab your old toothbrush or a small wire brush to scrub it free.
3. Wipe down the surfaces.
Dampen a rag or some paper towels and wipe the area under the insert until it’s clean. If you spot anything sticky or grimy, a touch of household cleaner helps. Don’t forget the underside of the insert itself—sometimes that’s where the worst crud hides.
4. Inspect for damage.
Before you put everything back, check for rust, cracked rubber, or worn weatherstripping. If anything looks bad, now’s the time to replace it—better safe than sorry.
5. Reinstall the threshold insert.
Line it up and press it firmly back into place. If you removed screws, tighten them securely. Give the door a test swing—no more grit, sticking, or draft? Success.
If your threshold is adjustable, give the screws a quarter-turn up or down if needed, just to make sure the seal is still even.
Troubleshooting Common Threshold Insert Problems
Sometimes cleaning out debris isn’t the end of the story—especially if your house is older, or if you notice issues even after a good scrub. Here’s what to watch for:
- If the threshold insert feels loose or wobbly when you step on it, double-check that you’ve reinstalled it correctly. Some inserts have little clips or tabs underneath—make sure those are secure. If one’s broken, you may need a replacement insert (luckily, most brands sell them separately).
- If the door still isn’t sealing, inspect the weatherstripping both on the door and underneath the threshold. Over time, this rubber or foam can flatten out, crumble, or peel. Swapping in a new strip is easy and fixes drafts fast.
- If water is still getting inside, you might have a bigger issue like a warped subfloor or a threshold that’s too low. Some adjustable thresholds let you raise the center by turning a screw—check your brand’s instructions if you have this type.
- If you have a smart threshold (with sensors for automated doors or security), take a quick look at the code, sync, or battery compartment. Debris can sometimes block these features, so a careful wipe-down inside those areas does wonders.
If you feel stuck, don’t be afraid to Google your exact door brand and “threshold insert troubleshooting”—chances are, you’re not alone, and there’s a quick fix.
Preventing Debris Build-Up In The Future
Here’s the annoying part: even after a deep clean, dirt will try its hardest to sneak back under your threshold insert. But you can make things easier on yourself next time with a few simple habits.
- Sweep or vacuum your entryway often. Keeping the area just outside your door clear of leaves and dirt really does help.
- Check the weatherstripping every few months. If it’s looking thin or worn out, replace it before debris can slip through.
- Use entryway mats. Place one outside and one inside—catching dirt before anyone steps over the threshold.
- Seal up any floor gaps. If there’s a visible space between the threshold and your floor, a bead of caulk or a new insert may help stop future messes.
Think of it like cleaning out your dryer lint trap. A couple minutes every now and then saves you a ton of hassle (and possibly a big repair bill) later.
Comparing Different Types of Threshold Inserts
If you’re curious about what kind of threshold insert you have—or wonder if a different style would help—you’re in good company. Not all inserts are created equal, and some are easier to clean or replace than others.
- Basic metal or aluminum inserts: These are sturdy, affordable, and common in older homes. They usually pop out for easy cleaning but can dent or corrode over time.
- Rubber or vinyl inserts: These offer a softer seal and are great at keeping drafts out, but they may crack or flatten after years of use, leading to more debris sneaking underneath.
- Adjustable threshold inserts: These have screws on top so you can raise or lower the central portion. Brands like Pemko and M-D Building Products love this style, and they’re fantastic for fine-tuning your door seal. Cleaning is just as easy—just make sure to reset (tighten) everything when you’re done.
- Electronic or smart threshold inserts: Not common in residential doors (yet), but if your home’s tech-savvy, you might find battery compartments or code-based sensors tucked under the insert. Clean gently around these—moisture or debris can mess with syncing and performance.
If you ever need to replace your insert, universal models work with most standard doors—but it’s always smart to double-check the size and brand before you buy. Some older or custom models may need a special order.
When To Replace vs. Clean A Threshold Insert
Cleaning can work wonders, but sometimes a threshold insert just isn’t worth saving. Here’s how to know when it’s time to throw in the towel and get a new one.
- Visible damage: If your insert is bent, cracked, or rusty—especially along the edges—it’s probably leaking air and letting debris in no matter how often you clean.
- Worn or missing weatherstripping: If the rubber edge is basically gone or feels more like sticky tape, a replacement will seal better and keep out both dirt and bugs.
- Chronic drafts or water leaks: If you’ve cleaned, adjusted, and checked everything, and you’re still dealing with leaks or cold air, upgrade to a new insert. Modern models are shockingly affordable and easy to install.
- Repeated electronic problems (for smart thresholds): If sensors keep losing sync or batteries keep dying even after cleaning, sometimes debris is just a symptom—upgrading the whole threshold may be worth it.
Think of it like resetting a glitchy remote. Sometimes troubleshooting or a quick battery change solves the problem. But if you’re forever fiddling, a total reset—aka a new insert—might just save your sanity.
Wrapping Up: Keeping Your Threshold Insert (And Entryway) Clean
A door threshold insert might seem like a small detail in home maintenance, but its job is more important than most people realize. Keeping it free of debris isn’t just about cleanliness—it’s about blocking drafts, keeping out water, and making sure your doors work smoothly every day. Whether you’ve got a basic rubber insert, an adjustable aluminum model, or even a smart threshold with sensors and battery power, a little bit of care saves a lot of trouble down the road.
So next time your entryway feels gritty or your door isn’t shutting right, remember: sometimes, the fix is as simple as popping out that threshold insert and giving it a good clean. With the right tools and a few minutes of work, you’ll keep your home comfier, cleaner, and a lot less drafty—no matter what the weather or the world throws at your doorstep.