Here’s the thing: those flexible strips under your door, often called door bottom seals or sweeps, are there for a reason. They keep out cold, dust, and pests. But when their channel gets clogged, they can’t do their job well—and cleaning out that narrow groove can feel like dealing with the lint trap from a dryer after a month of laundry. Whether you have a Pemko, Raven, or generic brand door seal, the process for cleaning the channel is pretty much the same. All you really need is a bit of patience, the right tools, and a few simple steps.
What Is a Door Bottom Seal Channel and Why Does It Get Dirty?
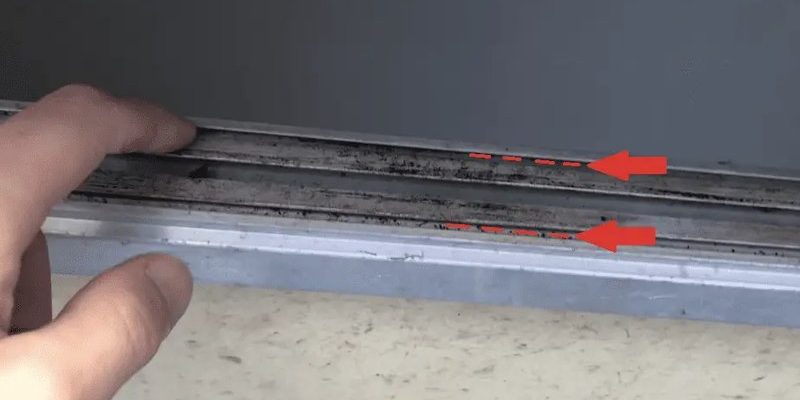
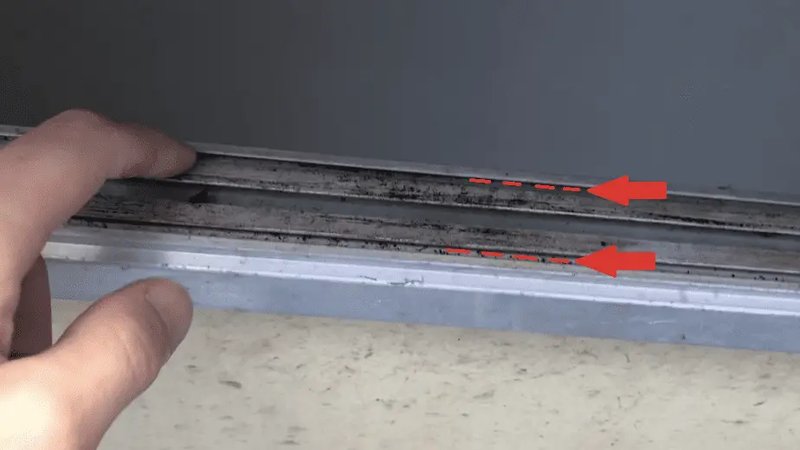
The door bottom seal channel is that little groove running along the underside of many doors, typically housing a flexible rubber or vinyl strip. You might notice it if you crouch down and look at the bottom edge—sometimes it’s a metal or plastic track, sometimes it’s just a slot cut right into the door. Its job is to tightly hold the seal in place so nothing slips past when the door is closed.
But here’s the problem: because this channel sits so low, it’s practically a magnet for anything underfoot. Whenever you sweep the floor, open the door after a muddy walk, or just go about your day, dust and debris work their way in. Over time, tiny rocks, pet fur, sand, and all sorts of grime can wedge themselves deep inside.
If left unchecked, clogged channels can do more than just look messy. Your door might not close all the way, you’ll feel drafts, or the seal could even wear out faster. In homes with lots of pets or in dusty areas, this is even more of an issue. Honestly, it’s kind of amazing how much gunk you’ll find in such a tiny space once you start poking around.
Signs Your Door Bottom Seal Channel Needs Cleaning
You might be wondering if your door seal channel actually needs cleaning—after all, it’s not something most of us check every week. Here are a few things to watch for:
- Noise: Does the door sound rough or grindy when you open or close it?
- Visible debris: Can you see dust, pet hair, or grit peeking out from the bottom?
- Drafts: Do you feel cold air sneaking in (or warmth escaping) even with the door shut?
- Trouble sealing: Is there a visible gap at the bottom, or does the seal look uneven?
If any of these happen regularly, take a closer look. Run your finger along the channel (carefully—sometimes there are sharp edges), and you’ll probably pick up a surprising amount of debris. And if you think it’s too soon to be a problem, remember: even a brand new Pemko or Raven seal can get jammed up within a month if you’ve got kids, pets, or a lot of foot traffic.
Honestly, a quick peek every couple of months can save you from bigger headaches down the road—like replacing a worn-out seal or fighting with cold drafts all winter.
Gathering the Right Tools for the Job
Let’s be real—nobody wants to spend an hour searching the garage for the right screwdriver or brush. Luckily, cleaning out a door seal channel doesn’t require heavy equipment. Most of what you need is probably in your kitchen junk drawer or cleaning cabinet.
Here’s what helps the most:
- Vacuum cleaner (with hose attachment)—great for sucking up loose dirt.
- Small brush (like an old toothbrush or paintbrush)—for scrubbing out stubborn gunk.
- Flat screwdriver or butter knife—to gently pry out the seal, if it’s removable.
- Soft cloth—for wiping down the channel after cleaning.
- Mild soap and warm water—if you need a deeper clean or there’s sticky residue.
- Flashlight—to see deep into the groove, especially in dim hallways.
Don’t worry if you can’t remove the seal—sometimes they’re fixed in place, especially on cheaper or older doors. In that case, focus on getting into every nook and cranny you can. Just be gentle, so you don’t damage the seal or the door itself.
How To Remove the Door Bottom Seal (If Possible)
Some brands, like Pemko or Raven, design their door bottom seals to slide or snap out for easy cleaning. Others are glued or stapled in, making removal tricky or impossible without tools. Here’s a safe, step-by-step approach:
- Open the door wide so you have easy access to the bottom
- Use a flat screwdriver, starting at one end, to gently pry the seal out of the channel. Go slow—forcing it can tear the rubber or bend the track.
- If the seal slides, pull it out evenly rather than yanking from one side. Wiggle it gently if it seems stuck.
- For glued or nailed seals, stop before you damage anything. It’s often best to clean these in place.
When the seal is out, take a good look at it. If it’s cracked, hard, or badly misshapen, this might be a good time to swap it for a fresh one from the same brand—or consider a universal fit if you can’t find the OEM replacement. But if it’s still flexible and not torn, a good scrub can make it almost like new.
Let me explain: in most cases, sliding or prying out the seal for cleaning gives you a much more thorough job. But if removal feels forced or risky, just clean what you can reach and save yourself the cost of a new seal.
Cleaning Out Debris from the Channel Step-by-Step
Now for the main event: cleaning out all that gunk. This is the part where a little patience goes a long way. Here’s how to do it:
- Vacuum First: Start by running your vacuum’s hose attachment along the channel. Take it slow to pull out major loose dirt, pet hair, and dust.
- Brush Out the Rest: Use your small brush to scrub inside the groove, loosening anything the vacuum missed. Tiny stones or caked-on grime often need a bit of force to dislodge.
- If you don’t have a brush handy, a folded piece of cardboard can do in a pinch.
- Wipe Down: Dampen a soft cloth with warm, soapy water and run it along the channel. Don’t soak the area—just enough to lift off remaining dust or sticky residue.
- Dry Completely: Use a dry towel to remove any moisture from the channel before reattaching the seal. Moisture left behind can foster mold or rust.
You might be surprised at the stuff you dig out during this process. One time, cleaning my own back door, I found a Lego piece, a paperclip, and enough pet hair to knit a new cat. It’s oddly satisfying to see a once-grimy groove turn spotless again.
What To Do If Debris Won’t Budge
Sometimes the debris in the door bottom seal channel puts up a fight. Maybe it’s wedged in with old grease, or there’s years of hardened mud stuck to the metal. Here are a few troubleshooting tricks:
- Try a Stiff Brush: A stiffer brush (like a small wire brush) can help scrape away tough buildup if a soft brush isn’t cutting it. Be cautious not to scratch painted or delicate surfaces.
- Soak Stubborn Spots: If the grime is sticky, dab a bit of warm, soapy water on it and let it sit for 5–10 minutes—not enough to warp the door, just to loosen the gunk.
- Use a Plastic Scraper: For really stubborn spots, a plastic putty knife works better than metal (no scratches).
- Check for Mold: If you see black, fuzzy spots, consider using a little diluted vinegar on a cloth to wipe it out—then dry thoroughly.
If you feel like nothing’s working, don’t be afraid to call it for now and come back later. Rushing it can cause damage. And if the channel is badly damaged or corroded, it might be time for a professional repair—or at least replacing the seal and track.
Reinstalling the Seal and Checking for a Proper Fit
Once everything is clean and dry, it’s time to reinstall your door bottom seal—or slide in a new one if the old seal bit the dust. This step can make or break your cleaning job, so take a bit of care with it.
- Slide or snap the seal back into the channel, making sure it lines up evenly from end to end. If it resists, double-check for leftover debris or bent spots in the track.
- Press gently but firmly so the seal sits flush—no gaps or twists. Avoid hammering or forcing, as this can split the rubber or damage the door.
- Open and close the door a few times to check for smooth movement. The seal should move without dragging or catching.
- Look for drafts or light leaks along the bottom edge. If there’s still a draft, try adjusting the seal or repeat the cleaning process if something’s still stuck.
If you upgraded to a new universal seal or a different brand (say, switching from Pemko to a generic fit), the process is basically the same. Just measure carefully and trim as needed, following the instructions that come with the new seal.
How Often Should You Clean Your Door Bottom Seal Channel?
Let’s be honest—most people don’t think about their door bottom seal channels until there’s a problem. But a little routine maintenance can make a world of difference for comfort, energy savings, and even the lifespan of the seal.
A good rule of thumb is this:
- Check every few months, especially if you live in a dusty area, have shedding pets, or kids tracking in mud.
- Tidy up before seasonal changes—spring and fall are smart times to clean, since you’ll likely be opening windows and letting in more outside air (and debris).
- Give a quick brush-out after big weather events—like rainstorms or when you’ve tracked in a lot of grit.
Regular cleaning not only keeps your door functioning smoothly, but can also help you spot wear-and-tear or potential leaks before they turn into bigger, pricier problems.
When To Replace Instead of Clean
No matter how thorough you are, sometimes cleaning just isn’t enough. Door bottom seals—especially on high-traffic doors—eventually wear out, crack, or become permanently misshapen. Here are a few signs it’s time for a fresh one:
- The rubber is brittle, cracked, or missing bits
- The seal won’t sit properly in the channel, even when cleaned
- There’s still a draft, even with everything snug and clean
- The channel itself is bent, rusty, or damaged beyond easy repair
Replacing the seal is usually quick and affordable—especially with universal-fit options. Just make sure to match the size and shape as closely as possible (brands like Pemko and Raven have plenty of online guides and diagrams). Sometimes, it’s worth the peace of mind to start fresh and enjoy a perfectly sealed, debris-free door.
Here’s the thing: even the best cleaning routine can’t save a seal that’s on its last legs. If cleaning doesn’t fix the problem, don’t sweat it—replacing a door bottom seal is way easier than you’d think.
Final Thoughts: Keeping Your Door Bottom Seal Channel Clean
Cleaning out debris from the channel of a door bottom seal is one of those chores that doesn’t take long but pays off big. Keeping that tiny groove clear keeps your door gliding smoothly, blocks out drafts, and helps your whole home feel cozier. It might not be the most glamorous DIY task, but with just a few household tools and a little time, you can make your door feel brand new. And honestly, once you get in the habit, it’s a lot easier than wrestling with a sticky, gunk-filled seal during the coldest week of the year.
So next time you sweep the floor or notice your door sticking, grab a vacuum and a brush and take a closer look at your door bottom seal channel. A clean channel means a longer-lasting seal, lower utility bills, and—perhaps best of all—a quiet, smooth door every time you come home.