Here’s the thing: cleaning and lubricating the shear line isn’t just for locksmiths or hardcore DIYers. Anyone can do this, with a bit of patience and a careful hand. Think of it like brushing your teeth—neglecting the basics leads to bigger problems down the road. Keeping this tiny space clean is the secret to a long-lasting, reliable lock—whether it’s on your front door, mailbox, or even a fancy Schlage smart lock that needs that classic key backup.
What Is The Shear Line In A Lock Cylinder?
You might be wondering, “Shear line? Isn’t a lock just pins and a key?” Fair question. In a standard pin tumbler lock (which covers most home and office locks, by the way), the shear line is the *tiny gap* where the cylinder and the housing meet. When you insert the key, the pins line up perfectly at the shear line. This is the sweet spot that lets the cylinder turn and unlock your door.
If the shear line is blocked by dust, gummed-up lubricant, or tiny bits of metal, even the right key won’t help much. You’ll feel resistance, or worse, you’ll risk jamming the cylinder entirely. The whole system relies on that *barely-there space* being totally clear. In a sense, the shear line is the lock’s “green light.” If something is blocking that path, you’re stuck outside—or forced to call a locksmith.
Honestly, without a clean shear line, even the most expensive lock is just an awkward paperweight. Whether you’re working with an old-school Yale or a newer, code-enabled smart lock, the same rule applies: a spotless shear line equals smooth operation.
Why Clean And Lubricate The Shear Line?
Let me explain why this tiny bit of maintenance makes a big difference. Over time, every lock—no matter the brand—gathers dirt, metal shavings, and dried lubricant inside. Using the wrong lube (like thick oil) can make things worse, trapping debris at the shear line and causing even more problems. You might notice your key starts catching, turning with difficulty, or not turning at all.
Here’s what a clean, well-lubricated shear line really does:
- Prevents key sticking or jamming: With nothing in the way, the pins snap perfectly into place.
- Reduces wear and tear: Friction wears out not only the key, but the tiny pins and springs inside.
- Avoids expensive repairs: A simple cleaning can save you from costly lockouts or cylinder replacements.
If you’re syncing a new smart lock with backup keys, or troubleshooting a jammed cylinder, checking the shear line should be step one. Regular cleaning also keeps old locks compatible with new keys after a reset or rekeying—something every landlord eventually faces.
Signs Your Lock Cylinder Needs Cleaning
Not sure if your lock’s shear line is clogged up? There are a few telltale symptoms. First off, if your key doesn’t glide in and turn smoothly, that’s a big red flag. You might have to wiggle it, or maybe it only works if you jiggle the handle a certain way. Occasionally, the key might get stuck halfway, or you’ll feel gritty resistance as you turn it.
Other signs include:
- Key marks or cuttings have tiny metal shavings on them—meaning the pins are wearing down inside.
- Lock feels “crunchy” or scratchy when turning, which usually means dirt has found its way inside.
- Lock cylinder won’t turn at all—the worst-case scenario when the shear line is blocked entirely.
If you’re using a universal key or an old remote backup key after a battery change, and it suddenly struggles to turn, it’s likely not a pairing or code issue, but a dirty shear line. Honestly, the solution is a lot simpler than it seems.
Tools And Lubricants You’ll Need
You don’t need a full locksmith’s toolkit for this job, just some basic supplies. Before you start, gather:
- Lock lubricant (graphite powder or PTFE-based spray; never use WD-40 or oil-based sprays)
- Lock cleaner or compressed air: Helps blast out debris from the cylinder.
- Small brush or pipe cleaner: For gently scrubbing inside the keyway.
- Clean, lint-free cloth: To wipe away old grease and residue.
- Safety glasses (if you’re using spray, just in case)
- Flathead screwdriver (if you need to remove the cylinder—optional for most basic cleaning)
If your lock is electronic or code-enabled, double-check your manual for specific cleaning tips. Some brands have tiny seals you shouldn’t disturb; others are built for quick DIY cleaning.
How To Clean The Shear Line (Step-By-Step)
Alright, let’s get into the meat of it. Here’s how to deep-clean the shear line of a lock cylinder:
1. Remove The Key
Always start with the key out of the cylinder. You want the pins to sit naturally, so debris can fall out easily.
2. Blast Out The Dirt
Use compressed air or a lock-specific cleaning spray to blast into the keyway. Aim for short bursts; you don’t need to go overboard. This step is especially important for older locks, like classic Yale models.
3. Brush The Keyway
Gently insert a brush or pipe cleaner inside the lock. Wiggle it back and forth to scrub away stuck-on grime. Don’t force it—you’re just loosening the dirt, not trying to deep-clean your teeth.
4. Wipe The Area Clean
Use your cloth to wipe the key and the face of the cylinder. You’d be amazed how much muck comes out, especially on locks that haven’t seen maintenance in ages.
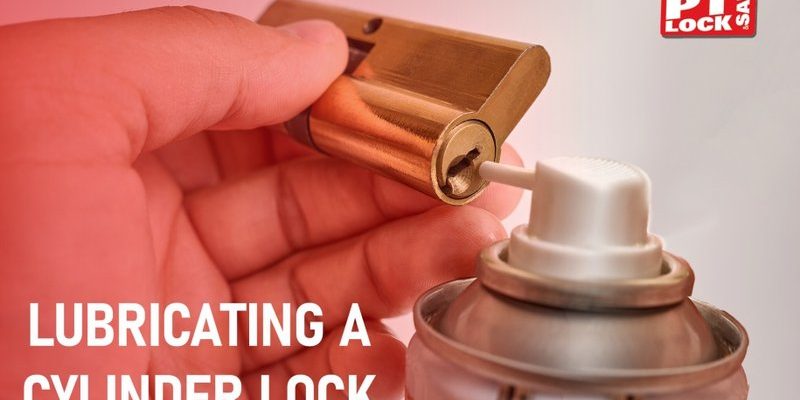
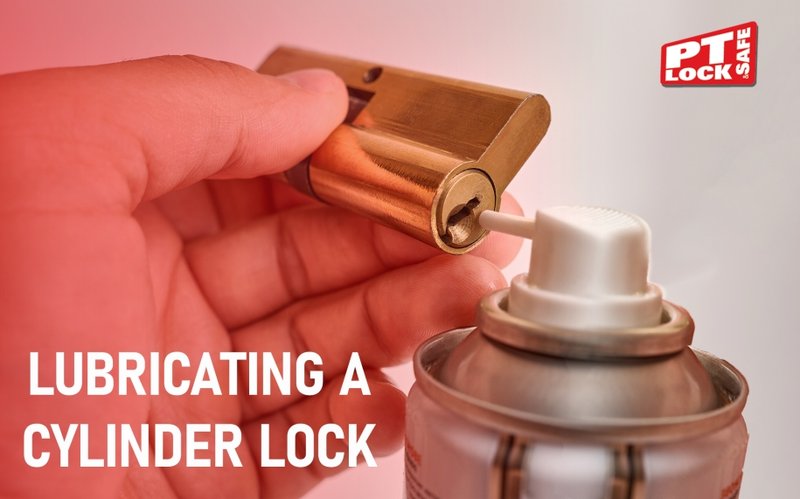
5. Use The Right Lubricant
Spray a *small* amount of graphite or PTFE-based lubricant straight into the keyway. Insert and remove the key a few times to help spread it along the pins and across the shear line. If you hear a satisfying click and feel smooth movement, you’ve done it right.
Pro tip: It’s tempting to use household oils, but these attract more dust and can gum up the works. Stick to dry lubricants made for locks!
Lubricating The Shear Line Without Removing The Cylinder
Most of us want quick fixes, not a full lock teardown. Here’s the good news: you don’t need to pull the cylinder out of the door for basic shear line maintenance. Modern locks (think Kwikset, Schlage, and many universal brands) are designed for simple in-place cleaning and lubrication.
The trick is to aim the lubricant and cleaning spray straight into the keyway. All those pins and springs are lined up inside, so when you spray, you’re hitting the right spot automatically. If you still notice sticking after cleaning, try rotating the key back and forth a few times—this helps distribute lubricant along the shear line.
Here’s where a little storytelling comes in handy. I once helped a neighbor clean her sticky Kwikset lock after a winter of road salt and dirt. We didn’t touch the screws or remove a single piece. After two rounds of spray and a few pumps of graphite, her key turned like new—all without any “reset” or complicated re-coding.
When To Remove And Deep-Clean The Cylinder
Sometimes, a simple cleaning just isn’t enough. If your lock is still stubborn after all those steps, or if you spot obvious corrosion or stubborn debris, you may need to remove the cylinder for a deeper clean. Here’s what to watch for:
- Visible rust or corrosion around the keyway or on the key itself
- Repeatedly stuck pins or a cylinder that won’t turn, even after plenty of lubricant
- Old locks that haven’t been serviced in years—or are starting to “eat” keys
Most lock cylinders can be removed with a flathead screwdriver or by unscrewing the faceplate. Once out, you can gently disassemble the plug to directly access the pins and shear line. Just make sure you remember the order of pieces—those tiny springs love to fly across the room!
If this sounds intimidating, there’s no shame in calling a locksmith. But for the patient DIYer, a deep clean can make even a decades-old lock work like a brand new code-enabled smart lock—minus the batteries.
Avoiding Common Mistakes And Troubleshooting
Honestly, the most common mistake here is using too much lubricant—or the wrong kind altogether. If the lock starts to feel gummy, you’ve likely overdone it with oil or grease. Another classic misstep is jamming tools too far into the keyway. Remember, those pins are tiny and delicate.
If you accidentally lock yourself out (don’t laugh—it happens after overzealous cleaning), try pairing a backup key, or use a universal key if your lock supports it. Double-check for any reset or sync steps required on electronic models before you panic.
In rare cases, if things get worse after cleaning, you might have dislodged a pin or spring. In that case, it’s time for professional help or a complete replacement.
Don’t forget: Lock maintenance doesn’t end here. Changing batteries on smart locks, keeping codes current, and regularly resetting or pairing remotes all keep your security in top shape.
Alternatives To Cleaning The Shear Line Yourself
You might be thinking, “What if I just want this done right with zero hassle?” There’s nothing wrong with calling a local locksmith for professional cleaning and lubrication—especially on high-security or commercial locks. Many pros use advanced cleaning solutions, tiny pin kits, and specialized tools to reset and recode locks far faster than a DIYer can.
Some newer locks (looking at you, high-end Yale and Schlage models) come with maintenance-free cylinders or self-lubricating pins. Still, most homeowners find periodic cleaning and proper lubrication gives them years of smooth, trouble-free use—even after hundreds of code changes and battery swaps.
If you’re managing multiple locks with a universal remote, regular maintenance is key for reliable syncing and pairing. Sometimes replacing an old cylinder is simpler than deep-cleaning, especially if rust or wear has already done its worst.
Wrap-Up: Keeping Your Lock Cylinder Shear Line In Top Shape
Here’s the bottom line: the shear line might be invisible, but it’s the heart of any lock cylinder—Kwikset, Yale, Schlage, or anything in between. Keeping it clean and lubricated solves most sticking, syncing, or “won’t turn” headaches long before you need to call a locksmith. Just remember: use the right lubricant, avoid harsh oils, and take your time with cleaning. Whether you’re a DIY fan or just want hassle-free entry every time, this tiny bit of care keeps your locks—and keys—working together perfectly.