
Here’s the thing: using a high-quality exterior caulk (think DAP Dynaflex 230 or GE Advanced Silicone for Doors & Windows) makes all the difference for durability and weather resistance. Interior caulk might look similar, but it doesn’t stand a chance against years of sun, storms, and temperature swings. If you want your new seal to last, don’t cut corners on your materials or your prep. Let’s walk through what you’ll need, what to watch out for, and how to end up with a neat, effective line of protection around your doors.
Why Exterior-Grade Caulk Matters For Door Seals
Honestly, if you use the wrong kind of caulk—even if it looks perfect on Day 1—you’re asking for trouble down the line. *Exterior-grade caulk* is made to handle all the stuff nature throws at your home: heat, freezing cold, pouring rain, and UV rays. It stays flexible, so it won’t crack when your house shifts a little with the seasons.
Here’s where it really matters: old, crumbly caulk or cheap products designed only for bathrooms will shrink or harden. That leaves tiny gaps for water, air, and even insects to sneak through. Over time, these leaks can cause rot, mold, or sky-high energy bills—none of which are fun to tackle. That’s why brands like DAP, GE, and Sikaflex specifically label their products for doors, windows, and siding.
Not all caulk is created equal. For door seals, look for *silicone* or *polyurethane* formulas marked “exterior” or “all-weather.” These can stick to both wood and metal frames, expand and contract without losing their grip, and resist mildew. Skip the interior latex options unless you’re only working on the inside trim.
Besides, exterior-grade caulk has a longer lifespan. You want to “do it once, do it right,” and not end up re-caulking every year.
Gathering the Right Tools and Materials
Before you start, you’ll want to have everything at arm’s reach so you’re not scrambling halfway through. *Applying caulk is a bit like icing a cake*—it’s easiest with the right tools and a steady set-up.
Here’s what you’ll need:
- Exterior-grade caulk (in a color that matches your trim or door, if you care about looks)
- Caulking gun (manual or battery-powered—for smoother, consistent pressure)
- Utility knife or old screwdriver (for scraping out crusty old caulk)
- Putty knife (to help remove debris and smooth the new bead)
- Masking tape (if you want crisp, straight caulk lines)
- Rags and a small bucket of soapy water (for clean-up and smoothing)
- Protective gloves (especially with silicone or polyurethane caulk)
If you’re picky about finish, you might add a caulk finishing tool to your list. These make the process even easier, but honestly, a damp finger works fine for most folks. Double-check that your caulk tube fits your gun, especially if you’re using an older or universal model—nothing’s more annoying than a jammed-up caulking gun mid-job.
Prepping the Area: Remove Old Caulk and Clean Surfaces
Prep work’s not glamorous, but it’s where the magic happens. Applying fresh caulk over dusty, crumbling old stuff is a bit like putting new paint on a dirty, peeling wall—it won’t last. Take your time here and you’ll get a result that works and looks great.
Start by using a utility knife or an old flathead screwdriver to gently pry out any old, cracked caulk around the door frame. Don’t hesitate to get every last bit—even tiny scraps can stop the new bead from sticking well. If your door has never been caulked before, just give the edges a good look for loose paint or grime.
Once it’s cleared, grab your putty knife or a stiff brush and give the surfaces a solid scrub. The cleaner the better—dirt, spider webs, or even leftover soap can keep your new caulk from making a tight seal. Some folks wipe the area down with rubbing alcohol for extra grip, especially on metal.
If you want pro-level results, stick some masking tape about 1/4 inch from the joint on each side. This gives you a runway for a perfectly straight caulk line—and it peels off for a crisp edge you’ll be proud of. Just be sure to pull the tape while the caulk is still wet.
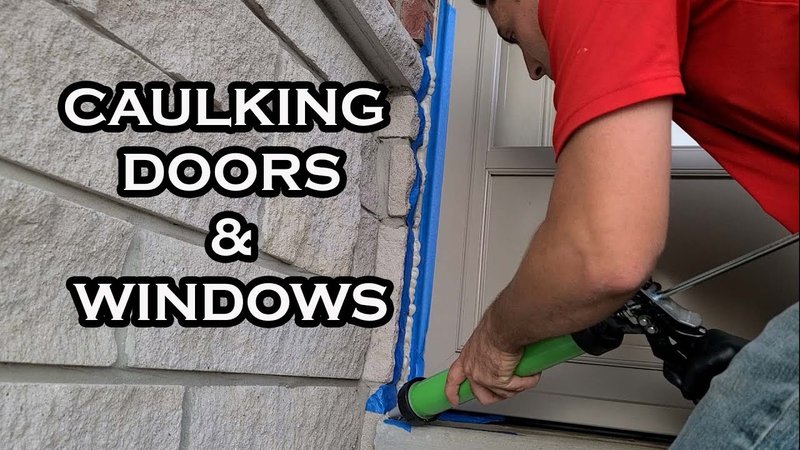
Applying Exterior-Grade Caulk: Step-by-Step
Here’s where you actually lay the bead that keeps the weather out. *Take it slow*—this isn’t a race, and a neat caulk line works better and looks sharper than a rushed, lumpy mess.
First, cut the tip of the caulk tube at a 45-degree angle—about as wide as the gap you’re sealing. Poke through the seal in the nozzle with a long nail or the built-in puncture tool if your gun has one. Load the tube into your caulking gun, making sure it’s secure.
Hold the gun at a slight angle and gently squeeze the trigger as you move the tip steadily along the gap between the door frame and the siding (or threshold). Try to keep the bead as even as possible—not too thick, not too thin. You might find a “universal” motion works best: steady hand, smooth pace, and eyes on the target.
Immediately after laying the bead, use your finger (dampened in soapy water) or a caulk tool to smooth it out. Press lightly to push the caulk into the gap and create a slightly concave finish that sheds water. If you used masking tape, peel it off before the caulk starts to set.
Let the caulk dry according to the instructions on the tube—some types need only a couple of hours, others take a full day. Don’t force the door open and closed if the caulk is still tacky. That’ll ruin your beautiful line and you’ll have to start over.
Common Mistakes to Avoid When Caulking Door Seals
It’s easy to rush through caulking, but that’s where most folks run into trouble. *The biggest mistake?* Using interior-grade caulk outside or applying the right stuff on a dirty, unprepared surface. That shortcut just won’t cut it, and you’ll be back at square one before long.
Another common slip-up is laying the bead too thick or too thin. If it’s too bulky, it won’t cure properly, and if it’s too skimpy, it won’t seal the gap. Stick with a bead about the thickness of a pencil. If you mess up, don’t be afraid to wipe away the fresh caulk with a damp rag and try again. Better a redo now than a leaky seal in a month.
Some people also forget to check the weather forecast. *Here’s the thing*: Caulk won’t set right in freezing temperatures or if it rains before it cures. Ideally, pick a dry, mild day—above 40°F (5°C)—for the job. If you’re working with a battery-powered caulking gun, check the battery level (and maybe keep a backup charged) so you don’t get stuck halfway through.
Finally, don’t paint over the caulk until it’s fully cured—check the manufacturer’s instructions. Some formulas can be painted, others can’t, so always double-check the label before moving to the next step.
Alternative Weatherproofing Options
You might be wondering if caulk is the only way to seal up drafty door frames. The short answer: it’s the gold standard for permanent fixes, but you’ve got options if you want a quicker or less messy approach.
One popular alternative is adhesive weatherstripping. These foam or rubber strips press right into the gap and work instantly, especially on the inside part of the door. They’re great for renters or folks not ready to commit to caulking, but they won’t last as long in tough outdoor conditions.
There are also threshold sweeps—flexible flaps that install along the bottom of the door. These help with drafts, but don’t address gaps around the sides or top of the frame. You might see some universal sealant tapes on the market, too. Honestly, those work for quick fixes but don’t compare to a proper bead of exterior-grade caulk.
If you’ve already tried these options and still notice leaks, or if you see visible gaps around your door frame, *that’s your cue* to break out the caulk and do the job right.
How Exterior Caulking Helps With Energy Savings and Troubleshooting
You might not see it immediately, but a proper seal with exterior-grade caulk can make a noticeable dent in your energy bills. All those invisible gaps around doors let in cold air in winter and leak precious cooled air in summer, forcing your HVAC system to work harder. It’s like trying to keep your house warm with a window cracked open.
A fresh bead of caulk means less heat loss, fewer drafts, and lower heating or cooling costs—plus, it keeps out moisture, which helps prevent rot and mold in the door frame. If you’re troubleshooting persistent cold spots or humidity near your doors, old or missing caulk is one of the first things to check.
Here’s a tip: after you apply new caulk, run your hand around the door’s edge on a windy day. If you still feel air movement, check the weatherstripping and the threshold. Sometimes the fix is a combination of both.
*Don’t underestimate the peace of mind* that comes from knowing your door is sealed up tight. Whether you’re in the middle of summer storms or bracing for a cold snap, your home will be better protected—and your wallet will thank you, too.
When To Call a Pro Instead
Let me be real—most homeowners can tackle caulking door seals with a few simple tools and a free afternoon. But sometimes, it’s smarter (and safer) to bring in a pro.
If you’re dealing with major gaps (wider than 1/2 inch), rotted wood, old lead-based paint, or signs of water damage, caulk alone won’t fix the underlying problem. You might need to repair the frame itself or replace damaged materials. In those cases, a handyman or contractor can assess and fix the issue properly.
Some older homes have unique trim or siding that’s delicate or historically significant—don’t risk it if you’re unsure. And if you physically can’t kneel, crouch, or reach the door’s upper frame safely, there’s no shame in calling for backup.
Sometimes, bringing in an expert for the tricky stuff lets you focus on smaller repairs you’re comfortable with—and guarantees a finished look that blends in perfectly with your home’s style.
Wrapping Up: Keep Your Door Seals Tight Year-Round
Sealing up your doors with *exterior-grade caulk* is the kind of project that pays you back every time you close your front door—less noise, fewer bugs, and no more drafts sneaking in. With the right prep, tools, and a little patience, you can get a water-tight, weatherproof seal that lasts for years.
Remember, take your time with each step. Scrape out old caulk, clean the surfaces, and lay a smooth, even bead. Check the weather, wait for the caulk to fully cure, and enjoy the extra peace of mind. Whether you’re dealing with noisy traffic, wild weather, or climbing energy bills, a simple tube of exterior-grade caulk (from brands like DAP or GE) might just be your new favorite home upgrade.