Honestly, I used to think caulk was just for pros or hardcore DIYers. But with a decent exterior caulk and a steady hand, anyone can do it. Most folks grab a tube of DAP Dynaflex 230 or GE Advanced Silicone, set aside an hour, and end up with a doorway that’s practically waterproof—no fancy tools or secret skills needed. So, if you’re tired of water sneaking inside or your energy bill creeping higher, sealing up that threshold makes a lot of sense.
Why Sealing Your Threshold Matters (More Than You’d Think)
Let’s be honest—thresholds aren’t exactly glamorous. But they’re ground zero for leaks, drafts, bugs, and even unwanted smells. Water that seeps under your door doesn’t just leave a mess; it can rot your floors, warp your trim, and invite a parade of ants inside. By caulking around your threshold, you’re not just blocking water—you’re protecting your entire entryway from long-term damage.
Here’s the thing: thresholds expand and contract as the weather changes. Sun, rain, cold, and foot traffic make those small cracks a little bigger every month. Over time, factory seals fail, and the original caulk (if there even was any) crumbles away. That’s why even newer homes eventually need a fresh bead of exterior caulk. It’s preventative maintenance, pure and simple.
A good watertight seal doesn’t just stop the water. It keeps warm air in during the winter and cool air in during the summer. That means more comfort for you and less work for your AC or furnace—which saves money on those pesky energy bills. Plus, modern caulk like the DAP Dynaflex 230 or GE Advanced Silicone brands are designed to stay flexible, so they’ll keep sealing out water and air for years.
Choosing the Right Exterior Caulk for a Threshold
Picking the right caulk can feel a little overwhelming the first time. There are rows of tubes that all look the same, but here’s what actually matters: for exterior threshold jobs, you want a paintable, weather-resistant caulk that can handle movement and won’t break down when it gets wet or cold.
There are two main types worth considering for your threshold:
- Silicone-based caulk: Extremely waterproof, flexible, and long-lasting. It’s not always paintable, but it’ll outlast most other kinds—especially if your threshold gets a lot of rain or sun.
- Polyurethane or hybrid caulk (like DAP Dynaflex 230): These combine flexibility and paintability with good water resistance. They’re a favorite for most doors because they move with the house and can be painted to match your trim.
You might be wondering about cheaper latex caulks. Honestly, I wouldn’t recommend them for exterior threshold work—they just don’t hold up to the elements. Stick with a proven exterior-grade product from a trusted brand. The extra few bucks are worth it for peace of mind.
If you have an aluminum, wood, or composite threshold, check the caulk label to be sure it’s compatible. Some caulks won’t bond well to certain materials, and nothing’s more frustrating than seeing your hard work peel away after one season.
Prepping Your Threshold: Clean, Dry, and Ready
Before you even open that caulk tube, it’s all about the prep. Caulk sticks best to clean, dry surfaces. Think of it like painting a wall—if there’s old paint or dust, your fresh coat doesn’t stand a chance. The same rule goes for your threshold. Let me walk you through the best way to start:
- Remove old caulk: Use a utility knife, painter’s tool, or even an old screwdriver. Slice along the edges of any existing caulk and gently peel it off. You want bare, solid material (like wood, aluminum, or composite) showing around the gap.
- Clean thoroughly: Sweep away dirt, spiderwebs, and anything else lurking near your doorstep. Then, grab a rag with rubbing alcohol or mild dish soap and scrub the threshold and adjoining surfaces. Let everything dry completely—water under the new caulk spells trouble.
- Inspect for damage: If you see rotten wood, rusted metal, or big cracks, now’s the time to fix it. Caulk is not a miracle cure for rotten materials; it just covers the problem.
You might be tempted to just “caulk over” old gunk, but that’s like patching a tire with chewing gum. Get it clean, and your new seal will actually last.
How To Apply Exterior Caulk Around a Threshold: Step-by-Step
Applying exterior caulk doesn’t require a steady surgeon’s hand, but it does help to work methodically. Here’s how most people (myself included) tackle it:
- Cut the tip of your caulk tube at a 45-degree angle, starting with a small opening. A smaller bead is almost always easier to control—you can always cut it bigger if needed.
- Load your caulk gun and get comfortable. Hold the gun at a slight angle to the gap you’re sealing—pointing the “cut” side of the tip forward.
- Squeeze a steady, continuous bead along the joint where your threshold meets the door jamb and floor. Try to keep the pressure even—fast, jerky movements make a mess.
- Tool the caulk with a wet finger or a caulk-smoothing tool. This presses the caulk into the joint and shapes it for a clean, professional look. Don’t skip this—it’s what makes the seal truly watertight.
- Wipe away excess caulk with a damp cloth as you go. Trust me, it’s a lot easier to clean up mistakes right away than after the caulk dries.
Work in sections so you don’t rush. If you’re sealing both sides of a threshold, finish one side fully before moving to the next. That way, you don’t accidentally smear your fresh bead.
Tips for a Perfect, Watertight Caulk Job
Here’s the thing—caulking isn’t just about squeezing goop into a crack and hoping for the best. There are a few tricks that make a world of difference, even for beginners:
- Don’t caulk in freezing or soaking wet weather. Caulk needs time to set up and cure, and cold temperatures slow it way down. Aim for a dry, mild day (ideally above 45°F/7°C).
- Use painter’s tape for ultra-clean lines. If you’re a perfectionist, run tape along both sides of the gap, then peel it away right after smoothing your bead. It works wonders, especially if you’re still learning.
- Mind the gap size. Caulk can only fill cracks up to about 1/2 inch deep. For larger gaps under the threshold, insert backer rod—a foam rope—first, then caulk over it. This saves caulk and creates a better seal.
- Check for shrinkage after drying. Some caulks shrink a bit as they cure. If you see new gaps after 24 hours, just run a second, lighter bead to fill them. No harm done.
Honestly, the hardest part is usually just kneeling in the entryway without getting dirt on your pants.
Drying, Curing, and Caring for Your New Seal
You might be curious about how long you need to wait before crossing your threshold or letting it get wet again. Drying and curing aren’t the same: drying is when the caulk feels dry to the touch, while curing is when it’s fully set and waterproof.
- Most exterior caulks are dry to the touch in 30–60 minutes, depending on the weather and type (silicone usually dries faster than polyurethane).
- Full cure time can take up to 24–48 hours—or longer if it’s humid or cold. Avoid washing the area or exposing it to heavy rain until it’s fully cured.
If you used a paintable caulk and want to match it to your doorframe or siding, wait until the product is fully cured (check the label for specifics). Never rush this part—a little patience goes a long way. Regularly check your threshold seal during seasonal home checks. If you spot cracks, gaps, or separation, it’s time to repeat the process. Good caulk should last several years before you need to think about resealing.
Troubleshooting Common Threshold Caulking Issues
Sometimes things don’t go perfectly the first time. You might be dealing with:
- Caulk that won’t stick: Usually caused by dirt, moisture, or leftover old caulk. Clean thoroughly and let it dry completely before trying again.
- Messy or uneven beads: Too much pressure on the caulk gun, or moving too fast. Go slower, and always smooth it right away with your finger or tool.
- Gaps after curing: This happens if the caulk shrinks or the crack was too wide. Just apply a second bead to top it off.
- Cracking or peeling: Wrong caulk, poor surface prep, or extreme weather during application. Remove it, prep again, and use a proven exterior caulk.
Don’t get discouraged. Even the pros need a second pass now and then. If you’re dealing with a particularly tricky threshold, or if you notice water pooling after every storm, it might be worth talking to a local handyman for extra advice.
Alternatives to Exterior Caulk for Thresholds
You might be wondering if there’s anything besides caulk that’ll keep water out. Here’s the truth: while caulk is the gold standard for sealing gaps, there are a few other options, each with their pros and cons.
- Weatherstripping: Great for blocking drafts and minor leaks, especially on the inside edge of a threshold. But it doesn’t fully seal big exterior gaps where water can flow in.
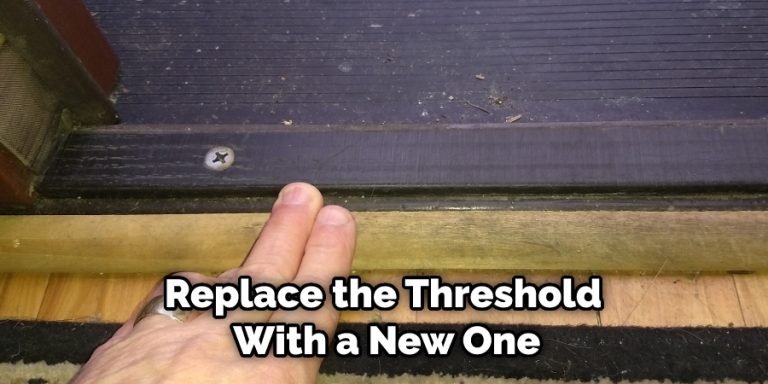
- Threshold replacement or upgrades: If your existing threshold is warped, rotted, or badly damaged, sometimes the best fix is to swap it out for a new one with integrated gaskets or seals. This is a bigger job—but sometimes worth it.
- Expanding foam: Handy for filling large, hidden gaps under a threshold. But it’s not UV-resistant and should be topped with caulk to protect it from the weather.
If you have a truly unusual entryway, a custom rubber gasket or metal flashing may be better. For 90% of homes, though, applying a good bead of exterior caulk is the simplest, most effective solution.
Pro tip: Universal caulk can be used almost anywhere, but double-check the label for exterior use and material compatibility. It’s always smart to sync your tools and supplies with the specific job at hand—don’t just grab any old tube from the garage.
Wrapping Up: Better Seals, Better Thresholds, Happier Homes
Applying exterior caulk around a threshold for a watertight seal isn’t glamorous, but it’s one of those fixes that just makes life easier. No more puddles by the door, no mystery drafts, and less worry during a thunderstorm. With the right caulk, a little prep, and some patience, even a total beginner can handle the job in an afternoon. And if you run into issues, you can always go back and reset, reapply, or even call in a pro—no shame in double-checking your work.
The big thing to remember: every threshold sees tons of traffic and weather, so sealing it right is a small effort that pays off for years. Next time you see a rainstorm brewing, you’ll be glad you got ahead of it—feet dry, energy bill lower, and home a little cozier. That’s a win in my book.