Don’t worry, you don’t need to be a pro contractor, or even “handy,” to handle this job. Picture applying sealant kind of like piping frosting onto a cake. There’s a tool, there’s a tube, and with a steady hand, you’ll block leaks and protect your door hardware. From silicone caulk to specialty polyurethane sealants, brands like GE and DAP are easy to find at any hardware store, and the difference a single tube can make is huge.
Let me explain exactly how to choose, prep, and apply weather-resistant sealant around your door hardware, even if you’ve never used a caulking gun before. You’ll avoid common pitfalls, learn a few insider tricks, and end up with a door that looks good and keeps bad weather where it belongs—outside.
Why Sealing Around Door Hardware Matters
Here’s the thing: When folks think about weatherproofing, they usually picture the door edges or the threshold. But exterior door hardware is just as vulnerable—think of it as the weak link in your home’s protective chain. Any small gap around a lock, handle, or mail slot is an open invitation for rain, wind, dirt, and even bugs to march inside. You might not notice the problem until wood starts to swell, paint bubbles, or you feel a chill every time there’s a breeze.
A proper *weather-resistant sealant* forms an invisible, waterproof barrier. It locks out moisture, keeps outside temps in check, and helps your expensive hardware last longer. Honestly, it’s a small effort for a big payoff. Think about how much a little leak can cost you in repairs—or how annoying it is to find puddles on stormy days. And it’s not just about stopping leaks. Sealing tight also means better energy efficiency, so your heating and cooling bills don’t spike every time the weather turns.
If you want a home that’s both comfortable and protected, sealing around door hardware isn’t optional; it’s essential. Whether your door and lock are brand new or several years old, a quality sealant acts as your secret weapon against the outside world.
Choosing the Right Weather-Resistant Sealant
Not all sealants are created equal. You can’t just grab the first tube you see on the shelf and hope for the best. Here’s what you need to know before picking out your weapon of choice. *Silicone sealants* are popular for a reason—they stay flexible, resist cracking, and repel water like nobody’s business. Brands like GE Silicone II and DAP 100% Silicone are solid, especially for most wood, metal, and vinyl doors.
If your area gets wild temperature swings or you want something extra rugged, *polyurethane* sealants like SikaFlex or Loctite PL might be your best bet. They handle movement well, which is handy around parts that get jostled (like handles and locks). Acrylic latex caulks, on the other hand, are usually best left for indoor jobs—they just don’t hold up outside.
Look for:
- Exterior use: The label should say it’s rated for outdoor/weather exposure.
- Paintable: If you plan to match your trim or door color, make sure the product can be painted once cured.
- Adhesion: The sealant must stick to your specific surface (metal, wood, vinyl, fiberglass, etc.).
*Pro-tip:* Bring a photo of your door hardware to the store so you can ask a knowledgeable employee if you’re unsure. Honestly, it takes five seconds and saves you from coming home with the wrong stuff.
Tools and Materials You’ll Need
Before you start, gather everything to avoid the classic “where’s the scraper?” scramble mid-project. I always find that being organized helps keep stress—and the mess—to a minimum. Here’s a quick checklist for sealing around exterior door hardware:
- Weather-resistant sealant (silicone or polyurethane, as described above)
- Caulking gun (unless you use a squeeze tube—caulking guns give better control)
- Utility knife or razor blade (to cut open the tube and tidy up stray sealant)
- Painter’s tape (for crisp lines and protecting the door finish)
- Rags or paper towels (for smoothing out sealant and quick clean-ups)
- Mild soap and water (for prepping the area—cleanliness is key)
- Gloves (optional, but highly recommended—this stuff is sticky!)
Some folks also use a small putty knife or popsicle stick to neaten up the bead of sealant. *Don’t forget ventilation*—even “low odor” caulk can have a whiff that lingers if you’re working in a tight spot. Set up a fan or keep the door cracked open if possible.
How to Prep the Area for Sealing
Let me walk you through this like I would a friend. Good prep equals great results. If you try sealing over dirt, old paint, or crumbly caulk, the sealant won’t stick—or worse, it’ll peel up in a week, and you’ll have to do the job all over again. Here’s how to get it right from the start.
- Remove old caulk or sealant. Use your utility knife, a scraper, or even an old toothbrush to dig out any cracked or flaking material around the hardware. Don’t rush—leftover gunk can ruin your nice, smooth seal.
- Clean the area. Wipe down the surface with mild soap and water. Rinse away any residue and let everything dry completely. Sealant doesn’t like moisture hiding underneath.
- Mask off your work area. Apply painter’s tape around the hardware and door, leaving just a narrow gap where you’ll lay the bead of sealant. It seems fussy, but it saves you from messy lines and keeps your paint job pristine.
*Quick tip:* If the temperature outside is below 40°F (5°C) or there’s heavy humidity, try to wait for a better day. Most weather-resistant sealant cures best when it’s dry and not too cold.
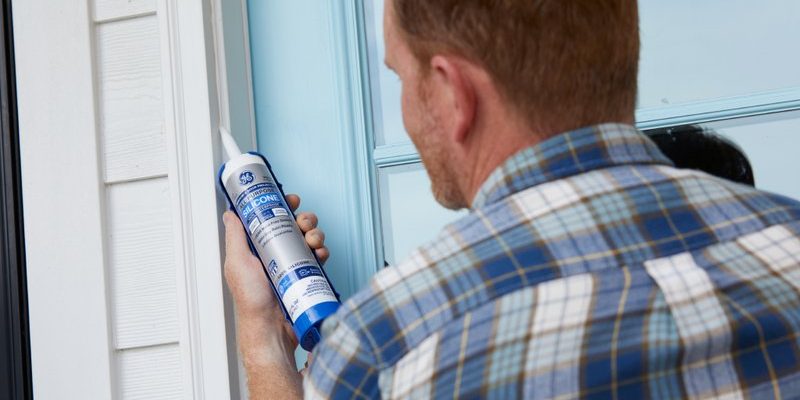
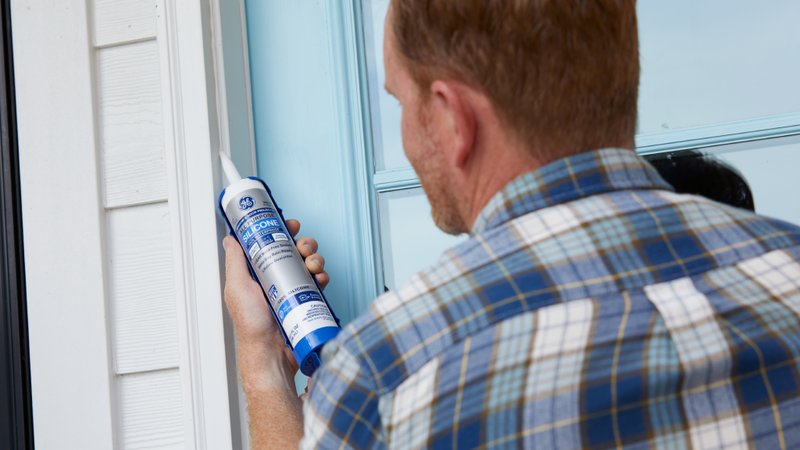
Step-by-Step: How to Apply Weather-Resistant Sealant
Here comes the fun part. Applying sealant is all about a slow hand and letting the product do the work. Honestly, it’s almost meditative once you get the hang of it.
- Cut the nozzle. Using your utility knife, snip the end of the sealant tube at a 45-degree angle. Aim for a small opening—about 1/4 inch wide—so you have control over the flow.
- Load up the caulking gun. Insert the tube and press the release tab to get a little pressure going. If you’re using a squeeze tube, just uncap it and you’re ready to roll.
- Apply the sealant. Hold the nozzle at a slight angle and run a steady, continuous bead around all edges where the hardware meets the door. Go slow, and don’t panic if it’s not perfectly even—you can smooth it out in a second.
- Smooth the bead. Use a gloved finger, a damp rag, or a tool to gently press and even out the sealant. This step helps it bond tightly while giving it that clean, finished look.
- Remove tape carefully. Pull up the painter’s tape before the sealant skins over (usually within 10–20 minutes), so you get crisp, professional lines.
Take your time and don’t stress over little mistakes. You can always trim away dried sealant with a razor later, and no one inspects up close except you.
What to Expect While the Sealant Dries
Don’t plan a barbecue or heavy-duty cleaning near your door right after sealing. Most *weather-resistant sealants* set, or “skin over,” in about 30 minutes. But full curing—where the sealant is totally waterproof and safe to paint—can take anywhere from 24 to 48 hours, sometimes longer if it’s damp or chilly outside.
You might be tempted to poke at the sealant to check if it’s done. Honestly, I don’t recommend it—there’s nothing more frustrating than leaving a fingerprint or smudge right in the middle of your new weather seal. If your hardware needs to be locked or unlocked while the sealant cures, just be careful not to disturb the bead.
And if you need to paint over your work, check the product label for timing. Some sealants take paint immediately after drying, others need a full day or two. When in doubt, waiting longer is safer than rushing and having your efforts peel or crack.
Common Problems and Fixes
You might be wondering: What if my sealant didn’t stick, or the bead turned messy? Don’t worry, these are classic rookie hurdles, and they’re easy to fix.
- Sealant won’t stick or peels off: This usually means the surface was dirty, wet, or had leftover old caulk. Clean, dry, and try again—sometimes a quick sanding helps with stubborn spots.
- Messy bead: If your line is lumpy or uneven, wait for it to dry completely. Then carefully trim away excess with a sharp blade and reapply a small, neat bead if needed. Patience really pays off here.
- Sealant cracks or shrinks: This sometimes happens with the wrong product for the material or environment. Make sure you’re using true exterior-grade, *weather-resistant sealant* for best results.
If you run into a stubborn fix, don’t feel bad. Even pros re-do sections now and then. The important thing is that you’ve blocked out leaks and drafts, which is exactly the goal.
Alternatives and When to Call a Pro
You might be thinking, “Is sealant really my only option?” In some cases, weatherstripping or foam gaskets can supplement (but not totally replace) a proper, waterproof barrier around hardware. Stick-on gaskets are great for door edges or thresholds, but they don’t create a tight seal at those tiny cracks around a lock or handle.
If your door or hardware is very old, warped, or visibly damaged—say, wood is rotten or the hardware shifts around—sealant alone won’t fix the underlying issue. That’s when it’s smart to consult a professional. Sometimes, you need new weatherproof door hardware or even a door replacement to truly solve leaks.
And just to compare: Professional installation of seals or new hardware can cost a few hundred dollars, while a tube of top-grade *weather-resistant sealant* runs less than $10. Not a bad trade-off if you’re looking for DIY results.
Final Thoughts: Keep Weather Where It Belongs
Sealing around exterior door hardware doesn’t have to be intimidating, and you don’t need a toolbox full of fancy equipment. With a little bit of patience and the right *weather-resistant sealant*, you can keep rain, wind, and bugs firmly outside—where they belong. You’ll protect your investment, boost your home’s comfort, and maybe even save money on energy costs.
As you finish up, take a moment to appreciate that you took charge of your comfort and your home’s wellbeing. If you ever need to refresh the seal, just repeat the process—you’ll get quicker and neater each time. That simple tube of sealant really is one of the unsung heroes of home care.