But how do you achieve that desirable patina? Here’s the thing: it’s easier than you might think. With a few simple steps and materials, you can create that aged look at home. This guide will walk you through the process, ensuring your brass hardware looks beautifully weathered in no time. Let’s get into it!
What is Patina and Why Apply It?
Patina is that gorgeous layer that forms over time on metals, often seen as a green or darkened finish, thanks to oxidation and environmental exposure. It’s similar to the way a vintage leather jacket gains character as it ages. Applying a patina can transform shiny, new brass hardware into pieces that appear lovingly worn and full of history.
You might wonder why someone would want to do this. Well, newly installed hardware can clash with an older home’s aesthetic or even look a bit too polished for your taste. Creating a patina adds depth and warmth, making the hardware feel like it belongs in your space. Plus, it’s a fun DIY project that gives you a chance to customize your decor.
Gather Your Materials
Before diving into the process, let’s ensure you have everything you need. Here’s a simple list of materials to get you started:
- Brass hardware: Your chosen door knobs, hinges, or locks.
- Patina solution: You can purchase a commercial patina solution or make your own using vinegar, salt, and ammonia.
- Protective gloves: It’s best to keep your hands safe from chemicals.
- Soft cloth: For cleaning and polishing the hardware.
- Brushes: To apply the patina solution evenly.
- Sealer: Optional, but good for protecting the patina after it’s applied.
With your materials in hand, you’re ready to begin. Having everything prepared will make this process smooth and enjoyable. Plus, nothing feels better than checking off your checklist!
Preparing Your Hardware
Before applying the patina, you need to prepare the brass surface. Start by cleaning the hardware thoroughly. Any dust, grease, or fingerprints can prevent the patina from adhering properly. Use a soft cloth and a mild cleaner to wipe down the hardware until it’s sparkling clean.
Once cleaned, dry the hardware completely. This step is crucial. If there’s any moisture left, it can interfere with the chemical reactions required for the patina to form. Take a moment to inspect each piece carefully. This is your canvas, and you want it to be perfect.
Choosing Your Patina Method
There are multiple ways to achieve that beautiful patina on brass. You can either choose a commercial solution or create a homemade mixture. Here are your main options:
Commercial Patina Solutions
These solutions are often easy to use and provide consistent results. Just follow the instructions on the bottle. Brands like Patina Fast or Brass Darkener work well, and you might find them at local hardware stores or online.
Homemade Patina Mixture
Creating a homemade patina can be a fun experiment. A simple recipe uses equal parts vinegar, salt, and warm water. Mix the ingredients until salt dissolves, and you have a natural solution ready to go. You can adjust the ratio based on how intense you want the patina to be.
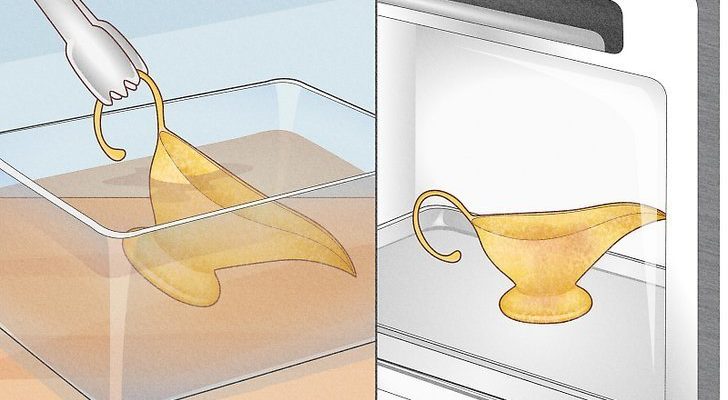
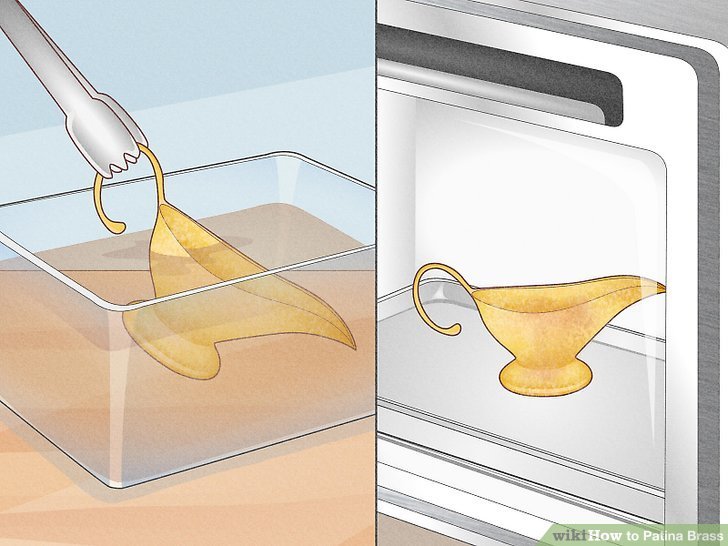
Applying the Patina
Now, it’s time to get your hands a little messy. Here’s how to apply the solution effectively:
1. Put on your gloves: Safety first! Protect your hands from the patina solution.
2. Use a soft brush: Dip the brush into your chosen patina solution and apply it to the brass hardware.
3. Work in even strokes: To get a uniform look, make sure to spread the solution evenly across the surface.
4. Monitor the process: Depending on the method, you may see changes in color almost instantly, or it might take a little longer. Keep an eye on it and stop when you’ve reached the desired hue.
Rinsing and Drying
After letting the patina sit for a while, it’s time to rinse it off. You’ll want to use clean water and a soft cloth to gently wash away any excess solution. This step is vital, especially if you’re using a commercial product that can continue to react if left on too long.
Once rinsed, dry the hardware completely with a clean cloth. This will help set the patina and allow it to dry with that gorgeous finish you’re after.
Sealing the Patina Finish
Sealing your newly patinated brass hardware is like giving it a protective coat. This step isn’t always necessary, but it can help maintain the look over time. You can use a clear lacquer spray specifically designed for metal surfaces.
Simply spray an even coat over the patinated hardware and let it dry according to the manufacturer’s instructions. The seal will help keep the patina from wearing away and can make cleaning easier in the long run.
Enjoying Your Beautifully Patinated Hardware
Once your hardware is sealed and completely dry, it’s time to install it back on your doors! You’ll likely be amazed by how a simple patina can add so much character and warmth to your home. It’s like you’ve unearthed a little piece of history.
And remember, you can always revisit the process if you want to deepen the patina over time. Each interaction can make your hardware uniquely yours.
So, whether you’re updating a single knob or transforming all the door hardware in your home, applying a patina to new brass can not only enhance aesthetics but also be a gratifying DIY project. Enjoy your beautifully aged results!