Adjusting the height of an adjustable door threshold sounds more complicated than it really is. Whether you’ve got a Pemko, M-D Building Products, or a generic brand, the basic principles are the same. You’re fine-tuning a little strip at the base of your doorway, which acts like a flexible middleman between your door and your floor. Do it right, and you’ll block out drafts, bugs, and even a bit of noise, all without making your door hard to open or close.
Let me explain what’s actually involved in adjusting a threshold, why it matters for both old and new doors, and how to do it without any special tools or stress. If you’ve never tackled one before, don’t worry—we’re taking it step by step, with the kind of advice I wish someone had given me the first time I tried it.
What Is an Adjustable Door Threshold—and Why Adjust It?
An adjustable door threshold is that strip along the bottom of your exterior door. Think of it like a mini ramp that lets your door meet the floor without letting cold air, rain, or bugs get inside. The “adjustable” part means you can tweak its height—either raising it up or lowering it down—to create a tight seal.
You might be wondering why you’d ever need to adjust it. Honestly, thresholds wear down over time. Weather, foot traffic, and even how your door hangs can cause gaps to form. If you feel a breeze under the door, notice bugs are getting in, or see daylight peeking through, that’s a sign your threshold isn’t sealing right. Sometimes, after installing a new door (or if you’ve just finished a flooring project), you’ll need to sync the threshold with the new setup.
Here’s the thing: adjusting the threshold isn’t just about comfort. A well-set threshold can make your home quieter, keep your floors from getting wet, and cut down your energy bills. If you ignore it, you’re basically throwing money out the door—literally!
How Does an Adjustable Door Threshold Work?
Most modern thresholds have screws or bolts hidden below little plugs or caps. These are the “adjusters.” When you turn them, they raise or lower individual sections of the threshold, kind of like tuning pegs on a guitar. This lets you fine-tune the fit so your door closes snugly against the weatherstripping.
The process is usually dead simple:
- If you turn the screw clockwise, you push that part of the threshold up.
- Go counterclockwise, and you lower it.
There’s no electrical code or battery involved—it’s just mechanical adjustment. But don’t let the simplicity fool you. If you raise the threshold too much, you’ll have trouble shutting the door. Too low, and you’ll get drafts. The sweet spot is where the door compresses the threshold’s seal just enough to keep out air and water, without sticking or jamming.
Some thresholds are universal and fit almost any standard door, while others might be brand-specific (like the Pemko or M-D Building Products models you’ll see at hardware stores). Either way, the adjustment method is nearly always the same.
Tools and Materials You’ll Need
Before you start, it helps to gather your tools. Honestly, you don’t need much, but having the right stuff handy will make the job smoother.
- Screwdriver: Most adjustable thresholds use a Phillips head. Check your specific model—some use flathead or even Allen wrenches.
- Utility knife: If your threshold has weatherstripping that’s worn or in the way, you might need to trim or remove it.
- Vacuum or brush: There’s usually dust, dirt, or grit around the threshold area. Cleaning helps you see what you’re working with.
- Replacement weatherstripping (optional): If yours is torn or brittle, now’s a good time to swap it out.
If you’ve got an older model or a brand-new threshold, double-check for any special instructions in the package or on the manufacturer’s website. (Just search for your threshold’s brand and “adjust height”—most major brands like Pemko or M-D Building Products have simple guides.)
Step-by-Step Instructions: How to Adjust the Threshold
Here’s how I’d walk a friend through it—step by step. Go slow, don’t force anything, and pay attention to how the door feels after every tweak.
- Open the door wide. Give yourself plenty of room. If there’s a rug or mat in the way, move it first.
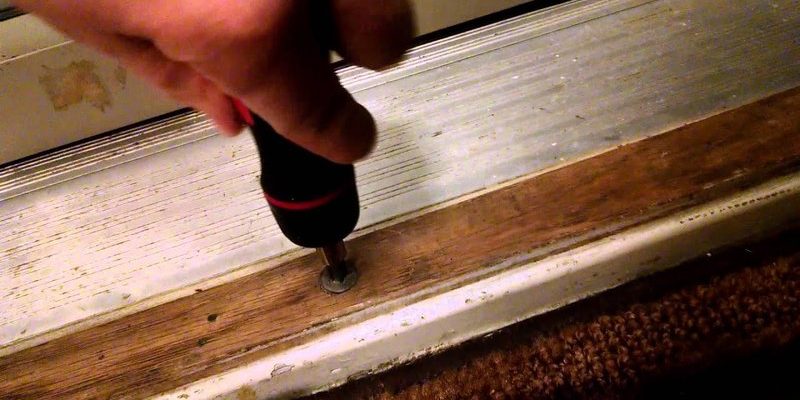
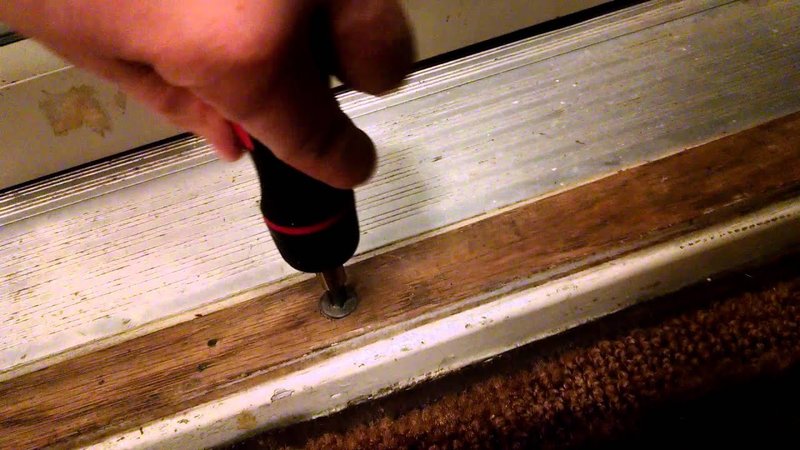
- Find the adjustment screws. Look along the top of the threshold. You’ll see a row of small plastic plugs or caps. Pry them up gently with your screwdriver or even your fingernail. Underneath are the screws.
- Check the current height. Close the door and look for daylight or feel for a breeze. If you see or feel gaps, you’ll want to raise the threshold. If the door is hard to close or drags, you’ll want to lower it.
- Turn each screw gradually. Don’t crank them all the way at once! Start with half-turns. Turn clockwise to raise, counterclockwise to lower. Adjust each screw a little at a time and then test the door.
- Test and repeat. After each adjustment, close the door. You want the door to compress the seal just a bit but still open and close smoothly. If you overtighten, you’ll feel resistance right away. If it’s too loose, you’ll spot gaps or feel drafts.
- Replace the caps. Once you’re happy, pop the plugs back over the screws. That keeps out dirt and moisture.
Pro tip: If you have a steel entry door or a thick weatherstripping gasket, try testing at several points along the threshold. Doors aren’t always perfectly straight, so some sections might need more adjustment than others.
Common Problems and How To Troubleshoot Them
Things don’t always go perfectly the first try—trust me. Here are some issues you could run into, with quick fixes:
- Door still drags or won’t close: You might’ve raised the threshold too high. Back the screws down quarter-turns until the door just clears the top.
- Still feel drafts under the door: Try shining a flashlight under the door at night. If you see gaps, tighten those specific areas. If the threshold is maxed out, you might need thicker weatherstripping or even a new threshold.
- Adjustment screws are stripped or stuck: This happens sometimes, especially on older models. Spray a bit of penetrating oil and let it sit. If that fails, you may need to replace the screws—or in some cases, swap out the whole threshold strip.
- Weatherstripping is torn or missing: Most thresholds let you replace just the strip. Bring the old piece to the hardware store and find a match. Installing new weatherstripping is usually as simple as sliding it in or sticking it down, depending on the type.
Here’s the thing—most issues boil down to patience. Go slow, test after every tweak, and don’t force anything if it’s not moving.
When Should You Replace Instead of Adjust?
Sometimes, adjusting the height just isn’t enough. If your threshold looks cracked, warped, or the adjustment screws are all frozen or stripped, it might be easier to replace the whole thing. The good news is, universal adjustable thresholds are available at any home improvement store and usually fit a standard exterior door.
You might also consider swapping out your threshold if:
- You’ve got wood rot or serious corrosion, especially on old metal models.
- The weatherstripping can’t be replaced or just won’t stay in place.
- The threshold doesn’t line up with your new flooring, making it a trip hazard or leaving a big gap.
Installing a new adjustable threshold isn’t much harder than adjusting one. Just make sure to measure carefully, cut to length if needed, and use a good bead of sealant underneath to block water. After that, you’ll use the same adjustment steps outlined above to sync the new threshold with your door.
Comparing Adjustable Thresholds: Universal vs. Brand-Specific
You might be wondering if it’s worth hunting down your door’s exact brand (like Pemko or M-D Building Products), or just grabbing a universal replacement. Here’s what I’ve found:
- Universal thresholds are designed to fit most door frames. They’re usually easy to trim to size and work with standard screw patterns. If you’re not sure what you need, this is a safe bet.
- Brand-specific thresholds can be a tighter fit—literally. If you’ve got a high-end or uniquely sized door, sticking with the brand might give you a more seamless look and feel.
- Either way, the adjustment process is almost always the same. It’s about raising or lowering those screws to sync the height with your door sweep.
If you have a specialty entryway (double doors, ADA thresholds, or custom woodwork), always check your door’s manual or the manufacturer’s website. There could be quirks that make a certain threshold style more compatible, or installation code issues to keep in mind.
Why Adjusting Your Door Threshold Matters for Everyday Comfort
Let’s be honest—no one brags about their perfectly adjusted threshold. But if you’ve ever had ice form inside by your front door, or dust and bugs collecting in your entryway, you know how important that little strip actually is. Getting the height right means less energy wasted on heating and cooling, and fewer headaches with stuck or squeaky doors.
It’s also one of those home maintenance tasks you can tackle in about fifteen minutes, with zero special expertise. You don’t need to sync up with a contractor or reset any complicated code. Just a screwdriver, a little patience, and a willingness to tweak till things feel right.
If you take care of your threshold, your door will take care of you—and your utility bills, too. It’s really that simple.
Closing Thoughts: A Small Adjustment, A Big Difference
Adjusting the height of an adjustable door threshold doesn’t call for any fancy tools or technical know-how—just a bit of care and patience. Whether you’re fixing up a classic wooden entry door, working with a steel model, or dealing with a Pemko or M-D Building Products threshold, the steps stay the same. Take your time, test after every turn, and you’ll notice the difference right away: no more drafts, no stuck doors, and a little extra peace and quiet.
The next time you hear that whistling wind or spot sunlight sneaking in under your door, remember: most problems at the threshold are just a few minutes and a screwdriver away from being solved. And in the world of home maintenance, that’s about as easy as it gets.