Imagine your door latch is like the settings on your favorite gadget. Just as you adjust various features for the best experience, fine-tuning your door latch ensures a snug fit and smooth operation. This is especially true with adjustable latches. Many modern latches—like those from popular brands such as Schlage or Kwikset—come with nifty features allowing you to easily change how they function. So, let’s dive into how to adjust the backset on these versatile interior door latches.
Understanding Backset and Its Importance
Before we jump into the nitty-gritty of adjustments, it helps to understand what backset actually is. The backset is the distance from the edge of the door to the center of the keyhole or latch. Think of it like the distance between your car’s steering wheel and your seat; it’s all about finding the right fit for comfort and functionality.
Why does backset matter? A properly adjusted backset ensures that your door latch will securely engage with the strike plate on the door frame. If the backset is too short or too long, you could face issues like the door not closing correctly or the latch getting stuck. It’s like trying to put a square peg in a round hole—frustrating, right?
To put it bluntly, having the right backset makes everything more straightforward. You don’t want to deal with a door that slams shut or swings open unpredictably, especially if you value privacy and security at home.
Gathering Your Tools
You don’t need a full workshop to adjust the backset on your door latch, but a few basic tools will make your life easier. Here’s a quick checklist of what you’ll need:
- Screwdriver: A Phillips or flathead screwdriver depending on your latch screws.
- Tape Measure: To check your current backset and measure your adjustments.
- Level: Optional, but helpful for ensuring your latch is straight.
- Pencil: For marking measurements if needed.
If you’re feeling particularly ambitious, you may want a small flashlight to illuminate the area around the latch. This is especially handy if you’re working in a dimly lit hallway. Just imagine how much easier it is to see what you’re doing when you shine a light on it!
Identifying the Current Backset
Now, let’s identify the current backset on your door latch. This step is crucial because you need to know what you’re working with before making any adjustments.
1. Open the Door: Start by opening the door wide enough to access the latch.
2. Measure the Backset: Use your tape measure to find the distance from the edge of the door to the center of the latch hole. Most standard backsets are either 2 3/8 inches or 2 3/4 inches.
3. Take Note: Write down your measurement. This will guide you in adjusting it correctly later on.
At this point, you might be asking yourself, “What if my measurements don’t match the standard sizes?” Don’t worry! Many adjustable latches can accommodate different backset settings, which is where the real adjustment comes into play.
Adjusting the Backset
So, you’ve pinpointed your current backset; now it’s time to make adjustments. The process varies slightly depending on the brand of latch you have, but here are the general steps:
1. Remove the Latch Plate: Using your screwdriver, remove the screws from the latch plate that’s mounted on the edge of the door.
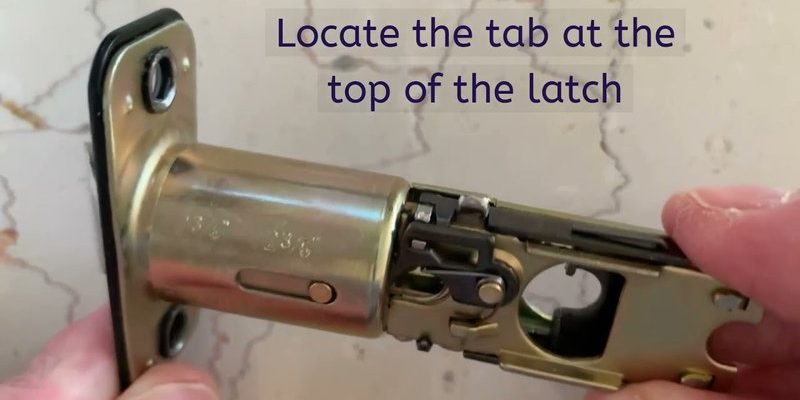
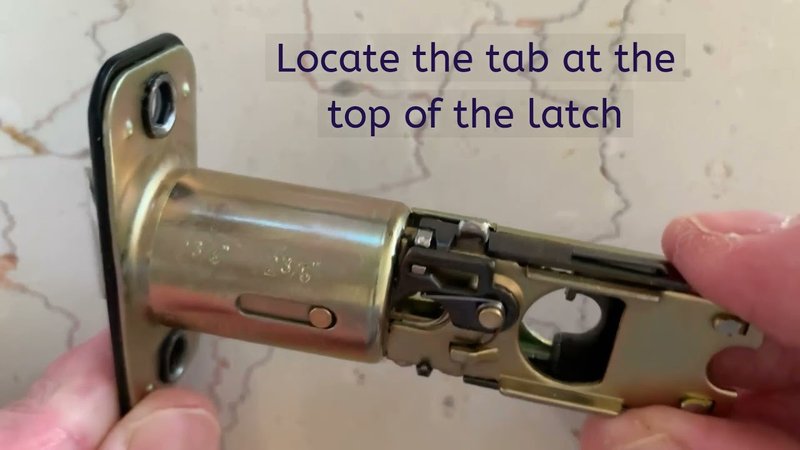
2. Release the Latch Mechanism: Most adjustable latches have a toggle or a button that lets you slide the latch mechanism to the desired backset setting.
3. Set the New Backset: Slide the latch to the new measurement you desire. If you’re switching between 2 3/8″ and 2 3/4″, listen for a click or feel for a lock-in that tells you it’s set.
4. Reattach the Latch Plate: Once you’ve adjusted it, carefully put the latch plate back on and secure it with screws.
And just like that, you’ve made your adjustment! Honestly, it may take you longer to gather your tools than to make this change.
Testing the Adjustment
After you’ve adjusted your latch, it’s time for the moment of truth: testing it out. There’s nothing like closing that door and hearing it click into place, right? Here’s how to do it:
1. Close the Door: Firmly shut the door and see if the latch engages smoothly with the strike plate.
2. Check Alignment: Use your level to ensure that the latch is aligned properly. If it feels off, you might need to make minor tweaks.
3. Open and Close Multiple Times: Do this a few times to ensure it works consistently. If it sticks, you may need to adjust the strike plate as well.
This part is key because proper testing confirms that your hard work has paid off. If done right, you should feel a satisfying click each time you close the door.
Common Issues and Troubleshooting
Sometimes, things don’t go as planned, and that’s okay. You might be wondering: what should I do if my adjustments haven’t fixed the issue? Here are a few common problems and their solutions:
– Door Still Won’t Close: If it feels like the door isn’t aligning with the strike plate, check the hinges. They might be loose, causing the door to sag.
– Latch Is Sticking: If the latch sticks, it may need lubrication. A tiny drop of silicone spray can do wonders.
– Incorrect Measurements: Double-check to see if you measured the backset correctly. It’s easy to miscalculate, so measure twice!
Remember, each door and latch can have quirks, much like people! Being patient and thorough will save you time in the long run.
Final Thoughts
Adjusting the backset on an adjustable interior door latch doesn’t have to be a frustrating task. With just a few tools and some patience, you’ve got the know-how to make your door operate smoothly and securely.
Every home has its quirks, and taking the time to adjust your door latch can make a big difference in your day-to-day life. So go ahead, give it a try! The satisfaction of a well-functioning door is worth the effort. Now, you can close that door with confidence!