Let me explain it this way: your door is like the lid to a treasure chest, and the frame is the box itself. If the box is warped or loose, the fancy lock hardware on the lid won’t line up, no matter how high-tech or basic it is. Whether you’re trying to install a Yale smart lock, troubleshoot a sticky Kwikset deadbolt, or just want your handle to click without a hitch, frame alignment is where it all starts.
Maybe your house settled over time, maybe the weather warped the jamb, or maybe the last owner just did a sloppy job. Whatever the reason, learning how to adjust your exterior door frame is a must for anyone who wants their door hardware—from remotes to handsets—to work reliably. Here’s how to tackle it, step by step.
Why Door Frame Alignment Affects Hardware Performance
Here’s the thing: even the best lock or remote entry system can’t work right if the door frame isn’t straight. A frame that’s even a hair off can throw everything out of alignment. Your deadbolt might catch halfway, a keypad might seem finicky, or your remote lock won’t properly sync and fully latch.
Picture this: your door hardware is designed for precision, kind of like a puzzle. Each part—the latch, the strike plate, even the code-based electronics—all needs to line up perfectly. If the frame bows outwards or sags at the top, suddenly the latch won’t meet the strike plate. You might hear scraping or feel extra resistance when locking or unlocking.
Many exterior doors use smart locks or remotes now, like Schlage or August units, which need things to fit just right. If you’re troubleshooting lock pairing or reset issues, often it isn’t the code or the battery—it’s the frame. A misaligned frame can keep electronics from sending the “locked” signal back to your app, so the system thinks the door is still open.
Quick insight: The physical fit of your door is just as important as the tech on it. When in doubt, check the frame before blaming the lock or remote.
Signs Your Exterior Door Frame Needs Adjustment
So, how do you know if your frame is the root cause? There are classic warning signs—and some are easier to miss than you’d think. Here’s what to look for:
- Sticking or Dragging: If you have to push hard to close the door or it rubs along the threshold, chances are the frame has shifted.
- Misaligned Deadbolt: When a deadbolt won’t slide smoothly, or you have to pull up on the handle for it to click in, the strike plate and bolt are probably out of line.
- Loose Remote or Smart Lock: If your smart lock feels loose or can’t sync hardware functions (like auto-lock or battery status), a wobbly frame might be the hidden culprit.
- Visible Gaps or Light: Stand inside during the day and close the door. If you see light peeking through the frame, that means air—and potentially water—can get in, too.
You might be tempted to just swap out the lock or reset your remote code, but if these issues keep coming back, don’t ignore the underlying frame problem. Even hardware rated for universal fit won’t tolerate a crooked, sagging, or warped frame for long.
Common Causes of Exterior Door Frame Problems
Honestly, even the best-built house can shift over time. But knowing the most common causes for a wonky exterior door frame can help you spot and fix issues before they get worse.
- Settling Foundation: Many homes develop small shifts in the foundation as they age. This can throw the whole door frame out of alignment, causing classic sticking and latching problems.
- Weather Changes: Wood expands when it’s humid and contracts when it’s dry, which can warp the frame. After a few wild seasons, it might need a tune-up.
- Poor Installation: Sometimes, the original installer didn’t shim the frame properly or left screws loose. Even a universal remote deadbolt can’t compensate for a frame that moves every time you shut the door.
- Wear and Tear: Years of kids slamming doors, pets pushing through, and heavy use can slowly nudge the frame out of square.
Let me put it this way: you wouldn’t expect your remote to pair properly if the battery’s dead or the code is wrong—so don’t expect perfect lock function from a crooked frame.
Tools and Supplies You’ll Need
Before you start, gather your gear. Adjusting an exterior door frame isn’t as tough as it sounds, but you do need a few basic tools to make the job smooth and safe.
- Screwdriver Set: Both flathead and Phillips—different brands use different screws.
- Hammer and Pry Bar: For removing trim or gently shifting frame components.
- Level: A small carpenter’s level (even a basic one from the hardware store) helps you make sure everything’s square.
- Wood Shims: Thin, wedge-shaped pieces of wood to nudge the frame into the right spot.
- Drill and Wood Screws: For securing the frame once you’ve got it in place.
- Utility Knife: To trim shims or excess material as needed.
If you have a smart lock, remote, or keypad already on the door, keep a fresh battery and the code handy in case you need to sync or reset after you’re done. Sometimes, moving the frame can jostle connections.
Step-by-Step: How to Adjust Your Exterior Door Frame
Don’t worry—this sounds harder than it really is. Here’s a beginner-friendly walkthrough, whether you’re tuning up a wooden front door or a steel entryway with a fancy smart remote lock.
1. Check and Remove the Door Trim
Carefully use your pry bar and hammer to loosen the interior trim around your exterior door. This gives you access to the frame and the shims inside. Go slow—if the trim splinters, a little wood filler can fix it later.
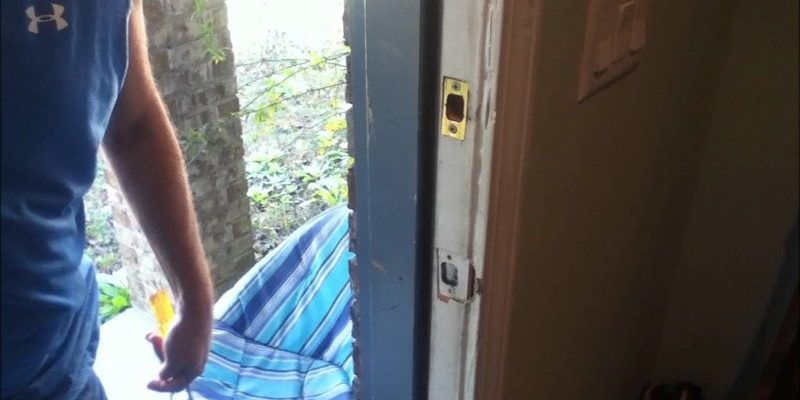
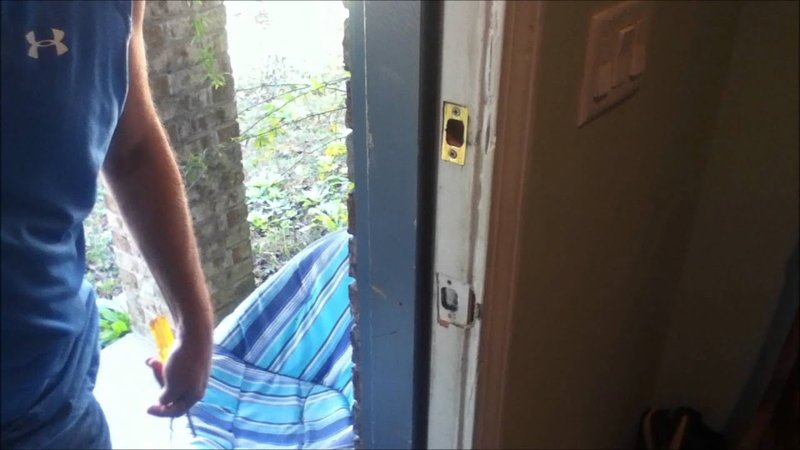
2. Inspect the Frame and Shims
Once the trim’s off, you’ll see the original shims and screws holding the frame to the wall. Use your level to check if the sides, top, and threshold are all straight and square. If you spot gaps behind the frame, that’s a clue you’ll need to add or adjust shims.
3. Adjust Frame Position With Shims
Here’s where you make the magic happen. Tap new shims into spots where the frame needs to move in or out. If the lock catches at the top, shim the top; if the latch binds at the bottom, focus there. Check your progress with the level often.
4. Secure the Frame
Once things look square, drive new screws through the frame and into the wall. This holds the new position. Try opening and closing the door a few times to see if it’s swinging clean and latching right. Don’t forget to test your hardware—whether it’s an old-school latch or a modern smart lock synced to your phone.
5. Replace Trim and Reset Hardware
Carefully reattach the door trim, patching as needed. Pop the battery back in your remote or smart lock. If you need to resync, just enter your code and pair up as the instructions say. If your hardware still won’t function, double-check alignment before diving into deeper troubleshooting.
Troubleshooting: When Hardware Still Isn’t Working
You’ve done all the right steps, but sometimes your lock or remote just won’t cooperate. Here’s what you can try before calling in a pro:
- Check Battery and Code: With high-tech locks, a low battery or a mistyped code is a simple thing to overlook when troubleshooting.
- Reset or Pair Your Remote: Sometimes, after frame adjustments, you’ll need to reset or pair the device again. Most brands have a reset button or code sequence.
- Inspect Latch Alignment: The latch should drop easily into the hole in the strike plate. If not, adjust the strike plate up or down slightly—sometimes a few millimeters makes all the difference.
- Tighten Hardware Screws: Loose screws can cause all sorts of “mystery” problems, from poor code recognition to wobbly remotes.
If you’ve tried everything and your hardware is still acting up, look for physical damage to the lock or frame. In rare cases, extreme warping means you might need to replace the frame—or call a local handyman for bigger repairs.
Comparing Adjustments: Universal vs. Brand-Specific Hardware
You might be wondering if adjustments make a difference based on hardware type. The simple answer: they do.
- Universal Hardware: These are made to fit most frames, so they’re more forgiving of minor frame quirks. Still, major misalignment will cause trouble, especially with precision parts like remotes or electronic deadbolts.
- Brand-Specific Hardware: Schlage, Yale, and similar brands design their locks for a tight fit in standard frames. If your frame is out of square, even a small gap can prevent proper code entry or syncing. Sometimes, custom strike plates are needed to compensate.
If your hardware includes extra features—like auto-locking, keypad reset, or remote pairing—the margin for error is even smaller. In other words: the more “bells and whistles” you have, the more important a perfectly-adjusted frame becomes.
When to Call a Professional
Let’s be real—not every frame problem needs a pro, but there are times when a DIY fix isn’t enough. If your door frame is badly warped, there’s rot in the wood, or you just can’t get things to line up after several tries, it’s worth calling for backup.
Professionals can spot issues you might miss—like hidden water damage or structural settling. And if you’re dealing with a specialty remote lock or need to sync multiple pieces of hardware, a pro can save you hours of frustrating troubleshooting. Sometimes, investing in a little expert help up front can spare you bigger headaches (and repairs) down the road.
Final Thoughts: Keep Your Exterior Door Frame In Top Shape
Getting your exterior door frame adjusted for optimal hardware function isn’t just about a smoother close or a better beep from your keypad—it’s about security, peace of mind, and having a home that feels solid every time you walk through the door. Whether you’re using a universal handle or the latest brand-specific remote lock, a properly aligned frame makes all the difference.
Take your time, stay patient, and remember: the small stuff adds up. A little adjustment here, a fresh battery there, and suddenly your whole entryway just works. And if things ever get truly stuck, don’t hesitate to call in a pro. You—and your door—deserve nothing less.