Imagine you’ve recently renovated your home or maybe moved into a place where the doors just don’t match your style. You’ve got some existing hardware—like doorknobs or locks—that you love, but the new door seems stubborn about accommodating them. Here’s where you can play handyman and adjust your pre-hung door so it works smoothly with the hardware you’ve already got.
The process isn’t as daunting as it may seem. Whether you’re dealing with a tight fit or misaligned strike plates, I’m here to walk you through step-by-step adjustments that will make everything fit just right. Let’s dive into this handy guide!
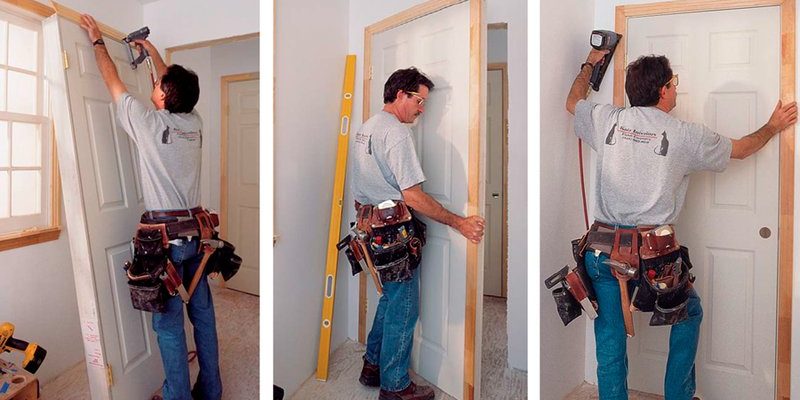
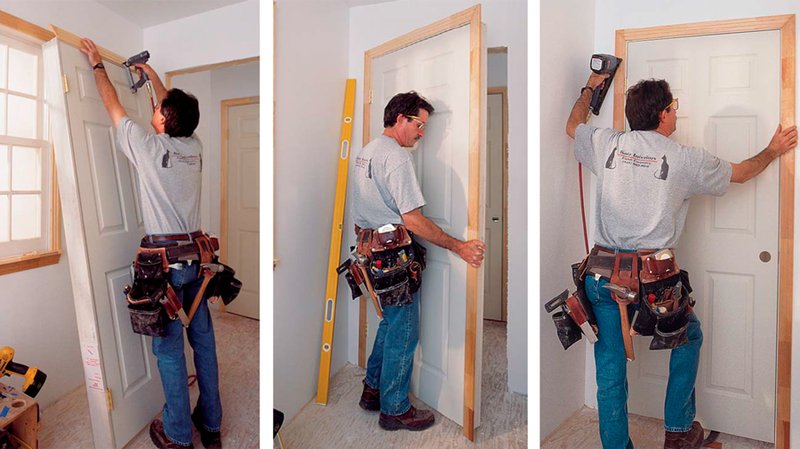
Gather Your Tools
Before doing anything, you need the right tools at your fingertips. Here’s a quick checklist:
- A measuring tape
- A level
- A screwdriver (flathead and Phillips)
- A chisel
- A wood plane (if necessary)
- A drill and drill bits
- An adjustable wrench
- Pencil or marker for marking
Having these tools on hand will help you work efficiently and make any necessary adjustments without running back and forth. You might be wondering why a level is so important. Well, ensuring that your door is perfectly vertical not only helps with aesthetics but also with functionality. A door that’s not straight can cause problems down the line, like sticking or improper latching.
Check the Alignment of the Door Frame
Once you’ve got your tools ready, the first thing to do is check the alignment of the door frame. Place your level against the door to see if it’s plumb—meaning it stands straight up and down. If the bubble is off-center, you’ll need to make some adjustments.
Start by inspecting the hinges. If the door is sagging or not aligned correctly, sometimes, it’s simply a matter of tightening or loosening the screws on the hinges. If that doesn’t do the trick, you might need to shim the hinges. This involves inserting thin pieces of wood behind the hinges to raise them slightly and bring the door into alignment.
Here’s a quick pro tip: if the bottom of your door is too close to the floor, shimming the top hinge might help lift the door a bit. It’s all about finding that sweet spot where the door swings smoothly.
Adjusting the Strike Plate
Now that the door is aligned, let’s tackle the strike plate. This is the metal piece that the latch clicks into when you close the door. If your existing hardware doesn’t line up with it, you’ll need to adjust it.
Start by closing your door slowly and observing where the latch hits the strike plate. If you notice it’s missing the plate, you might need to move the plate slightly. To do this:
1. Use a screwdriver to remove the strike plate from the door frame.
2. Measure where the latch hits in relation to the old strike plate.
3. Mark the new location on the door frame.
4. Drill new holes if necessary and screw the plate back into place.
This adjustment helps your door latch securely, preventing any unwanted drafts or security issues.
Trimming the Door Edges
Sometimes, adjusting your pre-hung door means getting a little hands-on. If your door is sticking or won’t close properly, it might be too wide for the frame. This is common, especially in older homes.
To trim the door edges, follow these simple steps:
1. Mark the Excess: With the door closed, use a pencil to mark where it sticks against the frame. This is typically at the top or sides.
2. Remove the Door: Take the door off the hinges carefully and lay it flat on a stable work surface.
3. Trim the Door: Using a wood plane or a circular saw, trim the edges of the door along your marked line. Be sure to remove only a small amount—about 1/8 to 1/4 inch should suffice.
4. Sand the Edges: After trimming, sand the edges to smooth any rough spots and prevent splintering.
5. Rehang the Door: Place the door back on its hinges and check for fit.
There you have it! A trimmed door that fits like a glove.
Reinstalling Old Hardware
If your existing hardware isn’t fitting properly after all these adjustments, it might be time to reassess how it’s installed. Sometimes, the holes may not align properly, especially if you’ve moved the strike plate or made adjustments to the door.
1. Remove the Hardware: Unscrew any old doorknobs or locks from the door.
2. Check Alignment: Hold the hardware up to the new position and see where it aligns. If it doesn’t, mark new holes and drill carefully.
3. Install the Hardware: Once everything aligns, install the doorknob or lock back into place, securing it firmly.
This step ensures that your beloved hardware fits and functions as it should.
Final Checks and Troubleshooting
After making all the adjustments, it’s vital to do a final check. Open and close your door a few times to ensure it swings smoothly. If it sticks or doesn’t latch well, revisit your previous adjustments.
Also, check for gaps along the edges of the door. Use a shim if necessary to fill any gaps to enhance insulation and security. If the door is still giving you trouble, you might need to rethink your approach. Sometimes, a fresh pair of eyes or a helping hand can pinpoint issues you might have missed.
If you’re still facing issues with the latch or hinges, consider whether you need to replace them entirely. Old or worn hardware can create frustration, even after making all the necessary adjustments.
Adjusting a pre-hung door for existing hardware compatibility might seem tricky at first, but with the right approach and a little patience, it’s very doable. Think of this process as a puzzle where each piece—your tools, door, and hardware—needs to fit together harmoniously.
By following these steps, you can transform a stubborn door into a functional piece that enhances your home’s style. Remember, it’s all about finding that balance between alignment and functionality. So grab your tools and get to work; your door will thank you!