Non-mortise hinges are typically found on interior doors. They’re designed to be installed without cutting into the door or frame, which makes them popular for quick installations. However, they might need some fine-tuning over time due to wear and tear or adjustments in humidity and temperature. Let’s dive into how you can adjust those hinges and get your door back into tip-top shape.
Understanding Non-Mortise Hinges
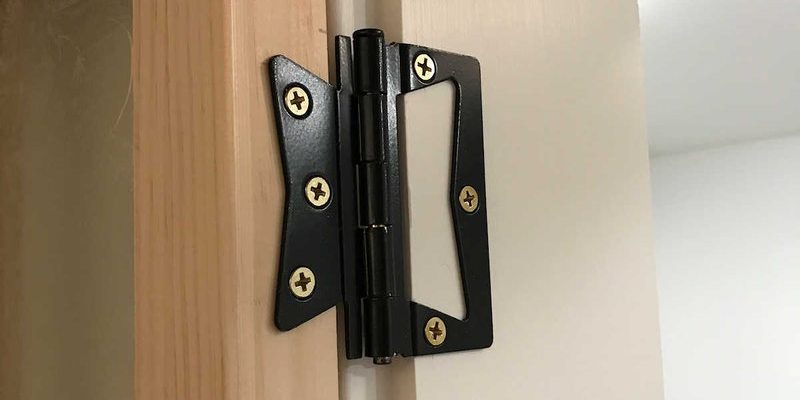
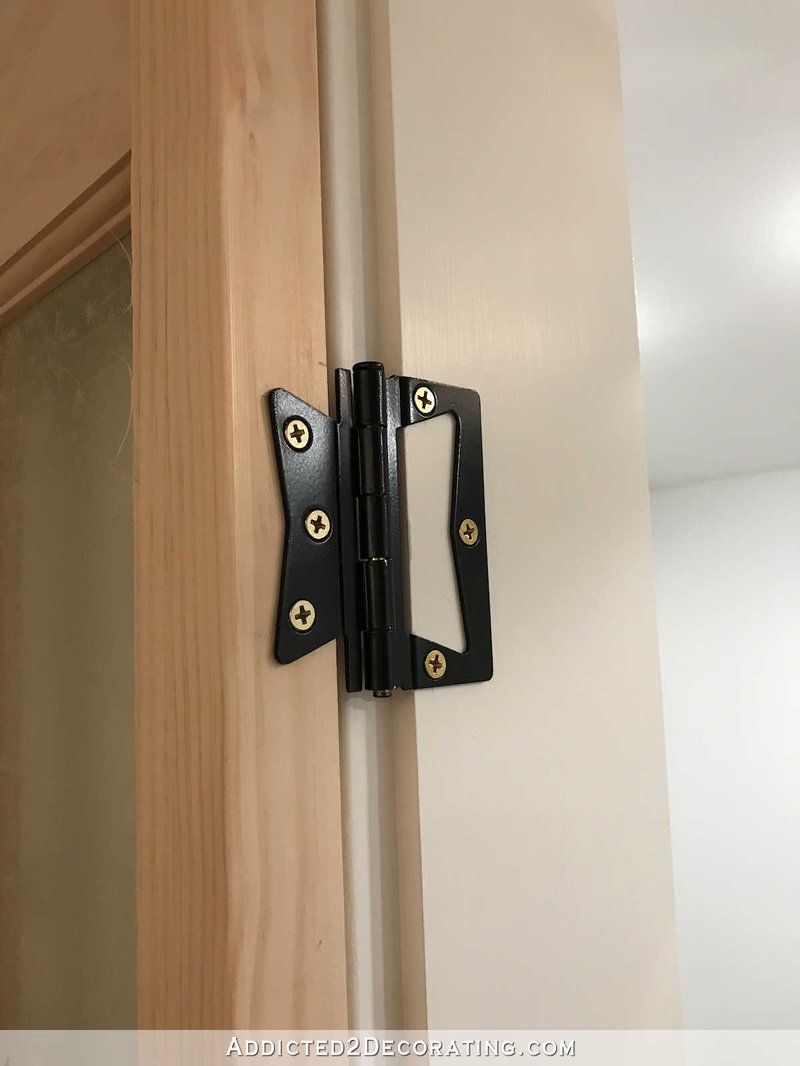
Before we get into adjusting your hinges, it’s helpful to understand what non-mortise hinges are and how they work. Non-mortise hinges, also known as decorative hinges, are installed on the edge of the door and the door frame, which allows them to be easily mounted without any need for mortises or cutouts.
This style of hinge typically consists of two leaves—a side attached to the door and another to the frame. They can also be identified by their leaf styles; some have a flat design, while others may be more decorative. These hinges are convenient for homeowners who want a straightforward solution without the hassle of complex installations.
You might be wondering why they require adjustments. Well, with regular use, hinges can loosen due to vibrations, gravity, or even changes in temperature and humidity that can cause the wood to swell. These factors can lead to misalignment, making it harder for doors to open and close smoothly.
Tools You’ll Need for Adjusting Non-Mortise Hinges
Before you get started, gather your tools. You won’t need much, but having the right equipment will save you time and frustration. Here’s a quick list:
- A screwdriver (usually a Phillips or flathead depending on your hinge screws)
- A level (to check if your door is aligned properly)
- A ruler or measuring tape (to ensure consistent adjustments)
- A pencil (to mark adjustments, if necessary)
These tools are often found in most household toolkits. Having them ready will make your adjustment process much smoother. Plus, it’s always a good idea to work in good lighting—nobody enjoys fumbling around in the dark.
How to Identify the Problem with Your Hinge
Identifying the problem is the first step toward a smooth-swinging door. Common issues include:
– Misalignment: If your door sticks or doesn’t close properly, that’s a good sign that it’s misaligned.
– Squeaking Noise: If your door squeaks when opening or closing, it might need lubrication or adjustment.
– Loose Hinge: Check if your hinge screws are tight. A loose hinge can lead to all sorts of issues.
To diagnose the problem, open and close the door slowly while observing how it moves. You’re looking for areas where it might catch or resist movement. If you notice uneven gaps between the door and the frame, that’s a clear indicator of misalignment.
Once you’ve pinpointed the issue, you’re ready to make your adjustments.
Adjusting the Screws on Your Non-Mortise Hinge
Now that you understand what’s wrong, it’s time to take action. The adjustment process is straightforward. Here’s how to adjust the screws on your non-mortise hinge:
1. Check the Tightness: Start by using your screwdriver to check all the screws on both the hinge connected to the door and the one attached to the frame. Tighten any loose screws gently but firmly.
2. Adjust the Position: If your door is still misaligned, try adjusting the screws slightly. For example, if the top of the door is sticking out, you might want to loosen the top hinge just enough to move it inward.
3. Test the Door: After making adjustments, close the door to see if it swings smoothly. If it still catches or sticks, you might need to make further adjustments. It’s often a game of trial and error, but don’t worry—this is completely normal.
Make sure to repeat this process for the bottom hinge as well, as the weight distribution can impact the alignment.
Using Shims for Additional Support
Sometimes, adjustments alone may not do the trick. If your door still seems misaligned, you might want to consider using shims as additional support. Shims are small, wedge-shaped pieces of material that can fill gaps and help level your door.
Here’s how to use them:
1. Identify the Gap: Look for any significant gaps between your door and the frame. This could be at the top, bottom, or sides.
2. Insert the Shim: Loosen the hinge screws slightly and insert the shim behind the hinge. This might help raise or lower the door to get it properly aligned.
3. Re-tighten the Screws: Once the shim is in place, re-tighten the screws, ensuring everything is secure.
Shimming can be particularly useful if your door keeps sticking even after screw adjustments. Just remember that you may need to do a little fine-tuning afterward for optimal results.
Testing Your Door After Adjustments
Once you’ve adjusted the screws and possibly added shims, it’s essential to test your door. This stage is crucial because it helps you confirm that everything is functioning as it should be. Here’s what to do:
1. Open and Close the Door: Do this several times, paying close attention to any sounds, resistance, or sticking. Ideally, it should swing open and shut easily without any hitch.
2. Check the Alignment: Use your level to see if the door hangs evenly. If it’s still slightly off, go back and adjust the hinges again or consider using additional shims.
3. Final Touches: If your door is still noisy, it may benefit from some lubricant on the hinge pins. A bit of WD-40 or silicone spray can eliminate squeaks and keep everything operating smoothly.
Testing is a vital step because it allows you to ensure that all your hard work paid off and that your door is in good condition.
Common Issues and Troubleshooting
Even after making adjustments, you might encounter some lingering issues. Here are a few common problems and tips on how to fix or troubleshoot them:
– Door Still Sticking: If your door continues to stick, double-check that the hinge screws are tight and inspect for any paint or debris in the hinge area that may be causing friction.
– Squeaking Noise Persists: If your door squeaks despite lubrication, the hinge pin may be damaged. You may need to replace the hinge entirely.
– Warping Issues: Changes in humidity can warp the door. If you notice significant warping, consider checking your weather stripping or using a dehumidifier in particularly damp climates.
Taking the time to troubleshoot can save you headaches down the road. Don’t hesitate to return to previous steps if necessary.
Maintaining Your Hinges for Longevity
After you’ve successfully adjusted your non-mortise hinge, it’s essential to give it a bit of upkeep. Good maintenance ensures that your hinges remain functional for years to come. Here are some simple tips:
– Regular Lubrication: Apply a small amount of lubricant every few months to keep the hinges running smoothly.
– Check Tightness Periodically: Make it a habit to check the screws every few months, especially if the door is used frequently. Regular checks can prevent future adjustments.
– Inspect for Rust or Damage: Especially in humid areas, check for any rust or wear on the hinges. If you spot any, consider replacing them before they fail completely.
By taking these preventive measures, you help extend the life of your hinges and keep your interior doors functioning well.
In conclusion, adjusting a non-mortise hinge on an interior door is a simple yet valuable skill that can enhance your home’s functionality. With just a few basic tools and some observational skills, you can tackle this task with confidence. Remember, the door should be a seamless entryway, not an obstacle in your daily life. So roll up your sleeves, take your time, and soon enough, you’ll master those hinges like a pro!