Let me take you through the steps to adjust a door the way you’d straighten out a crooked picture frame. We’ll go over the common reasons for drooping, tools you’ll need, and the step-by-step process to get that door back in shape. It’s less about being a DIY expert and more about having the right approach.
Understanding Why Your Door Is Drooping
Before diving into the “how-to,” it’s helpful to know why your door is drooping in the first place. Doors are heavy, and they bear a lot of weight over time. When you use them repeatedly, the hinges can start to toil under that pressure. This can be especially true for doors made of solid wood or heavy materials.
Sometimes, a door might droop because of environmental factors. Humidity can cause wood to expand or warp, leading to misalignment. On the flip side, doors with improperly installed hinges can also droop right from the get-go. So, think of it as your door having a little identity crisis!
Common Signs of a Drooping Door
You might be wondering how to tell if your door is drooping. Look for these signs:
- Gaps between the door and the frame when closed
- Difficulty locking or latching the door
- Scraping sounds when opening or closing
- Uneven gaps at the top or bottom edges
Recognizing these signs early can save you a lot of trouble later on.
Tools You’ll Need for the Job
You don’t need a full workshop to fix a drooping door. A few common tools will do the trick. Here’s what you’ll want to gather:
- Screwdriver: Either a flathead or Phillips, depending on your hinge screws.
- Level: This helps you ensure your door is straight after adjustments.
- Wood shims: Useful for stabilizing the door if needed.
- Lubricant (like WD-40): This can help with sticky or squeaky hinges.
Having these simple tools on hand makes the adjustment process smoother.
Checking Your Hinge Alignment
The first step in adjusting a door is checking the hinge alignment. If the hinges aren’t aligned properly, your door won’t hang correctly. Here’s how to do it:
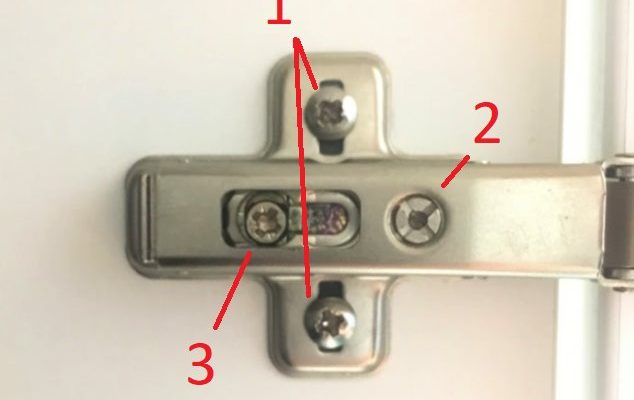
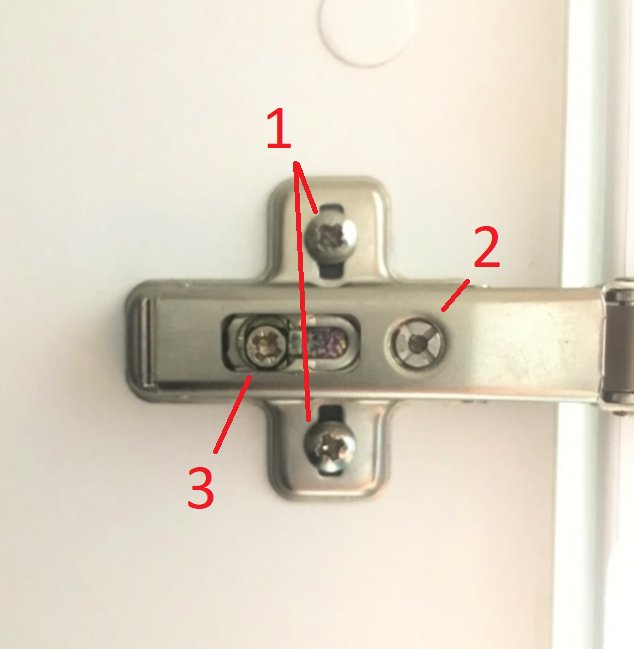
1. Examine the hinges: Look closely at where the door meets the frame and at the hinges themselves. Do they look straight? Bent?
2. Tighten screws: If any screws are loose, tighten them with your screwdriver. This often resolves minor drooping.
3. Use a level: Place your level against the door to check if it’s parallel to the ground. If it’s tilting, you’ll need to adjust the hinges.
Keeping your hinges aligned can make a world of difference. It’s a small step, but it often solves the problem.
Adjusting the Hinges
If tightening the screws didn’t do the trick, it’s time to adjust the hinges themselves. Here’s how:
1. Loosen the screws: Start with the top hinge. Use your screwdriver to loosen the screws, but don’t remove them completely.
2. Shift the hinge: If your door is drooping at the top, move the hinge up slightly. For drooping at the bottom, move it down. Nudge it just enough to make a difference.
3. Retighten the screws: Once you’ve positioned the hinge, retighten the screws securely.
Make sure to test the door after each adjustment. You should see an improvement every time you make a move.
Adding Shims for Extra Support
Sometimes, no matter how much you adjust the hinges, a door still droops. That’s where wood shims come in handy. They can help fill the gaps and give extra support. To use shims:
1. Identify where to insert shims: Usually, you’ll want them behind the hinges to lift the door.
2. Insert the shim: Carefully slide a shim into the gap. Be gentle, so you don’t break the shim or damage the door.
3. Check the fit: Close the door to see if the alignment improved. If it’s still drooping, you might need to add more shims.
This method is like putting a pillow under your mattress—sometimes a little lift is all you need.
Maintaining Your Door after Adjustments
Now that you’ve taken steps to adjust your door, maintaining it can keep it looking and functioning well for longer. Here are a few tips:
- Regular inspection: Every few months, check the hinges and screws for any loosening.
- Lubricate hinges: A quick spray of lubricant can help keep them moving smoothly.
- Watch for humidity: Keep an eye on moisture levels in your home, especially during rainy seasons; this can affect wood doors.
Taking care of your door means fewer adjustments in the long run.
When to Call a Professional
If you’ve tried everything and your door is still drooping like it’s had a long day, it might be time to call in a pro. Sometimes, the issue can be structural, particularly if the doorframe is warped or if the door is simply too heavy for the hinges installed. A professional can assess the situation and provide options for repair or replacement.
Sometimes, it’s best to lean on someone with the right training. You wouldn’t want to end up with a door that swings wide open or gets stuck after your hard work!
In summary, adjusting a door that’s drooping due to heavy use can be a straightforward task. With the right tools and a little bit of patience, you can get that door back to its prime shape, saving yourself from future headaches. Just remember, it’s all about taking it step by step. Happy fixing!