The good news? You don’t need to be a DIY pro to fix this. Adjusting a door sweep (whether it’s a classic rubber model, a bristle type, or even a fancy metal one) is straightforward—it just takes a little patience and a screwdriver. It doesn’t matter if you have a M-D Building Products sweep, a Frost King, or something you picked up at the local hardware store—the basic principles are the same. Let’s take a close look at how to get a perfect, airtight seal beneath your door, so you can stop wasting energy (and stop chasing that mysterious dirt trail across your floor).
What Does a Door Sweep Actually Do?
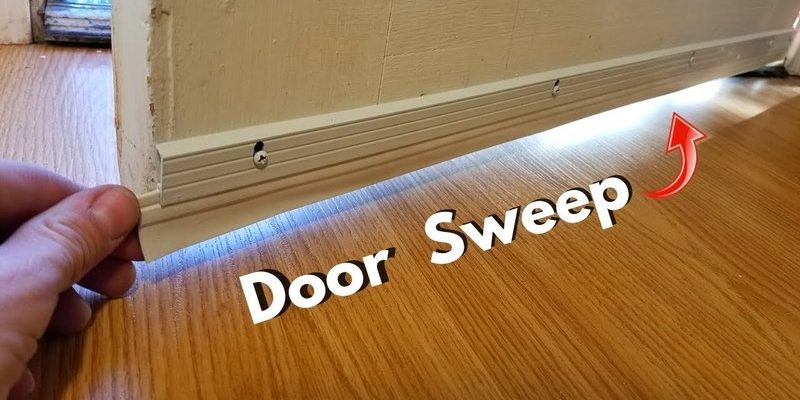
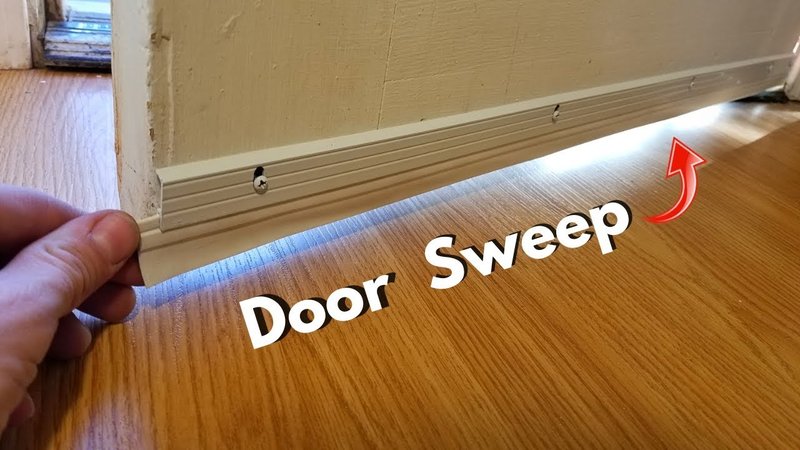
Think of a door sweep as a silent bouncer for your house. Its main job? Block anything from slipping in (or out) through the gap at the bottom of your door. When you install or adjust a door sweep correctly, you’re setting up a barrier against drafts that steal heat in the winter (or cool air in summer), sneaky insects, and even outdoor noise. It’s a small piece of hardware, but it has a big impact on your home’s comfort and energy efficiency.
Most door sweeps sit on the bottom edge of an exterior door. They come in different styles—some are rigid strips of vinyl or rubber, some have flexible bristles, while others are metal or even combination sweeps. The choice comes down to your specific door and what kind of sealing you want. For example, a garage door sweep might be a beefy rubber flap, while a simple interior door could use a thin strip.
If you’ve noticed your door sweep isn’t quite touching the floor, is scuffed or torn, or seems stiff and inflexible, it may not be sealing properly. Sometimes, a sweep is installed a bit too high or has worked loose over time. That’s why knowing how to *adjust* a door sweep is just as important as installing one in the first place.
Signs Your Door Sweep Needs Adjusting
Here’s the thing: Even the best door sweep will stop working if it isn’t installed at the right height or if it loosens up. It’s a little like wearing shoes that aren’t laced tightly—you just won’t get a good fit. Wondering if your sweep needs a tweak? Here’s what you might notice:
- Drafts: If you feel cold air coming through the bottom of the door, or if the area nearby is noticeably chillier, your sweep probably isn’t sealing all the way.
- Light leaks: If you can see daylight under the door—especially with the lights off and the outside bright—you’ve got a gap that needs to be closed.
- Bugs and dust: Creepy crawlies and unexplained dirt piling up near the gap? The sweep isn’t flush with the floor.
- Rub marks: Is the sweep scraping the floor, making it hard to open or close the door? It might be set too low.
Sometimes, even *after* you install a new door sweep, it might not be perfect right out of the box. Floors can be uneven, or the sweep might have shifted slightly after a few weeks of use. That’s why learning to adjust a door sweep for optimal sealing will save you time, frustration, and even a few bucks on your energy bill.
Tools and Materials You’ll Need
Before you start, grab the following tools. Don’t worry—nothing fancy needed. Most people already have these basics at home:
- Phillips or flathead screwdriver (depending on your sweep’s screws)
- Measuring tape or ruler (to check the gap height)
- Pencil (for marking placement if needed)
- Utility knife or scissors (if you have to trim a sweep to fit your door)
- Replacement sweep (if the old one is damaged)
Most door sweeps come with their own mounting screws and instructions. If you need a universal sweep for an odd-sized door, double-check the packaging to make sure it’s compatible—otherwise, you’ll spend more time troubleshooting than fixing.
How To Adjust a Door Sweep: Step-by-Step Instructions
This is where the magic happens. Honestly, it’s mostly a matter of patience: loosen, slide, tighten, repeat. Here’s how to get the job done:
1. Check the Sweep’s Current Position
First, open the door so you have clear access to the bottom edge. If your sweep is the screw-on type, look for a series of screws along the face of the sweep—usually three or four. Some sweeps (especially brands like M-D or Frost King) also have slots instead of holes, which let you gently slide the sweep up or down.
Take a good look: is the sweep already touching the floor, or is there a gap? Aim for the sweep to *just* make contact with the floor, but not so much that it drags.
2. Loosen the Screws
Use your screwdriver to carefully loosen (but not fully remove) the screws holding the sweep in place. If the sweep pops off easily, that’s fine—you can hold it next to the door to check the fit. Otherwise, you should be able to gently shift it up or down while the screws are loose.
If the sweep feels stuck, double-check that all screws are loose. Don’t force it—some sweeps may need a little extra wiggling, especially if they haven’t been adjusted in years.
3. Adjust the Height
Slide the sweep down so it *just* brushes the floor. For most homes, a good rule is to leave about the thickness of a credit card between the sweep and the floor—enough to seal out air, but not enough to snag on rough surfaces or mats. If you have carpet under the door, you’ll want the sweep to compress the fibers, but not flatten them.
Mark the new position with your pencil if it helps. Confirm that the sweep looks even across the whole bottom—especially with uneven floors, you may have to compromise a bit for the best possible seal.
4. Tighten It Up
Once you’re happy with the position, tighten the screws again. Don’t overtighten—just enough to hold it snugly. Open and close the door a few times to make sure it swings smoothly and the sweep isn’t binding or catching.
If you still see daylight or feel a draft, loosen and tweak the height in small increments until you hit the sweet spot. Sometimes, a bit of trial and error is completely normal.
Tips for Tricky Installations and Odd Gaps
Every home is a little different. Maybe you have an older doorframe, or your floor is uneven. Here’s what to do if your standard adjustment isn’t quite enough:
- Uneven floors: Door sweeps with adjustable slots can be angled slightly to match the slope of your flooring. Some sweeps allow you to trim off material with a utility knife for a custom fit.
- Wide gaps: If your floor slopes or the gap is larger than normal, look for an extra-large or heavy-duty sweep. Some can fill gaps up to 1.5 inches or more. Frost King and M-D both make oversized models.
- Threshold mismatch: If your door has a metal threshold, check that the sweep is making contact with the raised surface, not hovering above it. You might need a special style—like a U-shaped sweep that wraps around the door’s bottom edge—for a tight seal.
If you try everything and still have trouble sealing the gap, consider swapping your sweep for a different design—or adding a secondary weather seal (like foam tape) to fill in tough spots.
How To Tell If You’ve Got Optimal Sealing
You might be wondering, “How do I know if my door sweep is really working?” The answer is part science, part common sense. Here’s what you can look for:
- No more drafts: Stand by the closed door on a windy day. If you feel air moving, try to trace exactly where it’s coming from. A good seal means *no* noticeable breeze.
- No visible light: Turn off the lights inside, then check for sunlight peeking through the gap. Even a thin line means you’ve still got room for improvement.
- Smooth door action: The door should open and close easily. If the sweep drags, it’s too low—if it swings freely but leaves a gap, it’s too high. Aim for a gentle brushing sound.
A well-adjusted door sweep should feel almost invisible in daily use—not something you ever think about. That’s the goal.
Comparing Different Types of Door Sweeps
Not all sweeps are created equal. Picking the right style can save you a lot of future troubleshooting. Here’s a quick rundown of the main types (and when each makes sense):
- Vinyl or rubber blade: These are common, inexpensive, and easy to adjust. Great for smooth floors.
- Bristle sweeps: Look like thick paintbrushes. Best for rough or uneven floors, since the bristles flex to fill gaps.
- Aluminum or metal with rubber insert: These are heavy-duty (K&B, M-D, and Frost King all make them). Ideal for exterior or garage doors that need to handle weather and traffic.
Honestly, if your door takes a lot of abuse (think pets, rain, or heavy foot traffic), invest in a tougher model. For interior doors, a basic vinyl sweep usually does the trick. If you’re dealing with a truly unique door (like a vintage or custom shape), universal sweeps are easier to trim to size—but check that they’ll blend well, both in *look* and *function*.
Door Sweep Troubleshooting Tips
Let me explain—sometimes things just don’t go smoothly. Maybe you can’t get the sweep to line up, or the screws strip out. Here’s what can help:
- Screws loosen over time: If your sweep keeps slipping, add a dab of wood glue in the screw holes, or use slightly larger screws.
- Can’t get a perfect seal: Try adding a second, thinner sweep or a strip of weather tape. You can also shim one side of the sweep if your floor is seriously uneven.
- Damaged sweep: No amount of adjusting will fix a torn or cracked sweep. Just replace it—most are under $15, and it’s worth the peace of mind.
- Door binding: If the sweep constantly drags, double-check both the floor and the sweep height. Sometimes even a tiny shift (1/16 inch) makes all the difference.
If your sweep is still causing problems, reread the manufacturer’s instructions—brands like M-D and Frost King both have online manuals that cover common mistakes. And hey, sometimes a fresh set of eyes (a friend, neighbor, or a quick search for related troubleshooting tips) can spark a solution you might have missed.
Final Thoughts: Sealing the Deal on Door Sweeps
A well-adjusted door sweep might not get much glory, but it’s one of those tiny fixes that makes a home feel instantly cozier and more secure. Once you’ve found that sweet spot—where the sweep brushes the floor perfectly—you’ll wonder how you ever put up with those drafts or endless dust bunnies slipping through.
The process is pretty approachable, no matter what brand or type of sweep you have. Just remember: go slowly, tweak in small steps, and don’t be afraid to swap out your sweep if it’s beyond repair. With a good eye and a steady hand, you can adjust a door sweep for optimal sealing and enjoy a more comfortable, energy-efficient home. Door sweeps may not be glamorous, but when they’re set just right, they make a difference you’ll notice every single day.