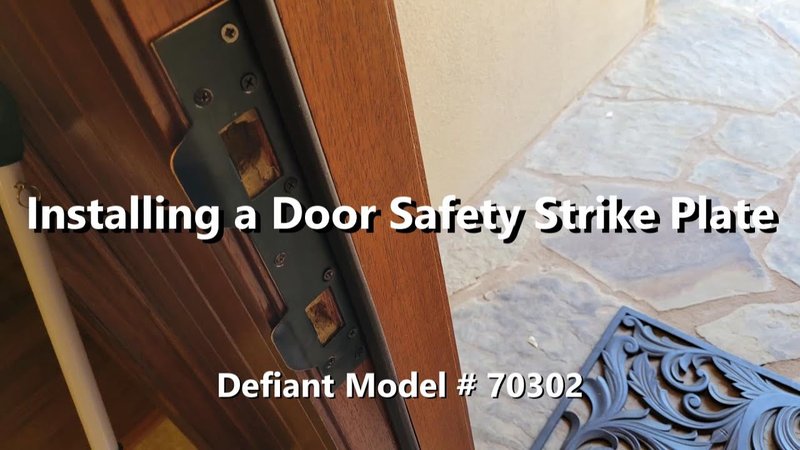
At first glance, it might seem complicated, but it’s really just a matter of making some simple adjustments. Think of it as fine-tuning an instrument; a little twist here and a nudge there can make all the difference. In this guide, we’ll break down the steps to adjust your door jamb so you can ensure that your new strike plate fits snugly and keeps your door secure.
Understanding the Strike Plate
Before we dive into the adjustment process, let’s take a moment to understand what a strike plate does. The strike plate is a small metal plate installed on the door frame that holds the latch in place when the door is closed. It’s vital for security and proper functioning of your door.
If you’ve recently bought a new strike plate, it may be a different size or shape from the old one. Sometimes, the screws might not align perfectly with the latch, causing it to jam or not close correctly. Honestly, having an ill-fitting strike plate can lead to issues like drafts or even security risks. You want your door to be as snug as a bug in a rug, right?
You might be wondering how to identify the right strike plate for your door. Generally, you’ll want to match the size and screw placement of the previous plate. If you’re switching to a different style or brand, familiarize yourself with the specific requirements of that product.
Tools Needed for the Job
To adjust your door jamb like a pro, you’ll need a few simple tools. Don’t worry; you don’t have to be a master craftsman to tackle this! Here’s a quick checklist:
- Screwdriver: A Phillips-head or flathead screwdriver will work, depending on your screws.
- Chisel: This will help in removing any wood for more space, if necessary.
- Hammer: To gently tap the chisel if you need to make adjustments.
- Measuring tape: For precise measurements, so your new strike plate fits just right.
- Wood filler (optional): If you’ve removed some old screws and need to fill those gaps.
With these tools by your side, you’ll be ready to tackle the adjustments. You might even find it a bit therapeutic—like putting together a jigsaw puzzle.
Identifying the Problem
Before you start adjusting the jamb, it’s essential to identify what the problem is. Is your door not closing all the way? Are the screws not lining up with the strike plate? Here are a few signs that something needs adjusting:
1. Gap Between the Door and Frame: If you see a noticeable gap when your door is closed, it’s a sign that the strike plate may need to be repositioned.
2. Difficulty Closing the Door: If you have to push hard to close the door, it’s likely that the latch isn’t catching the plate properly.
3. Misaligned Strike Plate: You can easily check alignment by closing the door and looking at where the latch meets the strike plate. If they don’t line up, adjustments are needed.
Identifying the exact issue will save you time and ensure that you make the right adjustments.
How to Adjust the Door Jamb
Now that you know what tools to use and how to identify the problem, let’s get into the steps for adjusting the door jamb.
1. Remove the Old Strike Plate: Start by unscrewing the old strike plate. Be gentle to avoid damaging the door frame.
2. Check the Alignment: Close the door and observe where the latch meets the frame. This will help you see how far off the alignment is.
3. Mark the New Position: With a pencil, mark where the latch hits the door frame. If it’s not aligned with the strike plate, you’ll need to move the plate.
4. Adjust the Jamb: Using your chisel and hammer, gently adjust the wood around your marked area. You want to create a space that allows the new strike plate to fit flush. If the new plate needs to come up or down, carefully chip away at the wood until it’s at the right height.
5. Install the New Strike Plate: Once everything is aligned, install the new strike plate using the screws. Make sure it’s securely attached but don’t overtighten, which could crack the wood.
6. Test the Door: After installing the strike plate, close the door and see if the latch engages smoothly. If it still doesn’t fit perfectly, repeat the process until you’re satisfied.
With a little patience, you’ll have a door that works like a charm.
Common Issues and Troubleshooting
Even with the best intentions, things can go awry. You might face a few common issues during your adjustment process. Here’s how to troubleshoot:
– Strike Plate Still Misaligned: If the strike plate doesn’t fit after adjusting the jamb, double-check your measurements and see if you missed any areas around the latch.
– Door Rubbing Against the Frame: If the door is sticking, you might need to adjust the hinges rather than the jamb. Loosen the screws slightly, reposition, and retighten.
– Cracked Jamb Wood: If you accidentally chiseled too much, you can use wood filler to patch up the gaps. Allow it to dry before reinstalling the strike plate.
These simple fixes can save you time and frustration and ensure your door adjusts smoothly.
Final Thoughts
Adjusting a door jamb to accommodate a new strike plate is a manageable project, even for beginners. By taking it step by step, gathering your tools, and troubleshooting as needed, you can create a door that functions beautifully. Remember, a well-fitting door not only keeps your space secure but also adds to your home’s overall comfort.
So, roll up your sleeves and give it a try! You might discover a new knack for DIY repairs along the way. Happy adjusting!
