Think of the door jamb as the framework that holds everything together. If it’s out of whack, your new hardware will struggle to function properly. It’s about finding that perfect alignment so everything works smoothly. In this guide, I’ll walk you through the entire process, ensuring you feel confident tackling this project.
Understanding Your Door Jamb
Before diving into adjustments, let’s clarify what a door jamb actually is. The door jamb consists of the vertical pieces that frame the door and support the door itself when it’s closed. It also provides space for the hinges and the lock. If you’ve ever noticed gaps around a door, it may indicate that the jamb is misaligned.
You might be wondering why this matters. Proper alignment ensures that your door opens and closes easily, keeps out drafts, and maintains security. Misalignment can lead to wear on your hardware and even cause the door to stick, making day-to-day life a little annoying. So, taking the time to adjust your door jamb is well worth the effort.
Tools You’ll Need
Before you start, gather your tools. Having everything on hand will make the process smoother. Here’s a handy list:
- Measuring tape: For checking dimensions.
- Level: Ensures everything is straight.
- Screwdriver: For adjusting screws on your hardware.
- Chisel: If you need to make adjustments to the jamb itself.
- Wood filler: To fix any gaps or holes.
- Wood screws: To reinforce the jamb if needed.
Once you have these tools ready, you’re set to start your adjustments. The next step is assessing the current state of your door jamb.
Assessing the Current Alignment
Before making any adjustments, take a moment to assess the alignment of your door jamb. Stand back and look at the door from different angles. This is like taking a step back to see the bigger picture—sometimes, a little distance helps you notice things you might miss up close.
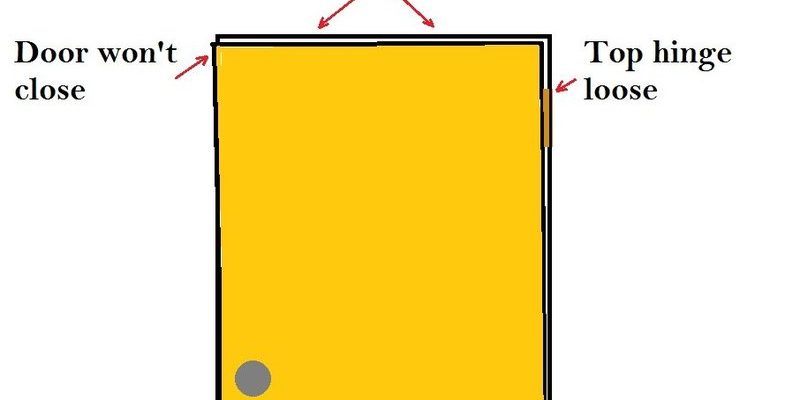
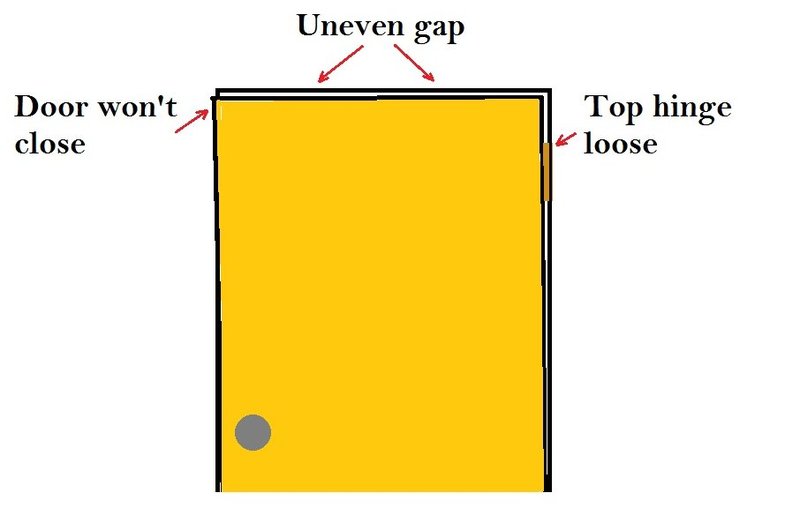
You’ll want to check for gaps between the door and the jamb. Are there spaces at the top, sides, or bottom? Try closing the door slowly while watching how it interacts with the jamb. If it sticks or doesn’t close flush, that’s a sign that you’ll need to adjust the jamb.
Grab your measuring tape and check the height at the top and bottom of the door. Are they even? If one side is lower, it may mean the jamb is tilted and needs some serious tweaks.
Making the Adjustments
Now let’s talk about the actual adjustments. The approach will depend on what you discover during your assessment. Here are the steps for the most common scenarios:
If the top of your door is higher on one side, you’ll want to adjust the hinges first. Here’s how:
1. Loosen the screws on the top hinge slightly without removing them completely.
2. Raise or lower the hinge. You might need to add shims—small pieces of wood—behind the hinge to achieve the right angle.
3. Tighten the screws back down, keeping everything in position.
You’re aiming for a level surface here, so check with your level as you go. It’s all about getting it just right.
If the bottom of your door is misaligned, you might need to do a little more work:
1. Check the hinges at the bottom. Sometimes, simply adjusting these can help.
2. If that doesn’t solve the issue, you may need to chisel away at the jamb slightly at the bottom to allow for the door to align properly.
3. After chiseling, test the door again to see if it swings smoothly.
Remember, if you’re in doubt, it’s okay to take things slow and adjust little by little rather than going for big changes all at once.
Reinforcing the Jamb
Once everything is aligned, it’s a good idea to reinforce your door jamb. This ensures that your hard work won’t go to waste. If you’ve made any changes with wood filler or shifted parts, it’s time to secure them.
1. Use wood screws to reinforce the hinges and any areas where you might’ve chiselled.
2. Fill any gaps with wood filler and sand it down for a smooth finish.
3. Allow everything to dry if you used any filler; then, you can repaint if needed.
Reinforcing your jamb gives it that extra durability, ensuring it can hold up against everyday use.
Final Check and Testing
Now that you’ve made the adjustments and reinforcements, it’s time for the final check. Stand back and admire your handiwork. Open and close the door multiple times to see how it works.
You want to ensure it swings smoothly without any sticking. Check again for gaps or any wonky angles. If something still feels off, don’t hesitate to make small adjustments until it feels perfect.
Remember, adjusting a door jamb for new hardware alignment can take a little patience. Think of it like tuning a musical instrument; sometimes, it just takes a bit of fine-tuning to get everything sounding just right.
Adjusting a door jamb for new hardware alignment may seem overwhelming at first, but with the right tools and a little patience, you can handle it like a pro. Whether you’re looking to improve the look or function of your door, these steps will help you achieve a smooth and aligned fit.
So next time you’re faced with a misaligned door, remember these tips. You’ve got the know-how to tackle it with confidence. Happy adjusting!