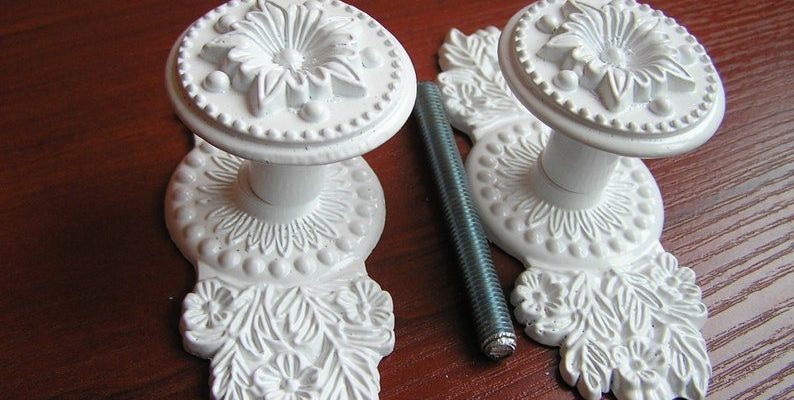
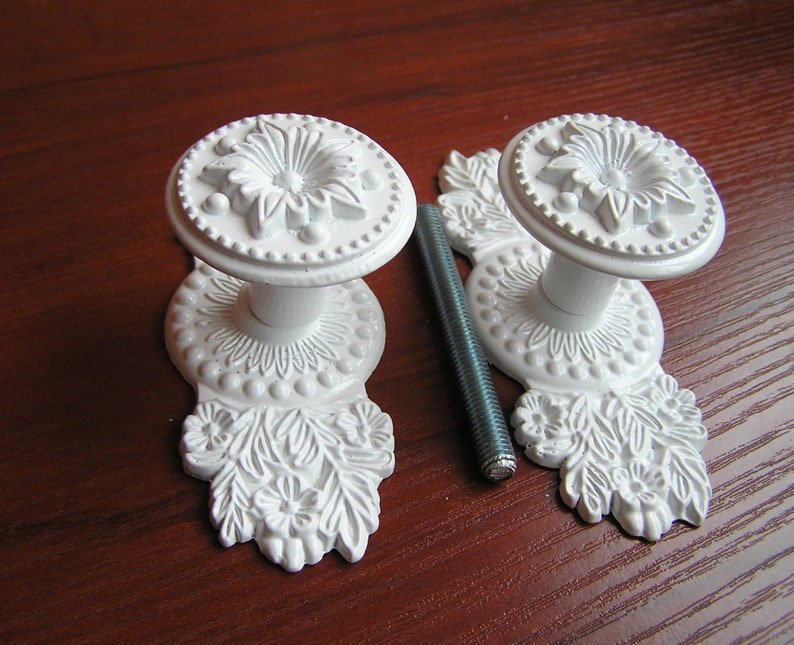
Before jumping into the “how-to,” you might be wondering what a rosette really is. A rosette is essentially a circular ornament that sits around the base of your door knob. It can be made from various materials like metal or brass, and it comes in a variety of designs. They’re easy to install and can make a huge difference in the overall look of your door. So, grab your tools, and let’s get started on this fun little home improvement project!
Why Add a Decorative Rosette?
Thinking about adding a decorative rosette? Here’s the thing: not only do they enhance the visual appeal of your door knobs, but they also serve a functional purpose. A rosette covers the gap between the knob and the door, creating a cleaner look. If you’ve ever noticed unsightly holes or imperfections around your door hardware, a rosette can mask them effectively.
Moreover, choosing the right rosette can add personality to your space. Whether your style leans towards modern, rustic, or vintage, there’s a rosette out there that will suit your taste. Imagine transforming a simple knob into a focal point of your room!
Adding a rosette also allows you to update the look without completely replacing your door hardware. This makes it an eco-friendly option as it reduces waste while refreshing your home’s aesthetic. In a world where home decor can get pricey, this is a win-win!
Choosing the Right Rosette
When selecting a decorative rosette, consider the finish and style of your existing door knob. Matching the color and material can create a cohesive look. For example, if you have a brushed nickel knob, a rosette in a similar finish will look seamless.
Think about the size too. A rosette that’s too big or too small can throw off the proportions. Generally, a rosette should not overwhelm the knob but rather complement it. If you’re unsure, bring your door knob to the hardware store or take measurements to find the best fit.
Design is another factor. Some rosettes have intricate designs while others are sleek and simple. Choose a style that reflects your personality and aligns with the existing decor. A decorative rosette can really pull a room together, so take your time in making a decision!
Gathering Your Tools
Before diving into the installation process, you’ll need to gather a few tools. Honestly, this is a straightforward DIY project, and you don’t need a full workshop. Here’s a quick list of what you’ll need:
- Decorative rosette
- Screwdriver (flat-head or Phillips depending on your rosette)
- Measuring tape
- A pencil (for marking)
- Cleaning cloth
Make sure your workspace is clean and free from clutter. If your door knob has any dirt or grime, give it a quick clean before starting. This will make the installation look sharper and more polished.
Removing the Existing Door Knob
Before you can add a decorative rosette, you’ll need to remove your existing door knob. This usually involves unscrewing the knob and any mounting plate. Here’s how to do it:
1. Locate the screws: Check behind the knob and near the base for screws. If you see them, use your screwdriver to remove them.
2. Take off the knob: Gently pull the knob away from the door. If it feels stuck, wiggling it a bit can help.
3. Remove the mounting plate: If your knob has a decorative plate attached, you’ll also need to take that off to reveal the area where the rosette will go.
This step may seem tricky, but most door knobs can be easily removed with a little patience. Just remember to keep the screws in a safe place, as you’ll need them later.
Installing the Decorative Rosette
Now for the exciting part: getting that rosette installed! Here’s a simple step-by-step guide:
1. Position the rosette: Place it around the base where the knob was. Make sure it’s flush against the door.
2. Mark the screw holes: Using the pencil, mark where the screws will go. This ensures they’ll be aligned properly.
3. Drill pilot holes: If necessary, you may want to drill small pilot holes at the marked spots. This makes it easier to drive in the screws.
4. Attach the rosette: Using your screwdriver, fasten the screws into the pilot holes, securing the rosette snugly to the door.
Make sure it’s tightly attached, but don’t overdo it—too much pressure can damage the rosette or the door itself.
Reattaching the Door Knob
With the rosette now firmly in place, it’s time to reattach your door knob. Here’s how to do that:
1. Align the knob: Slide the knob back onto the rosette, ensuring it’s properly aligned.
2. Secure with screws: Use the screws you saved earlier to secure the knob in place. Again, take care not to overtighten.
3. Test the knob: Give it a few spins and ensure it operates smoothly. You don’t want any weird sticking or wobbling.
If the knob feels loose or doesn’t turn properly, you might need to adjust the screws slightly.
Final Touches and Cleaning
Once everything is installed, it’s time to step back and admire your handiwork. But before you do that, a little cleaning goes a long way. Use a soft cloth to wipe down the rosette and knob, removing any fingerprints or dust that accumulated during the installation process.
Don’t forget to check how it looks from different angles. Sometimes a small adjustment can make a big difference. If everything looks good, then congratulations! You’ve added a decorative rosette that elevates your door knob—and your space.
If you’re ever in need of a change again, remember that changing out the rosette is a quick and simple way to refresh your home decor.
In summary, adding a decorative rosette to an existing door knob is an easy project that can significantly enhance your door’s look. With a few tools and steps, you can transform the ordinary into the extraordinary. Dive into your next DIY adventure with confidence!