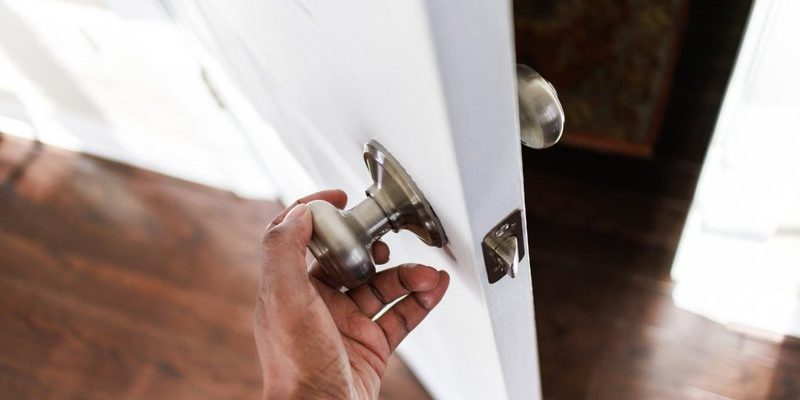
Understanding why a latch plunger can get sticky is key to resolving the issue. Latch plungers can stick due to dirt, grime, or even rust that builds up over time. If you have a specific type or brand of knob in mind, like Schlage or Kwikset, don’t worry—these steps can generally apply to most standard knobs you find around the house. So, grab your tools, and let’s dive into how we can fix this pesky problem together.
Identifying the Problem: Signs of a Sticky Latch Plunger
Before you start pulling things apart, it’s essential to recognize the signs of a sticky latch plunger. If you notice that the knob feels resistant when you turn it, or if you have to press it multiple times for the latch to engage, then you likely have a sticky plunger on your hands.
Some common indicators include:
- The latch doesn’t retract smoothly when you turn the doorknob.
- You hear a grinding noise when you try to operate the knob.
- The door doesn’t latch securely or often pops open.
If you’ve experienced any of these scenarios, you’re not alone. Many homeowners have dealt with this issue at some point. The good news is that with a few basic tools and a little patience, you can get everything back to normal.
Gathering Your Tools: What You Need for the Fix
Now that you’ve identified the problem, let’s talk about what you’ll need to tackle this fix. Honestly, the beauty of fixing a sticky latch plunger lies in its simplicity. You won’t need a fancy toolbox; just a handful of everyday items will do the trick.
Here’s what you should gather:
- A screwdriver (usually Phillips-head or flathead, depending on your knob).
- Lubricant (like WD-40 or a silicone spray).
- A soft cloth or rag for cleaning.
- A small brush (an old toothbrush works great).
Having these tools at hand will make the process much smoother. Once you have everything ready to go, you’ll be just a few steps away from solving that sticky latch problem.
Step-by-Step Guide: Fixing the Sticky Latch Plunger
With your tools in hand, it’s time to dive into the fix. Here’s a straightforward, step-by-step guide to help you tackle this issue like a pro.
Step 1: Remove the Door Knob
Start by removing the door knob. To do this:
1. Locate the screws on the knob. They’re usually on the side or behind the knob itself.
2. Using your screwdriver, gently unscrew the knob. Take care not to rush; you don’t want to strip any screws.
3. Once unscrewed, pull off the knob and set it aside safely.
If your door knob has a cover plate, you may need to pop that off first. This may require a bit of wiggling, but be gentle.
Step 2: Clean the Latch Plunger
Now that the knob is off, it’s time to tackle the main culprit—the latch plunger. Use your cloth to wipe down any visible dirt or grime. If it’s particularly dirty, take your small brush and carefully scrub around the plunger.
1. For stubborn gunk, use some warm soapy water to soak it up and loosen any build-up.
2. Rinse it off and dry it with your cloth.
3. A clean surface allows for better lubrication, which is crucial for smooth operation.
Step 3: Apply Lubrication
After cleaning, it’s time to apply some lubricant to the latch plunger.
1. Shake your can of WD-40 or silicone spray.
2. Gently spray a small amount onto the latch plunger—less is more here.
3. Important: Move the plunger in and out a few times to work the lubricant into the mechanism.
This will help reduce friction and make the plunger operate more smoothly.
Step 4: Reassemble the Door Knob
Now that everything is clean and lubricated, it’s time to put it back together.
1. Position the latch plunger back into the door hole.
2. Align the knob back onto the spindle and make sure it fits snugly.
3. Reinsert and tighten the screws carefully to avoid any damage.
After you’ve reassembled everything, give the knob a few turns to ensure it’s functioning as it should.
Testing the Door: Ensuring Smooth Operation
Now that your knob is back on, it’s time to put it to the test. Turn the knob several times to see if the plunger moves freely. You should feel a noticeable difference!
If it still feels sticky, don’t worry—just repeat the cleaning and lubrication process. Sometimes it takes a bit of extra attention to get it working perfectly again.
While you’re at it, check the alignment of the strike plate on the door frame. If it’s misaligned, it can contribute to operational issues. Adjust it if necessary to ensure a good fit.
Preventing Future Problems: Tips for Maintenance
Now that you’ve fixed the sticky latch plunger, let’s talk about how to keep it that way. Regular maintenance goes a long way in preventing future issues.
Here are some tips:
- Clean regularly: Every few months, wipe down the knob and latch with a damp cloth to prevent dirt build-up.
- Lubricate occasionally: Applying lubricant occasionally can help keep everything smooth and functional.
- Inspect for wear: Check for any signs of rust or damage. Replacing parts early can save you from bigger issues down the road.
Taking these small steps can prolong the life of your interior door knob and keep it working like new.
Fixing a sticky latch plunger on an interior door knob is a simple task that anyone can tackle with just a few tools and a bit of time. It’s satisfying to see a quick fix lead to a smooth-operating door. Plus, now you know how to maintain it and prevent future issues.
So next time you face a stubborn knob, you can confidently say, “I’ve got this.” Just remember to gather your tools, follow the steps, and keep an eye on maintenance. Enjoy your newly functioning door!