Protecting your door hardware during a paint job isn’t just about aesthetics, though; it’s about keeping everything in tip-top shape. Imagine putting in all that effort to create a splendid room only to have the doorknob look like it just emerged from a paintball fight. Nobody wants that! Whether you’re a DIY warrior tackling this job alone or you’re hiring professionals, understanding how to keep your door hardware safe is crucial.
Here’s how you can easily shield your door hardware from paint, ensuring it remains functional and attractive.
Why Protecting Door Hardware is Important
You might be wondering, “What’s the big deal if a little paint gets on my doorknob?” Well, here’s the thing: paint can create a sticky mess that may interfere with how smoothly your door operates. Imagine having to yank a door open just because the hinge got gummed up with paint. Moreover, if the hardware is painted over, it can lead to corrosion or rust over time.
More than just looks, protecting your doorknobs and hinges helps preserve their functionality. After all, door hardware is used daily, and you want it to work properly without any hiccups. If you don’t take precautions, you might find yourself having to replace expensive hardware sooner than necessary—a hassle that can easily be avoided.
Gather Your Materials
Before diving into the protection process, you’ll need the right materials. Getting organized can make the whole experience smoother and more efficient. To protect your door hardware from paint, consider grabbing:
- Painter’s tape: This specialized tape is great because it sticks well but won’t leave residue behind.
- Plastic sheeting: Great for covering larger areas, just like a drop cloth for your furniture.
- Old rags or newspapers: Perfect for wiping off any accidental drips.
- Painter’s plastic: This material is ideal for wrapping around hardware, offering better coverage while being easy to manipulate.
- Scissors: To cut your tape or plastic to the right size.
Having these materials on hand means you can protect your door hardware quickly and effectively. A little preparation goes a long way, making sure you don’t have to scramble at the last minute.
Step-by-Step Protection Process
Now that you’re prepped, let’s break down how to protect your door hardware effectively. There are several methods you can use, but consistency is key. Here’s a simple step-by-step process.
1. Remove or Mask Hardware: If possible, take the doorknob and hinges off. This not only protects them but gives you a cleaner painting area. If you can’t remove them, use painter’s tape to carefully mask around the hardware.
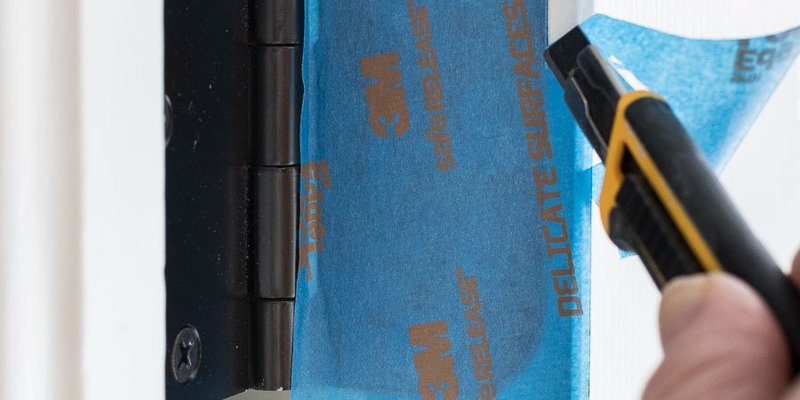
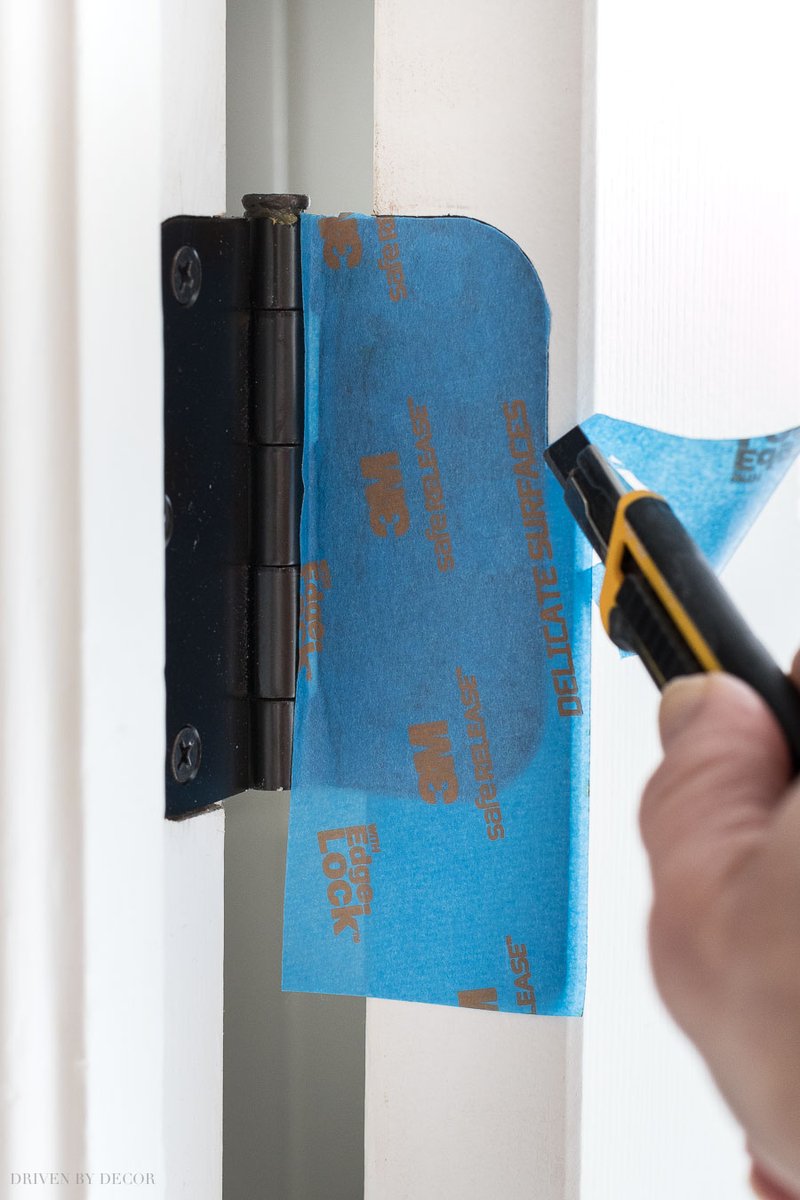
2. Apply Painter’s Tape: Cover exposed areas tightly with painter’s tape. Make sure to press the edges down firmly to avoid any paint sneaking underneath.
3. Use Plastic Sheeting: For larger pieces like door handles or strike plates, wrap them in plastic sheeting. Secure it with tape to keep it from slipping off while you paint.
4. Check Twice, Paint Once: Before starting to paint, take a look around to ensure all hardware is adequately covered. It’s better to double-check than to find paint on your prized doorknob later.
Alternative Methods for Protection
If the methods above feel too tedious, there are some alternative ways to protect your door hardware. Different approaches can offer the same level of protection with less hassle.
Using Old Socks: Believe it or not, an old sock can be a simple solution! Slip it over doorknobs or hinges before painting. Just make sure it’s clean and dry—not the best idea to use one that’s been through the mud!
Buying Hardware Covers: There are also specific hardware covers available at home improvement stores. These come with adhesive backs and fit over knobs and hinges. They’re reusable and can save time, especially if you paint frequently.
Cleaning Up After Painting
Once you’ve finished painting and allowed everything to dry, it’s time to remove all that protective gear. Here’s how to do it without a hitch:
1. Peel Tape Off Gently: Start to slowly remove the painter’s tape; peel it back at a 45-degree angle. This helps avoid tearing the paint underneath.
2. Remove Plastic Sheeting: Take off the plastic carefully to avoid any paint drips falling onto the door or floor.
3. Check for Mistakes: Do a quick inspection. If you spot any paint on the hardware, use a rag to gently wipe it off before it dries completely.
Common Mistakes to Avoid
Even seasoned DIYers can make mistakes here and there. Let’s look at some common pitfalls when protecting door hardware during painting, so you can avoid them.
Skipping the Prep: Underestimating the importance of prep work can lead to disaster. Always take the time to cover or remove hardware.
Using Regular Tape: Avoid using regular tape, as it can leave sticky residue behind. Painter’s tape is specially designed for this purpose and makes your life easier.
Not Checking Your Work: After painting, it’s tempting to assume everything is fine. Always verify that you didn’t miss any spots or get paint on exposed hardware.
Protecting your door hardware during a painting job doesn’t have to be a hassle. By taking a little time to prep properly, you can ensure your knobs, hinges, and locks remain in excellent shape. Whether you choose to remove them, mask them with painter’s tape, or use alternative protection methods, a little foresight goes a long way.
Incorporate these simple protections into your painting routine, and you’ll keep everything looking sharp and functional for years to come. After all, a beautiful paint job is complete only when all elements—door hardware included—are clean and stunning. Happy painting!