
Protecting your door hardware isn’t just a precaution; it’s about preserving the beauty and functionality of your home’s features. Think of it as wrapping up your favorite dish to keep it from spilling during a bumpy drive. In this guide, we’ll explore the best ways to guard your door hardware against the chaos that often comes with renovations, ensuring everything looks as good as new when it’s time to show off your hard work.
Understand the Risks Involved
Before you even start protecting your door hardware, it helps to understand what you’re up against. Renovations can be messy, involving dust, paint splatters, and the occasional bump from tools or furniture being moved around. Just like you’d put on a helmet before riding a bike, knowing the risks helps you prepare better.
Typically, door hardware can suffer from:
- Scratches: Accidental brushes with tools or materials can leave unsightly marks.
- Paint Damage: Paint drips or oversprays can ruin the finish of your door handles.
- Dents: Heavy objects can easily knock into hinges or knobs, causing dents.
Understanding these risks is the first step in taking action, ensuring your hardware stays safe while your home undergoes its makeover.
Remove Hardware When Possible
One of the most effective ways to protect your door hardware is to remove it during renovations. It might feel like an extra step, but think of it as taking off your shoes before entering a clean house. By removing hardware, you’re avoiding any accidental damage altogether.
Here’s how to go about it:
1. Gather Your Tools: You’ll typically need a screwdriver (flathead or Phillips, depending on your screws).
2. Label Everything: As you remove pieces, label them to make reinstallation easier. You don’t want to end up with a bag of screws that you can’t match to their respective handles.
3. Store Safely: Keep all pieces in a secure place. A small container or bag works wonders to keep screws and hardware together.
4. Clean the Surface: Before you put everything back in place, give the surfaces a quick wipe down to remove dust or debris.
By taking these steps, you’re not just protecting your hardware; you’re making the entire process smoother for yourself.
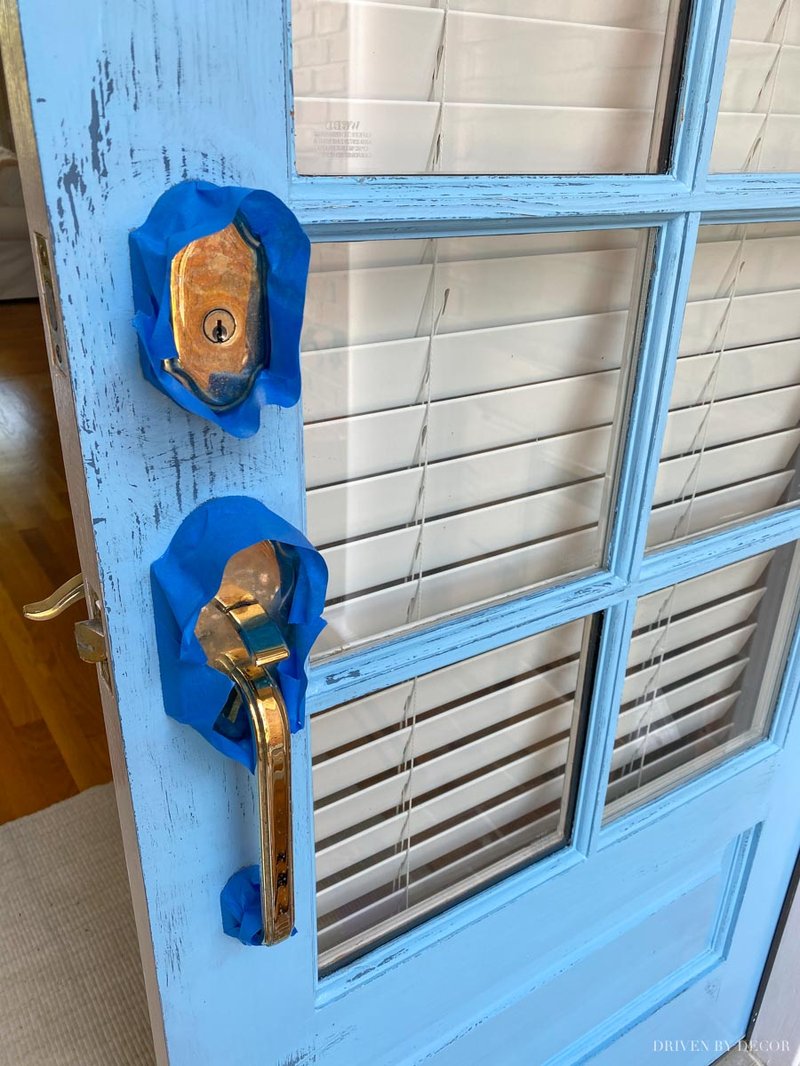
Use Protective Covers
If removing the hardware isn’t an option, using protective covers can be a game-changer. Think of them as armor for your door hardware. These protective measures are designed to shield your hardware from dust and damage.
Here are some suggestions:
- Painter’s Tape: A simple yet effective way to cover knobs and handles. Just wrap it around the hardware to keep paint splatters off.
- Plastic Wrap: For an extra layer of protection, use plastic wrap. It keeps out dust while still allowing easy access when you need to open doors.
- Soft Cloths: Wrapping fragile pieces with soft cloths can help absorb any accidental knocks.
Using these materials can save you from a lot of headaches later on, letting you focus on the renovations instead of worrying about your hardware.
Regular Maintenance Before Renovations
Think of your door hardware as part of a car—you wouldn’t drive it around without regular maintenance, would you? Before you dive into renovations, it’s a good idea to check on your door hardware’s condition first.
Before starting your project, take a few moments to:
- Inspect for Damage: Look for any existing scratches, rust, or loose screws. Addressing these issues now can prevent bigger problems later.
- Clean Thoroughly: Use a gentle cleaner to wipe down the hardware. Removing dirt makes it easier to protect.
- Lubricate Moving Parts: A bit of lubricant on hinges can help ensure they don’t get stuck during the busy renovation period.
By maintaining your door hardware ahead of time, you’ll not only protect it but also ensure that it works smoothly once the renovation dust settles.
Shielding During Heavy Work
If you’re planning any heavy work, like knocking down walls or moving large furniture, think of your door hardware as a delicate flower. You wouldn’t want to trample it while you’re rearranging the garden!
Here’s what you can do:
1. Create a Barrier: Place large sheets of cardboard or old blankets in front of the door area to shield hardware from any potential impacts.
2. Direct Traffic Wisely: If your renovation crew is working in tight spaces, clearly mark traffic paths that avoid areas near your door hardware.
3. Coordinate Work: Schedule heavy work at times when door access isn’t critical, allowing you to close them off from potential damage.
By creating a protective bubble around your door hardware, you’re ensuring it survives the renovation chaos.
Post-Renovation Check-Up
After the renovations are complete, it’s time for a little TLC for your door hardware. Just like a post-race check-up for athletes, giving your hardware some attention will help it shine.
Here’s how to do a thorough post-renovation check:
- Inspect Thoroughly: Look for any scratches or damage that might have occurred during the work. This is your chance to address issues while they are fresh.
- Clean Everything Again: Dust and debris can settle even on hardware that was previously protected. A quick wipe-down will bring back its luster.
- Reinstall Any Removed Pieces: If you removed any hardware, now’s the time to put it back in place. Make sure everything is secure and functions properly.
Taking these steps means your door hardware will not only look great but function perfectly for years to come.
In Conclusion
Protecting your door hardware during home renovations doesn’t have to be complicated. By understanding the risks, using protective covers, and taking the time for regular maintenance, you can ensure your hardware remains in top shape. Just like a chef takes care of their best knives, a little attention goes a long way in preserving the beauty and function of your door hardware.
With these tips in your toolbox, you’ll be ready to tackle any renovation project confidently, knowing your door hardware is safe and secure. Now, go forth and renovate with peace of mind!