Honestly, when a deadbolt seizes up or gets sticky, life slows down. You might find yourself jiggling the key, fiddling with the remote lock functions, or worst-case, locked out during a rainstorm. And corrosion isn’t just an eyesore; it slowly chews away at your home’s security. So, let’s talk about how to keep your deadbolt turning smoothly—rain or shine.
Why Deadbolts Rust—and Why That’s a Problem
Okay, so what causes rust in the first place? It doesn’t matter if your lock is a simple mechanical model or a newer smart deadbolt that pairs with an app; nearly all are made with metal parts that can fall victim to moisture. When water meets metal, especially steel or iron, oxidation starts to break things down. If you’ve got an electronic remote deadbolt or a battery-operated model, corrosion can even creep inside and mess with the motor or code syncing components.
Rust isn’t just surface-deep. Once it gets inside the lock body or latch, you might start noticing trouble turning the key, or the bolt might not fully extend when you try to lock the door. Even worse, if the internal parts are affected, the lock can stop responding to your paired remote or keypad altogether—leaving you fumbling for a workaround.
Let me explain with a quick example: I once left a rarely-used back door deadbolt unchecked all winter. Come spring, the key wouldn’t budge. The culprit? Moisture had seeped in, causing both the keyway and latch mechanism to corrode. The fix took some time—and I could’ve prevented it all with a bit of routine care.
How to Clean and Inspect Your Deadbolt
Here’s the first step to keeping your deadbolt rust-free—make cleaning and inspection a regular habit. You don’t need special tools or a deep technical background. Just a bit of patience and maybe a flashlight.
- Remove Surface Dirt: Wipe down the exterior of the deadbolt with a damp cloth. Dirt and grime can hold moisture, so it’s worth clearing that away once in a while.
- Inspect for Early Rust: Look closely at the edges, around the keyhole, and anywhere the finish looks rough or discolored. Early rust often appears as orange or brown flecks. If you spot any, gently remove it using fine steel wool or a soft brush. Go slow to avoid scratching the finish.
- Check the Keyway and Bolt: Insert your key fully a few times and test the bolt action. If it feels sticky, chances are high there’s buildup or the start of corrosion inside.
If you’ve got a smart deadbolt, pop open the battery compartment and check for any signs of white or greenish crust—classic signs of corrosion that can eventually mess with your remote syncing or cause a reset failure.
If you catch rust early, a quick scrub and a little care can save you from a much bigger headache down the line.
Lubrication: The Best Defense Against Rust and Corrosion
Here’s where a little bit of maintenance goes a long way. Lubricating your deadbolt every few months is one of the easiest ways to keep rust and corrosion from taking hold. But before you reach for the nearest can of WD-40—stop. Not all lubricants are created equal, and some can actually attract dust or gum up internal parts, especially in code-locked or remote-controlled models.
- Graphite Powder: This is a classic choice. It’s dry, doesn’t attract dust, and works well on traditional keyway deadbolts.
- Silicone-Based Sprays: These are perfect for modern deadbolts, especially if you have sensitive electronic components. They repel water while keeping things gliding smoothly.
- Avoid Oil-Based Lubricants: Products like standard WD-40 can actually form a sticky film over time. If you must use them, use sparingly and wipe away excess.
To lubricate, insert the nozzle or tube into the keyhole and give a brief spray or puff of powder. Move the key in and out several times to distribute the lubricant through the mechanism and the bolt. Don’t forget to wipe up any drips so the exterior doesn’t become a dirt magnet.
A well-lubed lock resists moisture, keeps keys turning easy, and prevents internal parts from getting stuck—even if your remote loses sync or you need to reset the system manually.
Weatherproofing Techniques for Outdoor Locks
Deadbolts used on exterior doors—garage entries, outdoor gates, or shed doors—take the brunt of nature’s worst. So it makes sense to give them some extra armor against rain, snow, and humidity. Let’s walk through some proven weatherproofing tricks.
- Use a Lock Cover: There are simple plastic or rubber lock covers that slip over your deadbolt. These work like tiny umbrellas, blocking direct rain and stopping water from pooling around the mechanism.
- Seal the Door Frame: If the deadbolt sits in a drafty or unsealed doorframe, moisture will sneak in every time the weather turns rough. Add weatherstripping around the door and make sure the strike plate sits flush—no gaps for water to slide through.
- Apply Protective Coating: Some folks swear by a light layer of clear nail polish or car wax on the deadbolt face. It sounds odd, but this can add an extra barrier without affecting the finish or function.
If your lock is battery-powered or syncs with a remote, double-check that the battery cover fits tightly and isn’t allowing water to slip inside. A simple oversight here can lead to electronic corrosion, forcing an annoying round of troubleshooting—or even a full deadbolt reset.
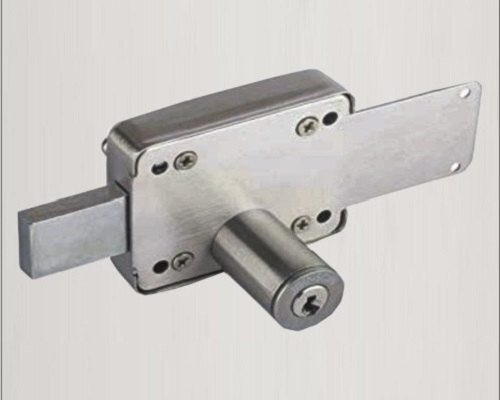
The Role of Materials: Choosing Rust-Resistant Deadbolts
Not all deadbolts are built the same. If you’re shopping for a new lock, or replacing a corroded old one, the actual metal matters a lot. Let’s break down some common choices:
- Brass and Bronze: These materials are the gold standard for rust resistance. They don’t oxidize as easily and tend to look good for years. Most high-end brands, such as Schlage and Kwikset, offer models in these finishes.
- Stainless Steel: Another great pick. It shrugs off corrosion better than standard steel and is a solid choice for humid or coastal areas. Make sure it’s actually stainless, though—some locks only have a stainless finish, not solid construction.
- Zinc or Powder-Coated Locks: These add a protective layer that’s helpful, but not as durable as solid brass or stainless. They’re better than bare steel, but if you’re in a really wet climate, you may want to look higher up the chain.
If you’re into smart locks or models you can pair with your phone or remote, check product specs for ratings like “weatherproof,” “IP-rated,” or “corrosion-resistant.” There’s no point in a fancy motor if rust gums up the gears or the connection code goes haywire every rainy season.
A rust-resistant deadbolt is like a good raincoat—it just makes life easier and spares you future hassle.
Simple DIY Solutions If Rust Already Started
So let’s say you’re already noticing rust or the deadbolt is feeling rough. No need to panic—you can still save it with some straightforward steps before things get worse.
- Remove the Deadbolt (if possible): Take the lock off the door. This lets you open it up, clean out any moisture, and scrub away internal rust with a soft brush or a cotton swab dipped in rubbing alcohol.
- Treat With Rust Remover: There are rust sprays or gels at your local hardware store designed for small metal parts. Follow the instructions carefully—and always wear gloves and ventilate the space.
- Dry Everything Thoroughly: After cleaning, let all lock parts air dry completely. Honestly, even a tiny bit of trapped water can start corrosion again almost instantly.
- Re-lubricate and Reinstall: Before you put the deadbolt back, add a fresh coat of dry lubricant as described earlier. Test all the functions—key, bolt, and, if you’ve got one, the remote or code features—to make sure everything’s smooth before returning it to service.
If you spot white or greenish buildup in battery compartments or on circuit boards, take the batteries out and wipe the contacts with rubbing alcohol. Sometimes, you’ll need to resync or reset smart lock codes if corrosion affected connections.
Routine Maintenance Tips to Keep Rust Away
Once you’ve got your deadbolt back in fighting shape, keeping it that way is mostly about regular, low-effort habits. Here’s a routine you can follow every few months:
- Monthly Quick Checks: Give the deadbolt a turn or two. If anything feels crunchy, inspect for grime or early rust.
- Seasonal Deep Cleans: At least twice a year, clean the exterior, add a fresh coat of lubricant, and check the weatherproofing. If your lock uses a battery or remote, swap in fresh batteries and test the sync.
- Keep Keys Clean: Dirty keys shove grit inside the lock. Each time you clean the deadbolt, wipe down your most-used keys. Trust me, this tiny habit makes a big difference.
- Stay Ahead of Weather: Before heavy rain or snow, double-check seals and covers. It’s easier to prevent water from getting in than to fix corrosion later.
If you use remote features, make sure the firmware or code is up to date and test the paired functions now and then. Odd glitches can hint at corrosion you can’t see yet.
Comparing Universal Deadbolt Protection vs. Brand-Specific Tips
You might be wondering—are there tricks that work for all deadbolts, or do you need to follow instructions for your specific brand? Here’s the honest answer: general rust prevention steps work for nearly all models, but some brands (like Schlage, Kwikset, or Yale) have a few quirks worth noting.
- Universal Methods: Regular cleaning, dry lubrication, and weatherproofing work for both mechanical and electronic deadbolts, no matter the make.
- Brand-Specific Features: Some brands use unique finishes, battery placements, or code syncing methods. Always check your deadbolt’s manual for any cleaning restrictions—some warn against graphite, or require resets if you remove batteries to clean corrosion.
- Smart Deadbolts: These often need extra attention around the electronic housing and battery compartment. Make sure to keep firmware or code updated and test pairing after any deep clean or battery swap.
Honestly, even the best universal tips can’t make up for skipping brand instructions. When in doubt, check the manufacturer’s site for troubleshooting or rust-prevention advice tailored to your specific deadbolt.
Final Thoughts: Keeping Your Deadbolt Healthy for Years
Taking a few minutes every now and then to protect your deadbolt can save you hours of frustration—and maybe even keep your home safer. Whether you’re working with a budget single-cylinder lock or a high-tech smart deadbolt with paired remote features, rust and corrosion don’t have to be inevitable.
Treat your deadbolt like you would a favorite tool: keep it clean, keep it dry, and give it a little TLC now and then. Pay attention to signs of trouble, fix issues early, and always gear your maintenance toward your local climate and specific lock model. With these habits, you’ll keep your deadbolt running smooth and rust-free for years—no extra keys or troubleshooting required.